Parameter Binding
Parameter binding is the core of tracking in VTube Studio (VTS).
VTS receives input tracking parameters from different sources, such as:
- Face tracking
- Mouse/tablet tracking
- Controller tracking
- Plugins and other external input sources
VTS then maps these input tracking parameters to Live2D model parameters. Live2D model parameters are the values that control model motion (for example head angle, eye open/close, or mouth open/close).
How Mapping Works
Basic Idea
A mapping (parameter binding) connects:
- Input parameter from tracking (for example input parameter
MouthOpen) - Output parameter on the Live2D model (for example output parameter
ParamMouthOpenY)
If you want the model mouth to follow your real mouth movement, bind the tracking input MouthOpen to the Live2D model parameter ParamMouthOpenY.
Most mappings are preconfigured, but they usually need tuning to get the best result for your setup.
Range Conversion
A mapping converts an input range to an output range.
Example:
- Input range:
-30to30 - Output range:
-30to30
In this setup:
- When the input is
30, the output is30 - When the input is
0, the output is0 - When the input is
-30, the output is-30
Now change only the input range:
- Input range:
-20to20 - Output range:
-30to30
Then:
- When the input is
20, the output is30 - When the input is
0, the output is0 - When the input is
-20, the output is-30
This means the same real movement of the tracking object can produce a larger model movement, because a smaller input range is mapped to a larger output range.
Parameter Binding/Mapping in VTS
- In the Model Settings tab, go to the parameter binding section.
- All parameter bindings are listed in this section. You can click the
+button to expand a parameter binding and see details.
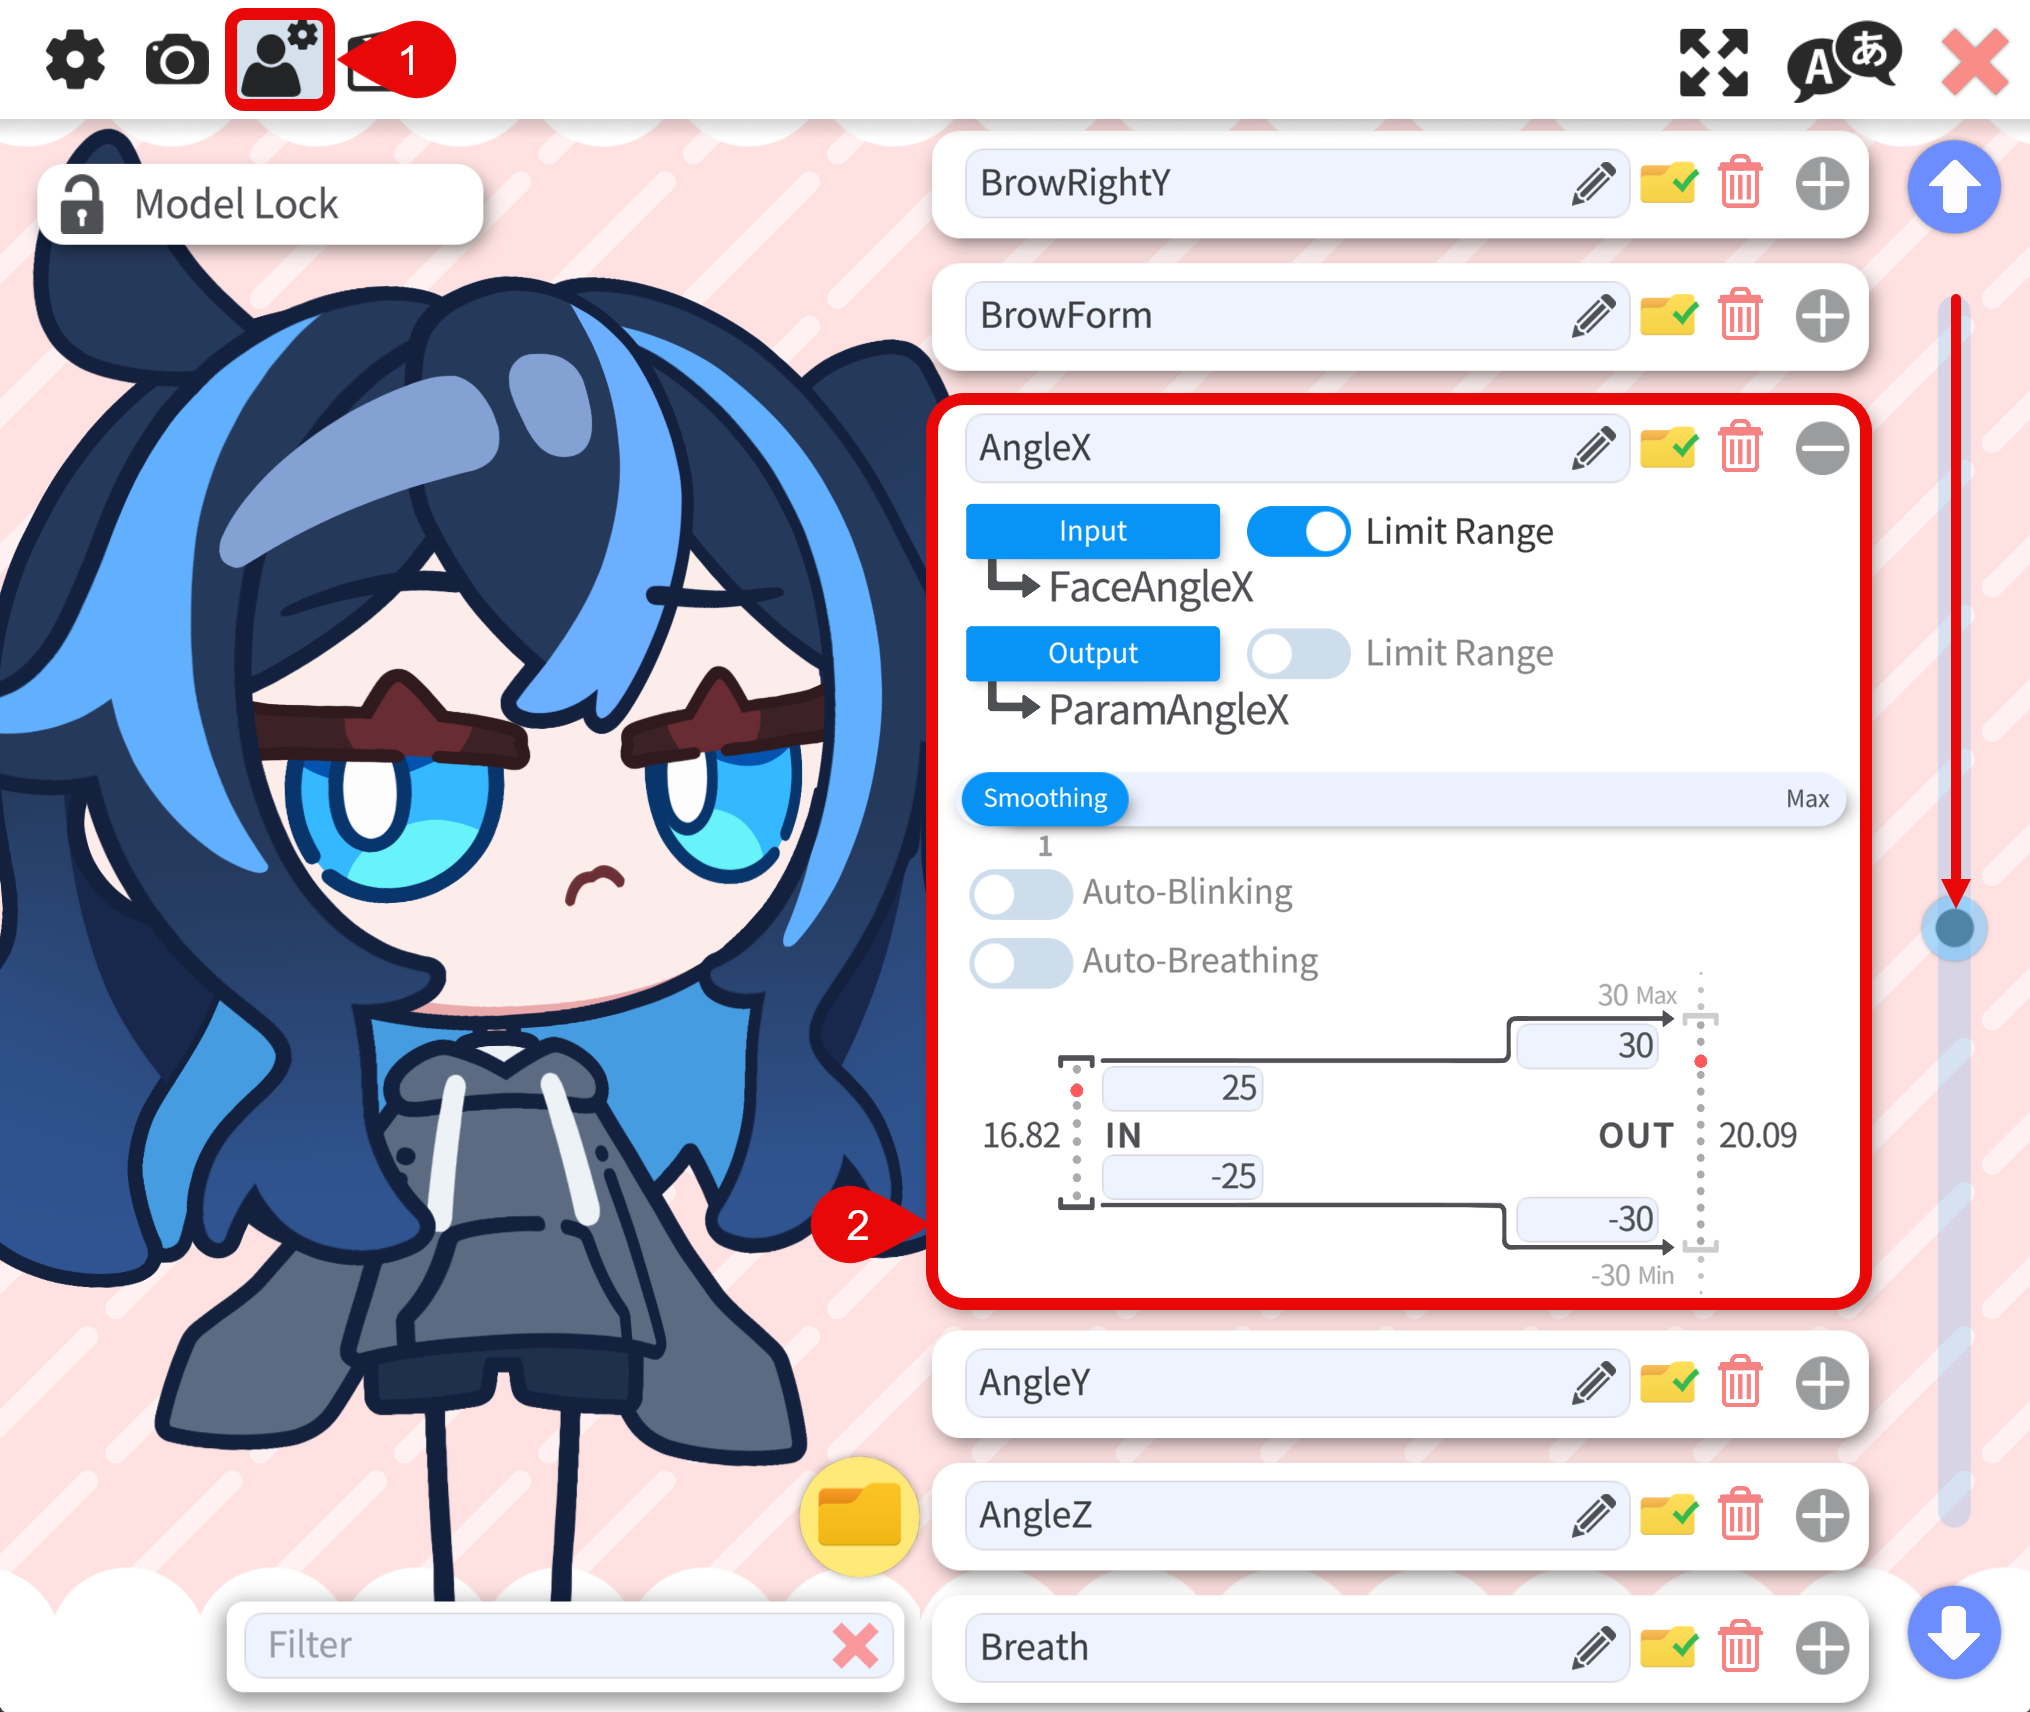
Binding Details
Although parameter bindings are usually preconfigured, it is important to understand each binding so you can tune it for your own setup.

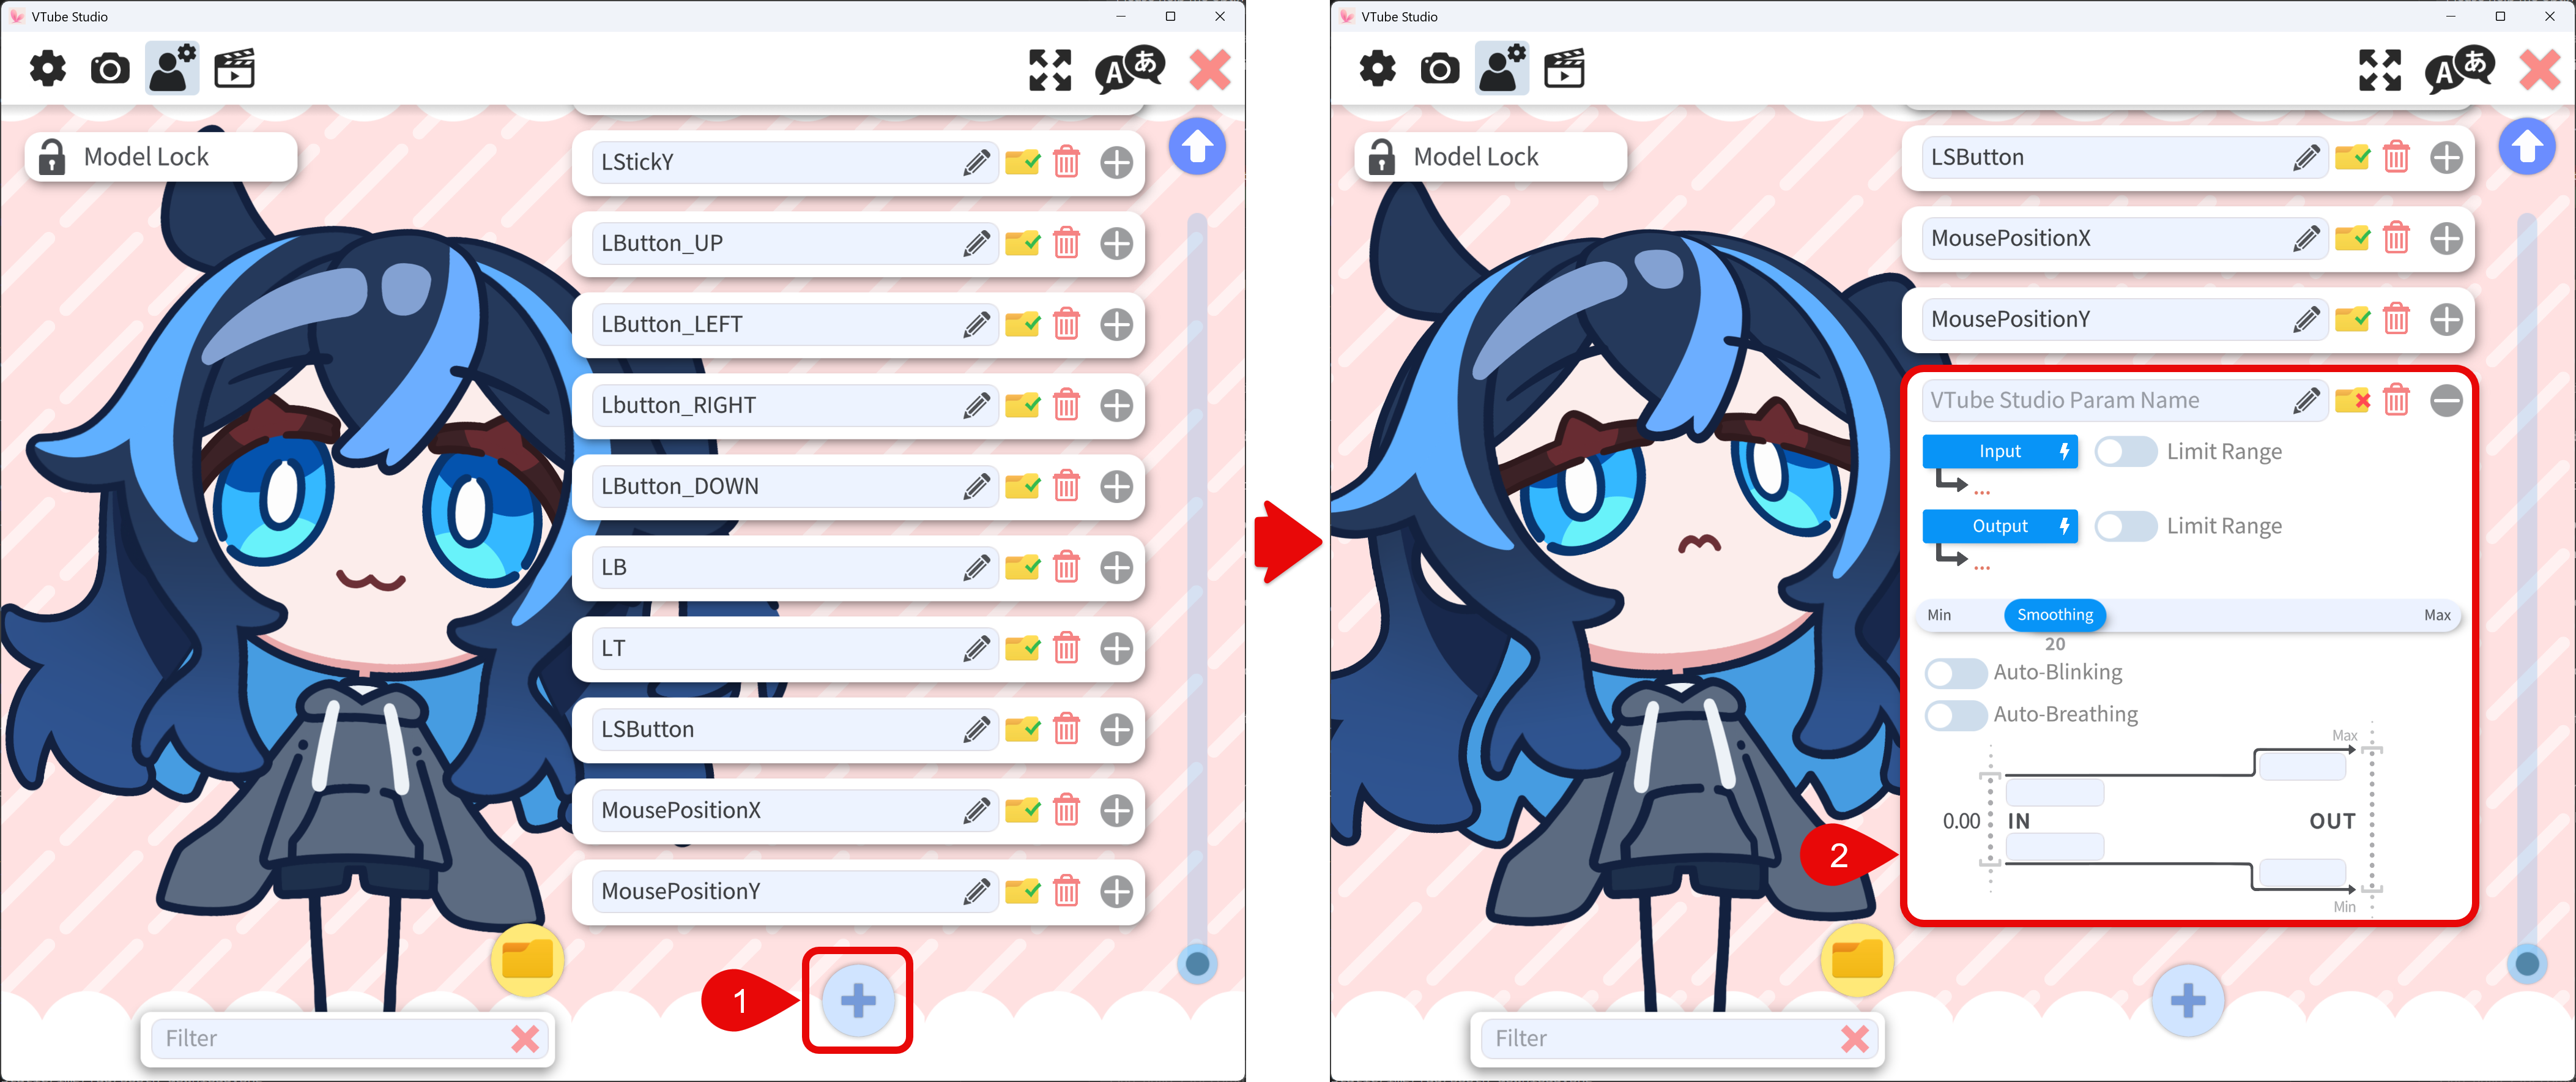
- Input: Input parameter from tracking (face tracking, mouse, controller, plugin input, etc.).
- Output: Output parameter on the Live2D model.
- Limit Range: When enabled, VTS clamps values to your configured limit range and applies smoother stopping near the limits.
- Smoothing: Higher values reduce jitter but add lag. If tracking quality is good, use a lower value (
0-5). If tracking is unstable, use a higher value (10-50). Sometimes higher smoothing is intentionally used when multiple Live2D parameters use the same input; different lag across those parameters can make motion feel more natural. - Auto-blinking: When enabled, VTS randomly lowers the output value to its minimum for a short period to simulate blinking.
- Auto-breathing: When enabled, VTS slowly oscillates the output parameter between its minimum and maximum values to simulate breathing.
- Input parameter settings (see below for details)
- Output parameter settings (see below for details)
- Each output parameter can only be bound once.
- One input parameter can be bound to multiple output parameters.
- There are no strict rules for which input parameter can be bound to which output parameter. In practice, output parameters are usually bound to related input parameters (for example,
MouthOpentoParamMouthOpenY), but custom bindings/mappings are also possible.
- Input parameter value: The red dot indicates the current input parameter value. When tracking is enabled, the red dot moves to the current input value.
- Input parameter range: The top value is the input maximum and the bottom value is the input minimum. It is recommended to tune this to the actual range you usually reach during natural movement.
- Output parameter range: The top value is the output maximum and the bottom value is the output minimum.
- Live2D model parameter range: The top value is the maximum of the Live2D parameter and the bottom value is the minimum. These values are defined by the Live2D model itself and cannot be changed in VTS.
- Output parameter value: The red dot indicates the current output parameter value. When tracking is enabled, the red dot moves to the current output value.
Why Tuning Is Necessary
In real usage, tracking input often does not reach its theoretical minimum/maximum values.
For example, even if a Live2D model parameter is designed for -30 to 30, your actual input may only move between -20 and 20 because of movement habits and other factors.
If your input only reaches -20 to 20 during natural movement, your model may look less dynamic with default mapping (input -30 to 30, output -30 to 30). Reducing the input range can help the output reach full motion.
The output range is usually set to the Live2D parameter range. The parameter range is limited by the Live2D rig itself and cannot be truly expanded. You can set output beyond that range, but the value will still be clamped by the model parameter limits.
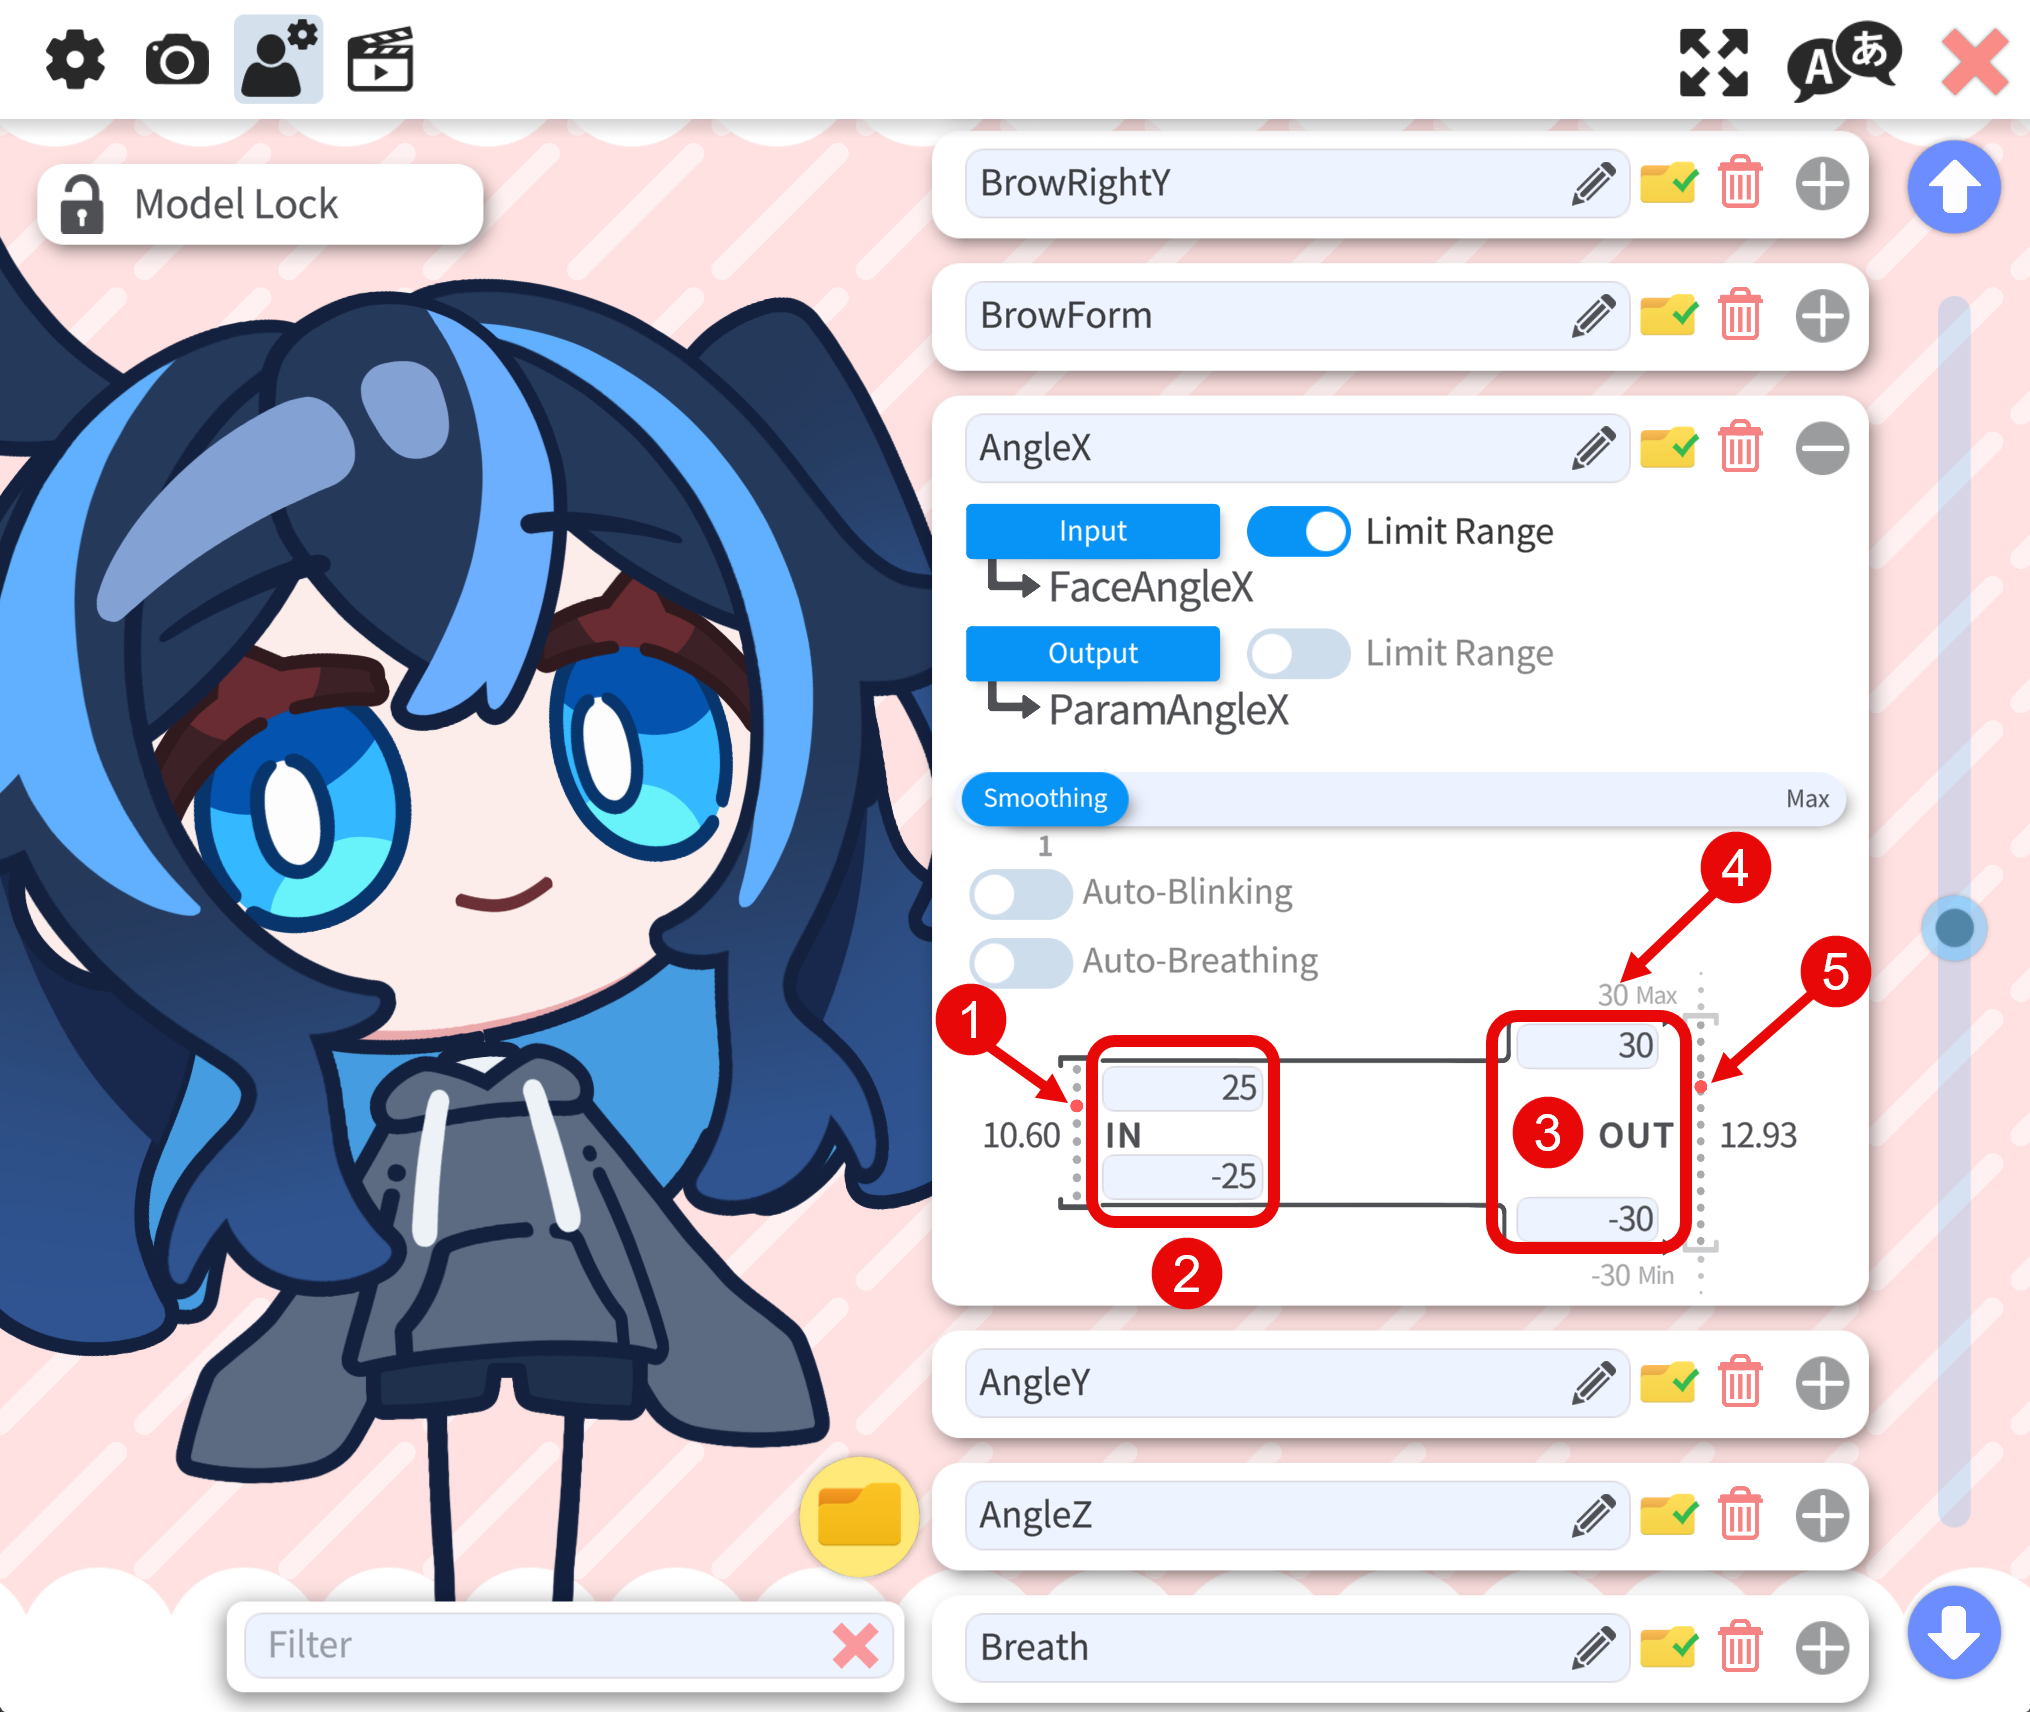
Head Angle Example
In the binding Face Left/Right Rotation, we have:
- Input
FaceAngleXrange:-30to30 - Output
ParamAngleXrange:-30to30
When you move your head, FaceAngleX may typically oscillate between -20 and 20.
Before Tuning
- Input
20maps to output20 - Model head only moves about
-20to20
After Tuning Input Range to -20 to 20
- Input
20maps to output30 - Input
-20maps to output-30 - Model head can use the full
-30to30movement range
Result: movement feels more dynamic.
Avoid Over-Tuning
If the input range is too small (for example -10 to 10), output can hit maximum too easily. Then the model reaches extreme poses too easily and stays clamped at those extremes. This can make motion look awkward or unnatural. So tuning is always a balance between Responsiveness and Stability.
Recommended Workflow
- Keep default mapping first.
- Observe live input values while moving naturally.
- Identify the actual input range you usually reach.
- Narrow input range gradually until motion feels dynamic but not clipped.
- Test in your real streaming/recording posture and camera setup.
Because tracking devices, camera setups, and user behavior differ, each user should tune mappings for their own environment. There is no universal mapping that works for everyone.
Add a New Parameter Binding
- At the bottom of the parameter binding list, click the + button to add a new parameter binding.
- A blank parameter binding will be added to the list. You can edit the parameter binding to suit your needs. Most details are explained in Binding Details above.
Parameter Group
For parameter grouping, see Parameter / Hotkey Group.
Troubleshooting
If the output parameter is changing in VTS config but visible model motion is not changing, the value is often being overridden by:
- An expression
- An animation
- Physics behavior