Texture Editing
Editing the model’s texture images changes the actual pixels the runtime samples onto each mesh. Compared with mesh color editing in VTube Studio (multiply/screen tint only), texture work gives richer color control and more freedom. It is the recommended way to edit the color of the model.
Prerequisites
Color-Only Edits
You only need basic familiarity with an image editor that supports PNG format. Drawing skill is not required. Commonly used image editing software includes Adobe Photoshop, Krita, Clip Studio Paint, Sai, etc.
The following tools are useful:
- Selection tools: square lasso, free lasso, etc.
- Adjustment/filter layers: curves, levels, hue/saturation, gradient maps, etc.
Alteration of Existing Parts
You will be able to draw using a tablet or a mouse. Basic drawing skills are required. It is recommended to use the software that you are most familiar with.
This guide does not teach a specific program (Photoshop, Clip Studio Paint, Krita, etc.). Use the editor you already know, and consult its official manual or tutorials when you need help.
Basic Concepts
Start with the Live2D primer for the basic concepts of Live2D models.
Texture Atlas
When the model is exported from Live2D Cubism Editor, the painted art is packed into one or more texture images (often a single large PNG, sometimes several).
Each mesh stores the UV coordinates that point to an island or a region on the atlas. At runtime, the engine samples the texture at those coordinates and maps the result onto the mesh on screen. If you edit or repaint pixels on the atlas, every mesh that samples that area changes appearance together.
Mesh vs Painted Area
Meshes are often slightly larger than the visible artwork. The rigger leaves a bit of padding so texture filtering (sampling at edges) does not show hard cutoffs or seams. That margin is normal.
When you edit:
- Lock or preserve opacity when you only mean to change color, so you do not accidentally expand or move the painted area.
- Because of the mesh padding, painting a little outside the obvious island is often fine as long as the expanded area is within the mesh padding.
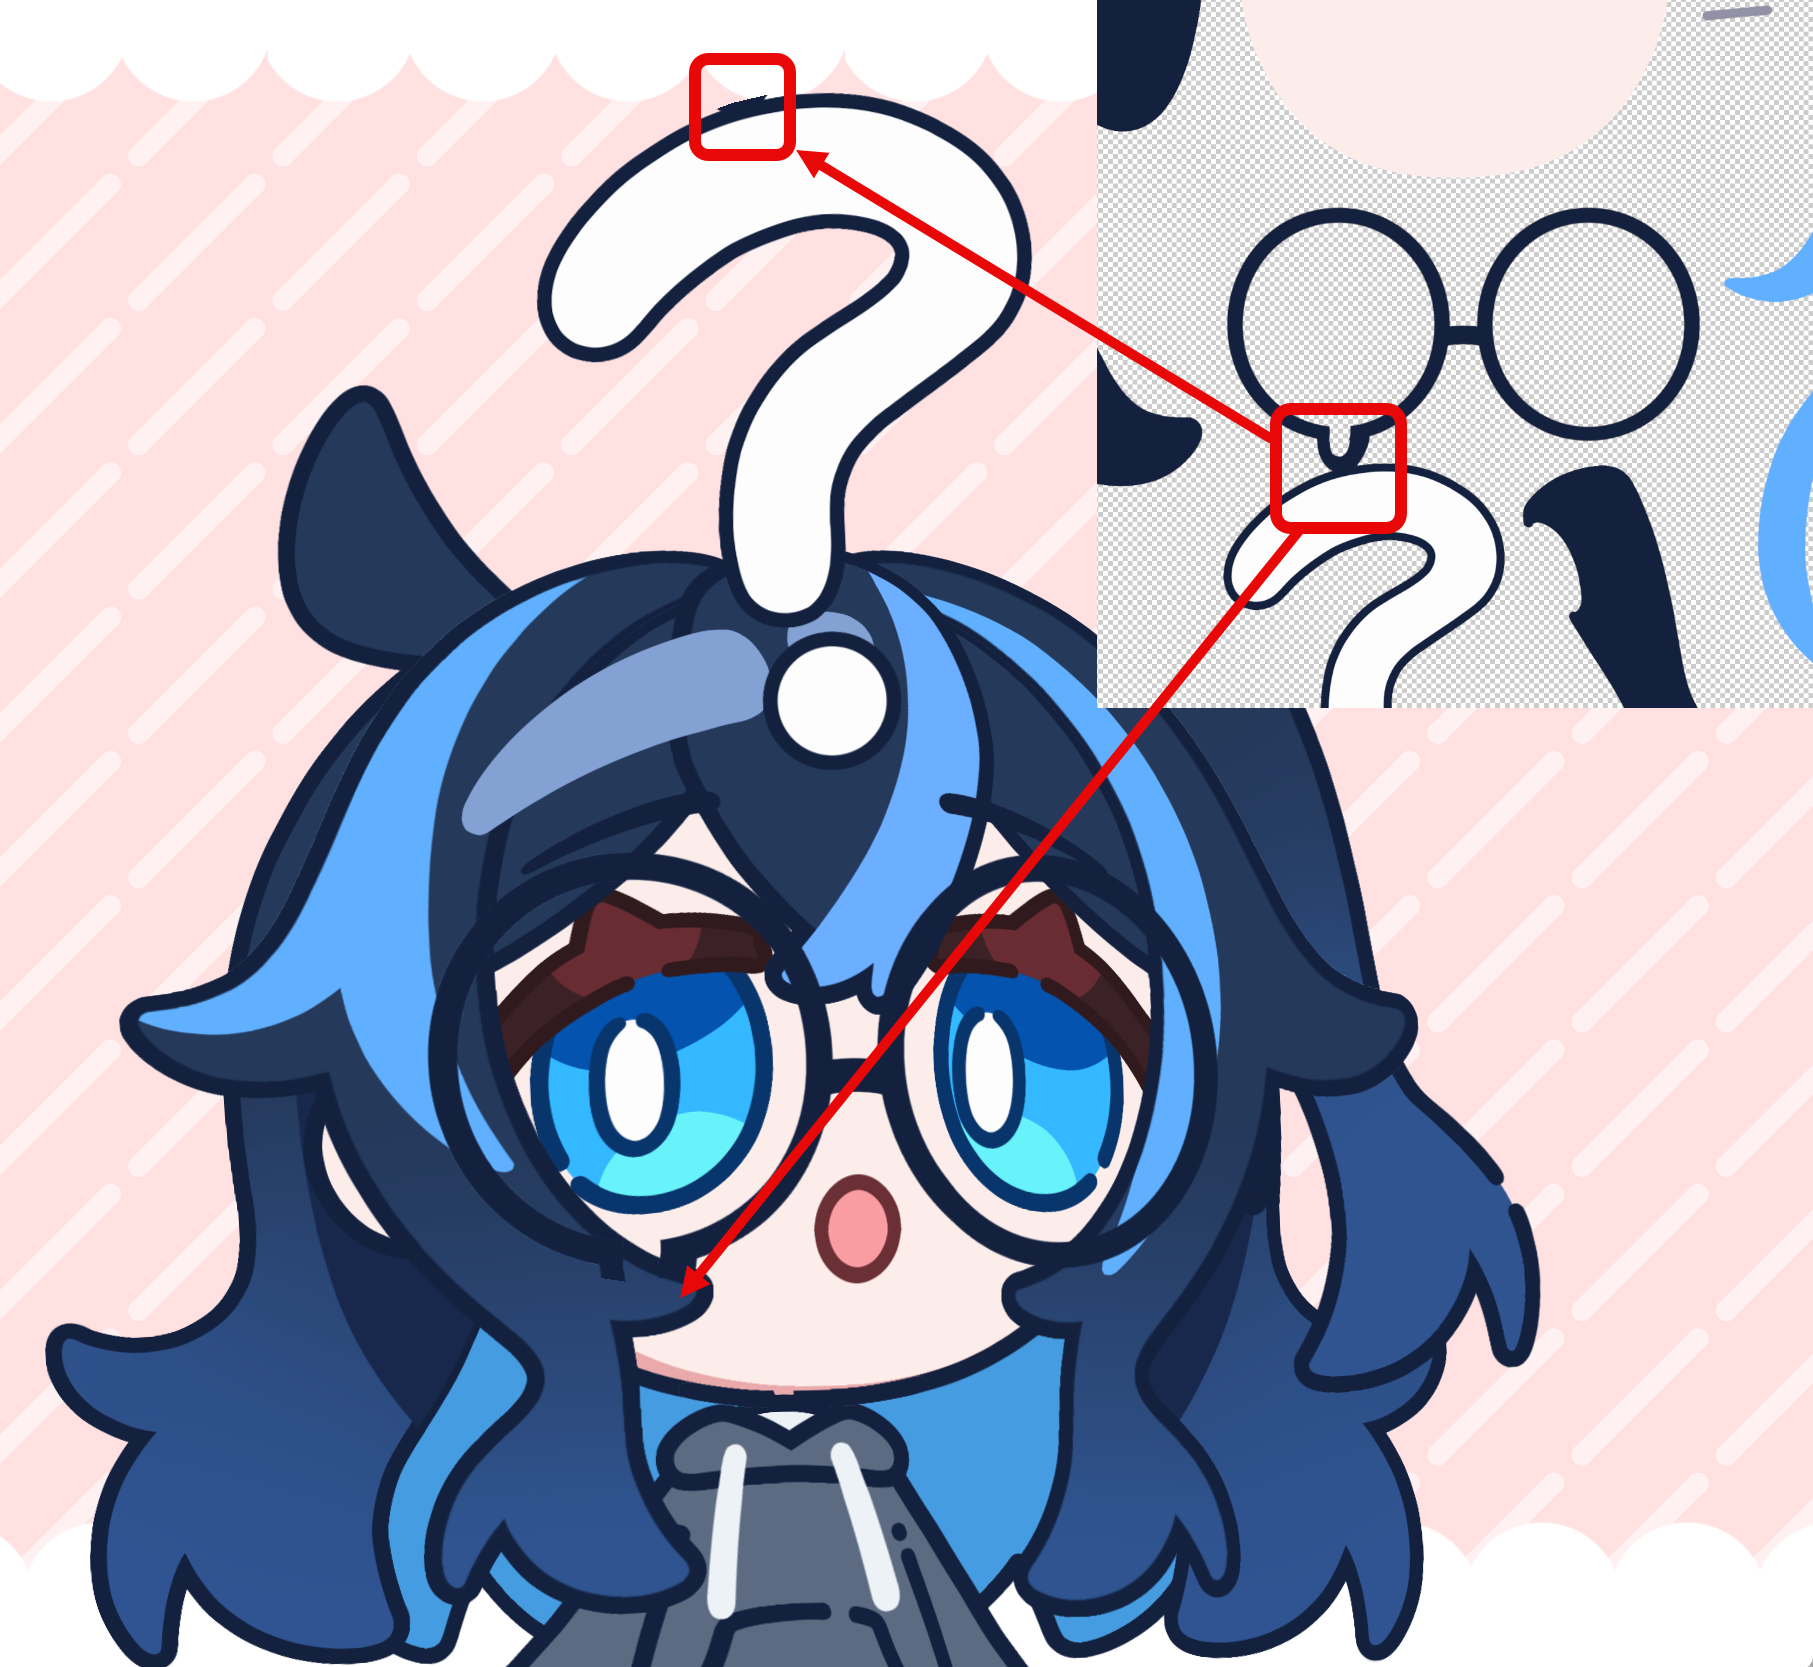
In the example below, on the left side of the image, the painting is slightly outside the island, but still within the mesh padding. This is fine when editing the texture. On the right side of the image, the painting is outside the mesh padding, resulting in a clearly visible hard edge with aliasing. The drawing outside the mesh will be clipped.
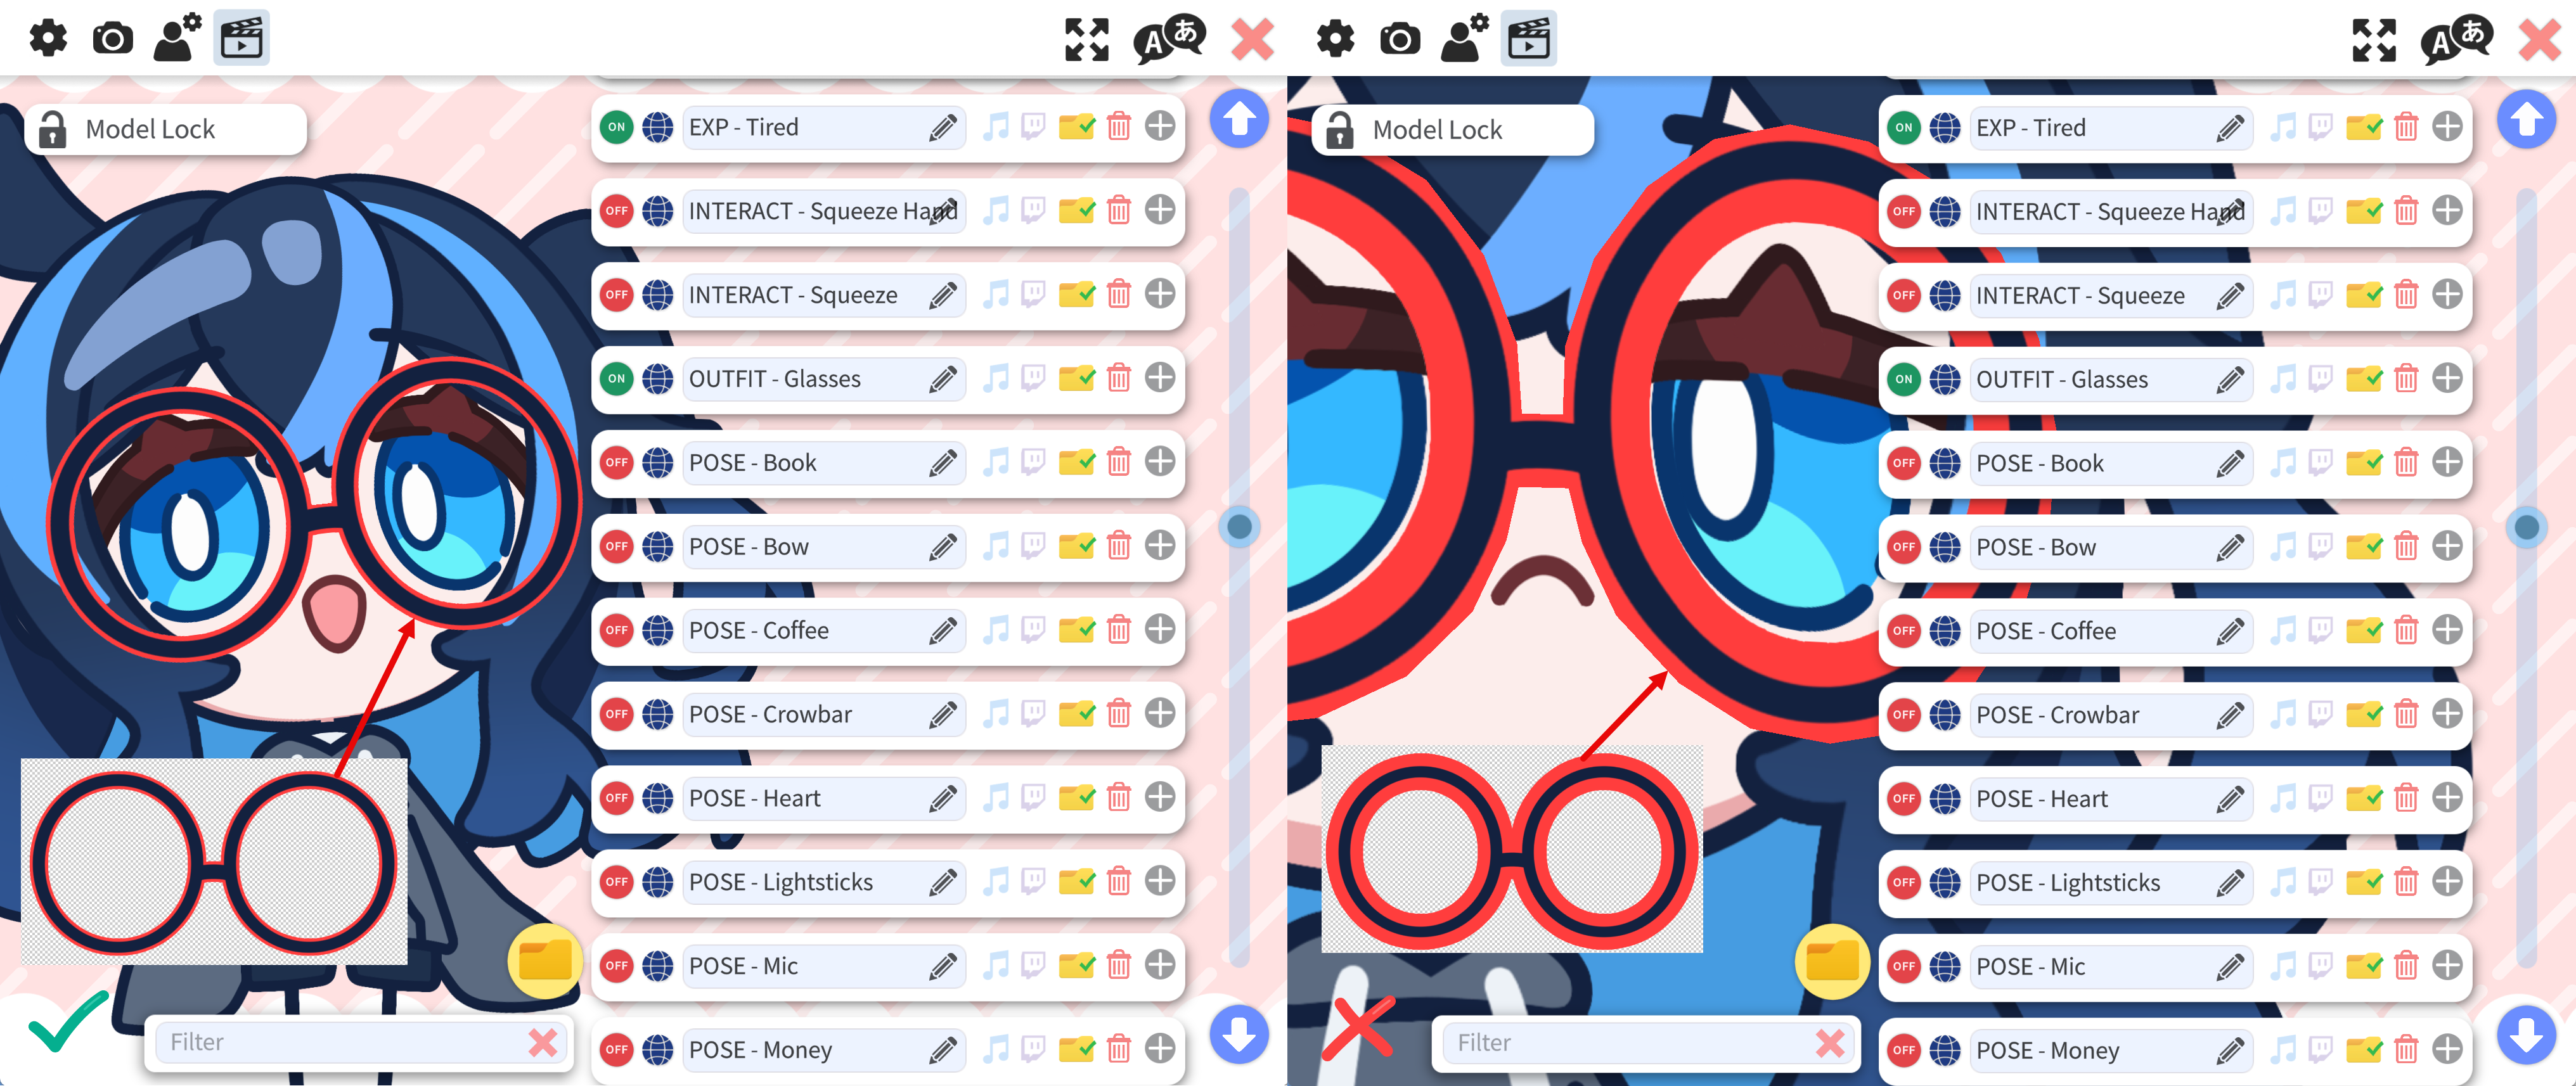
The drawing outside the mesh will be clipped by the mesh padding. Since all islands are placed on the same image, it is also possible that the paint outside the mesh enters the boundary of another mesh, resulting in unexpected artifacts. Hence it is strongly recommended to keep the painting within the mesh padding.
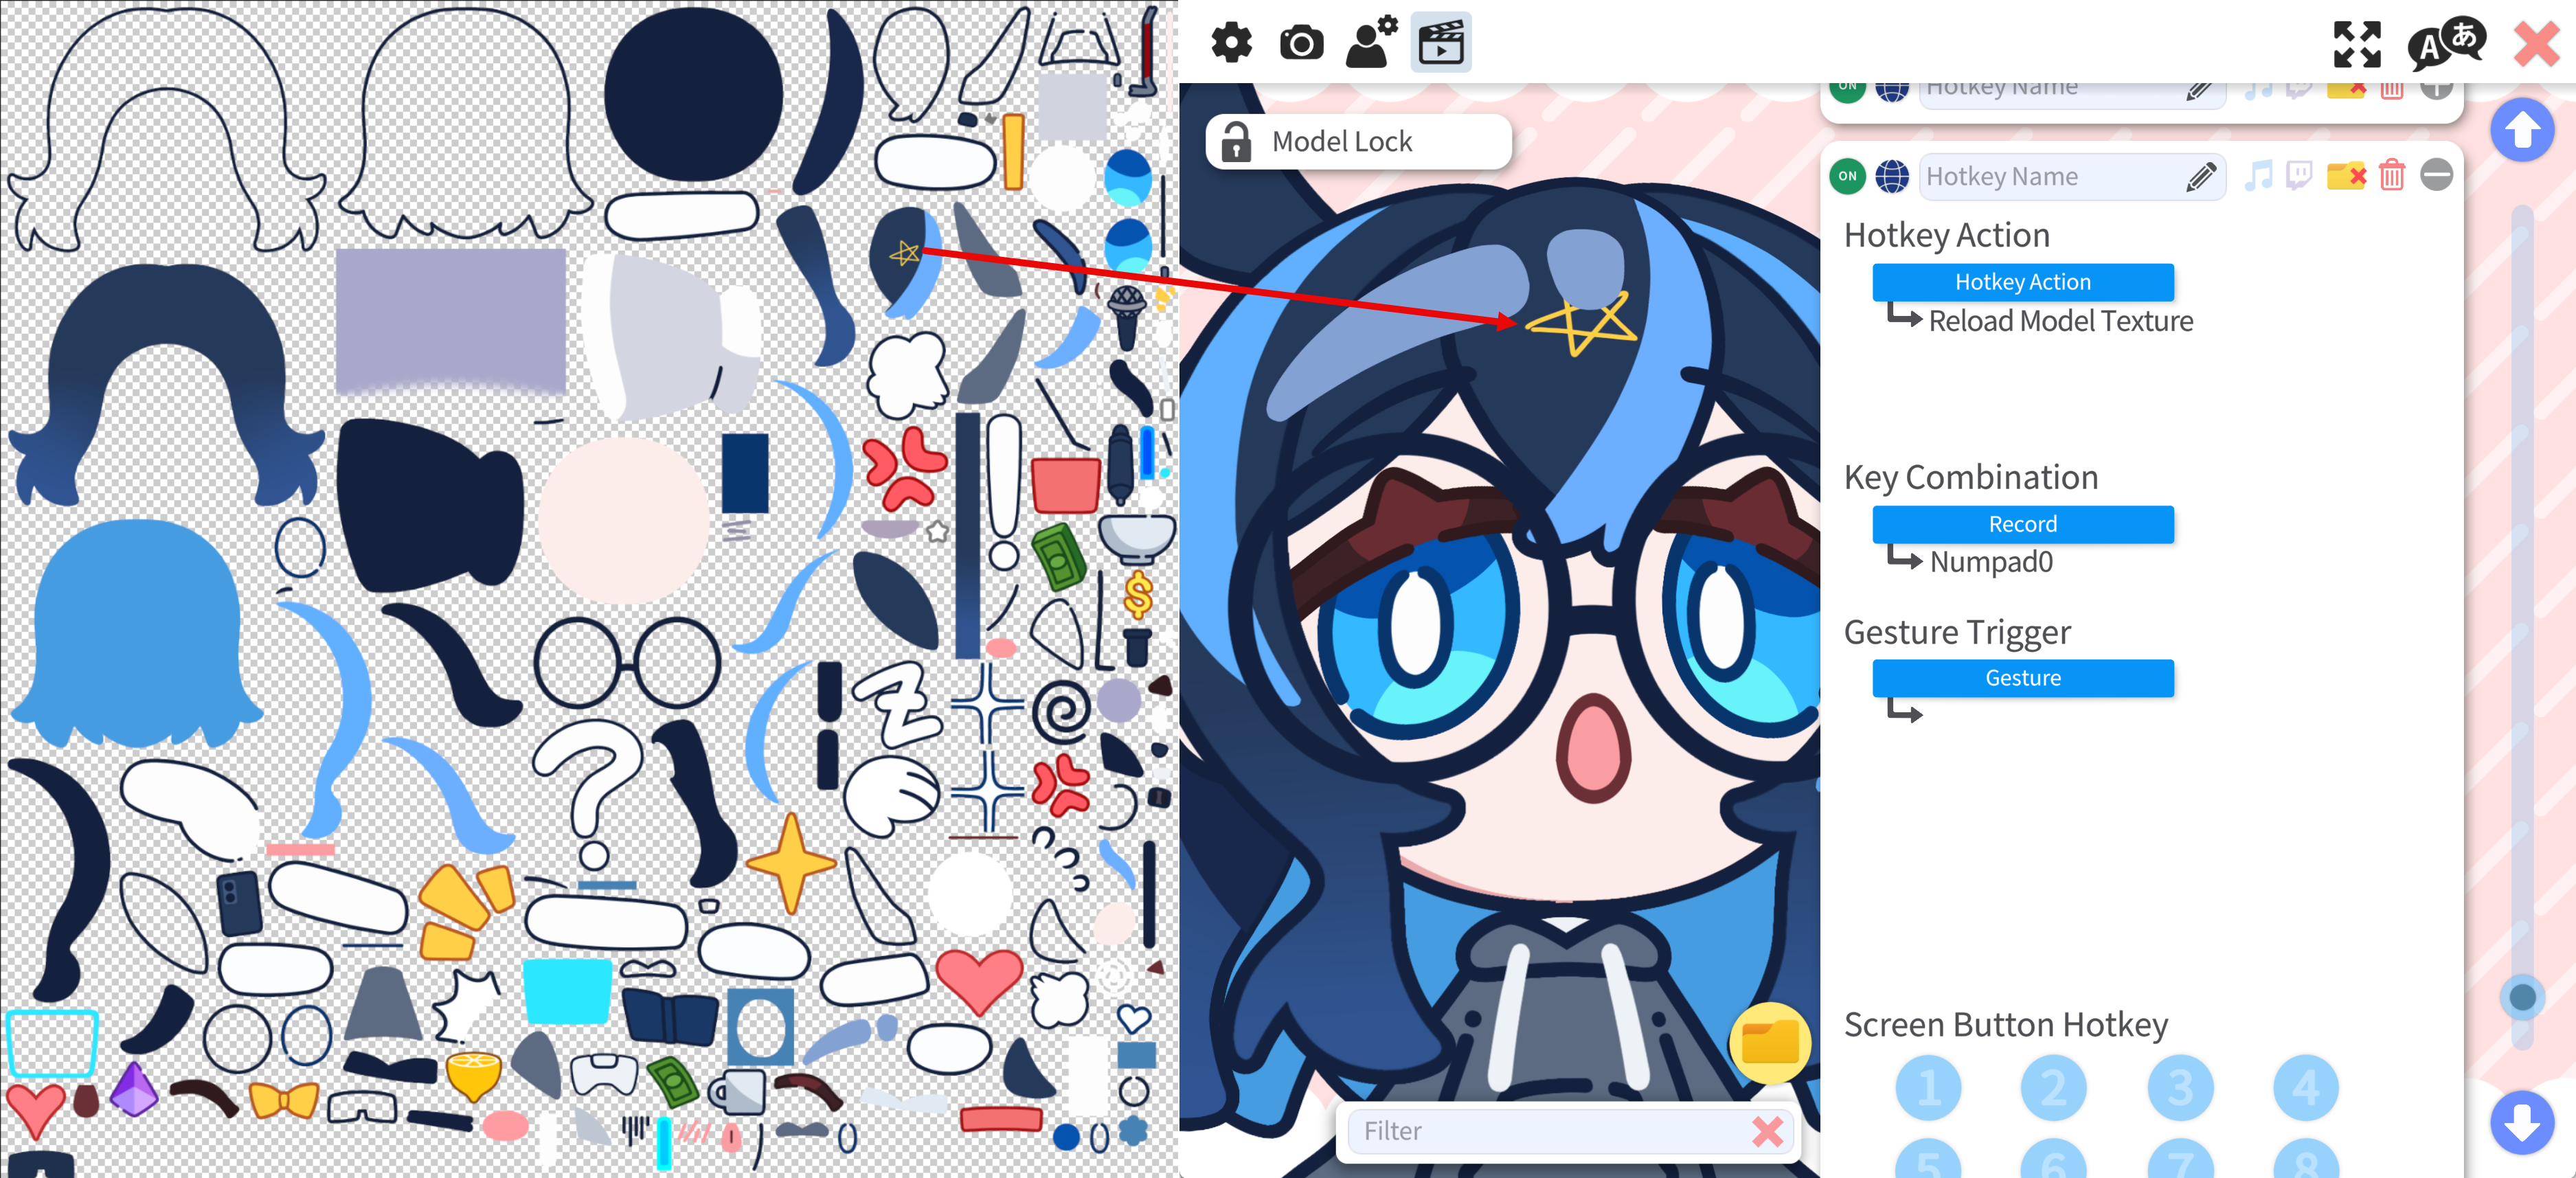
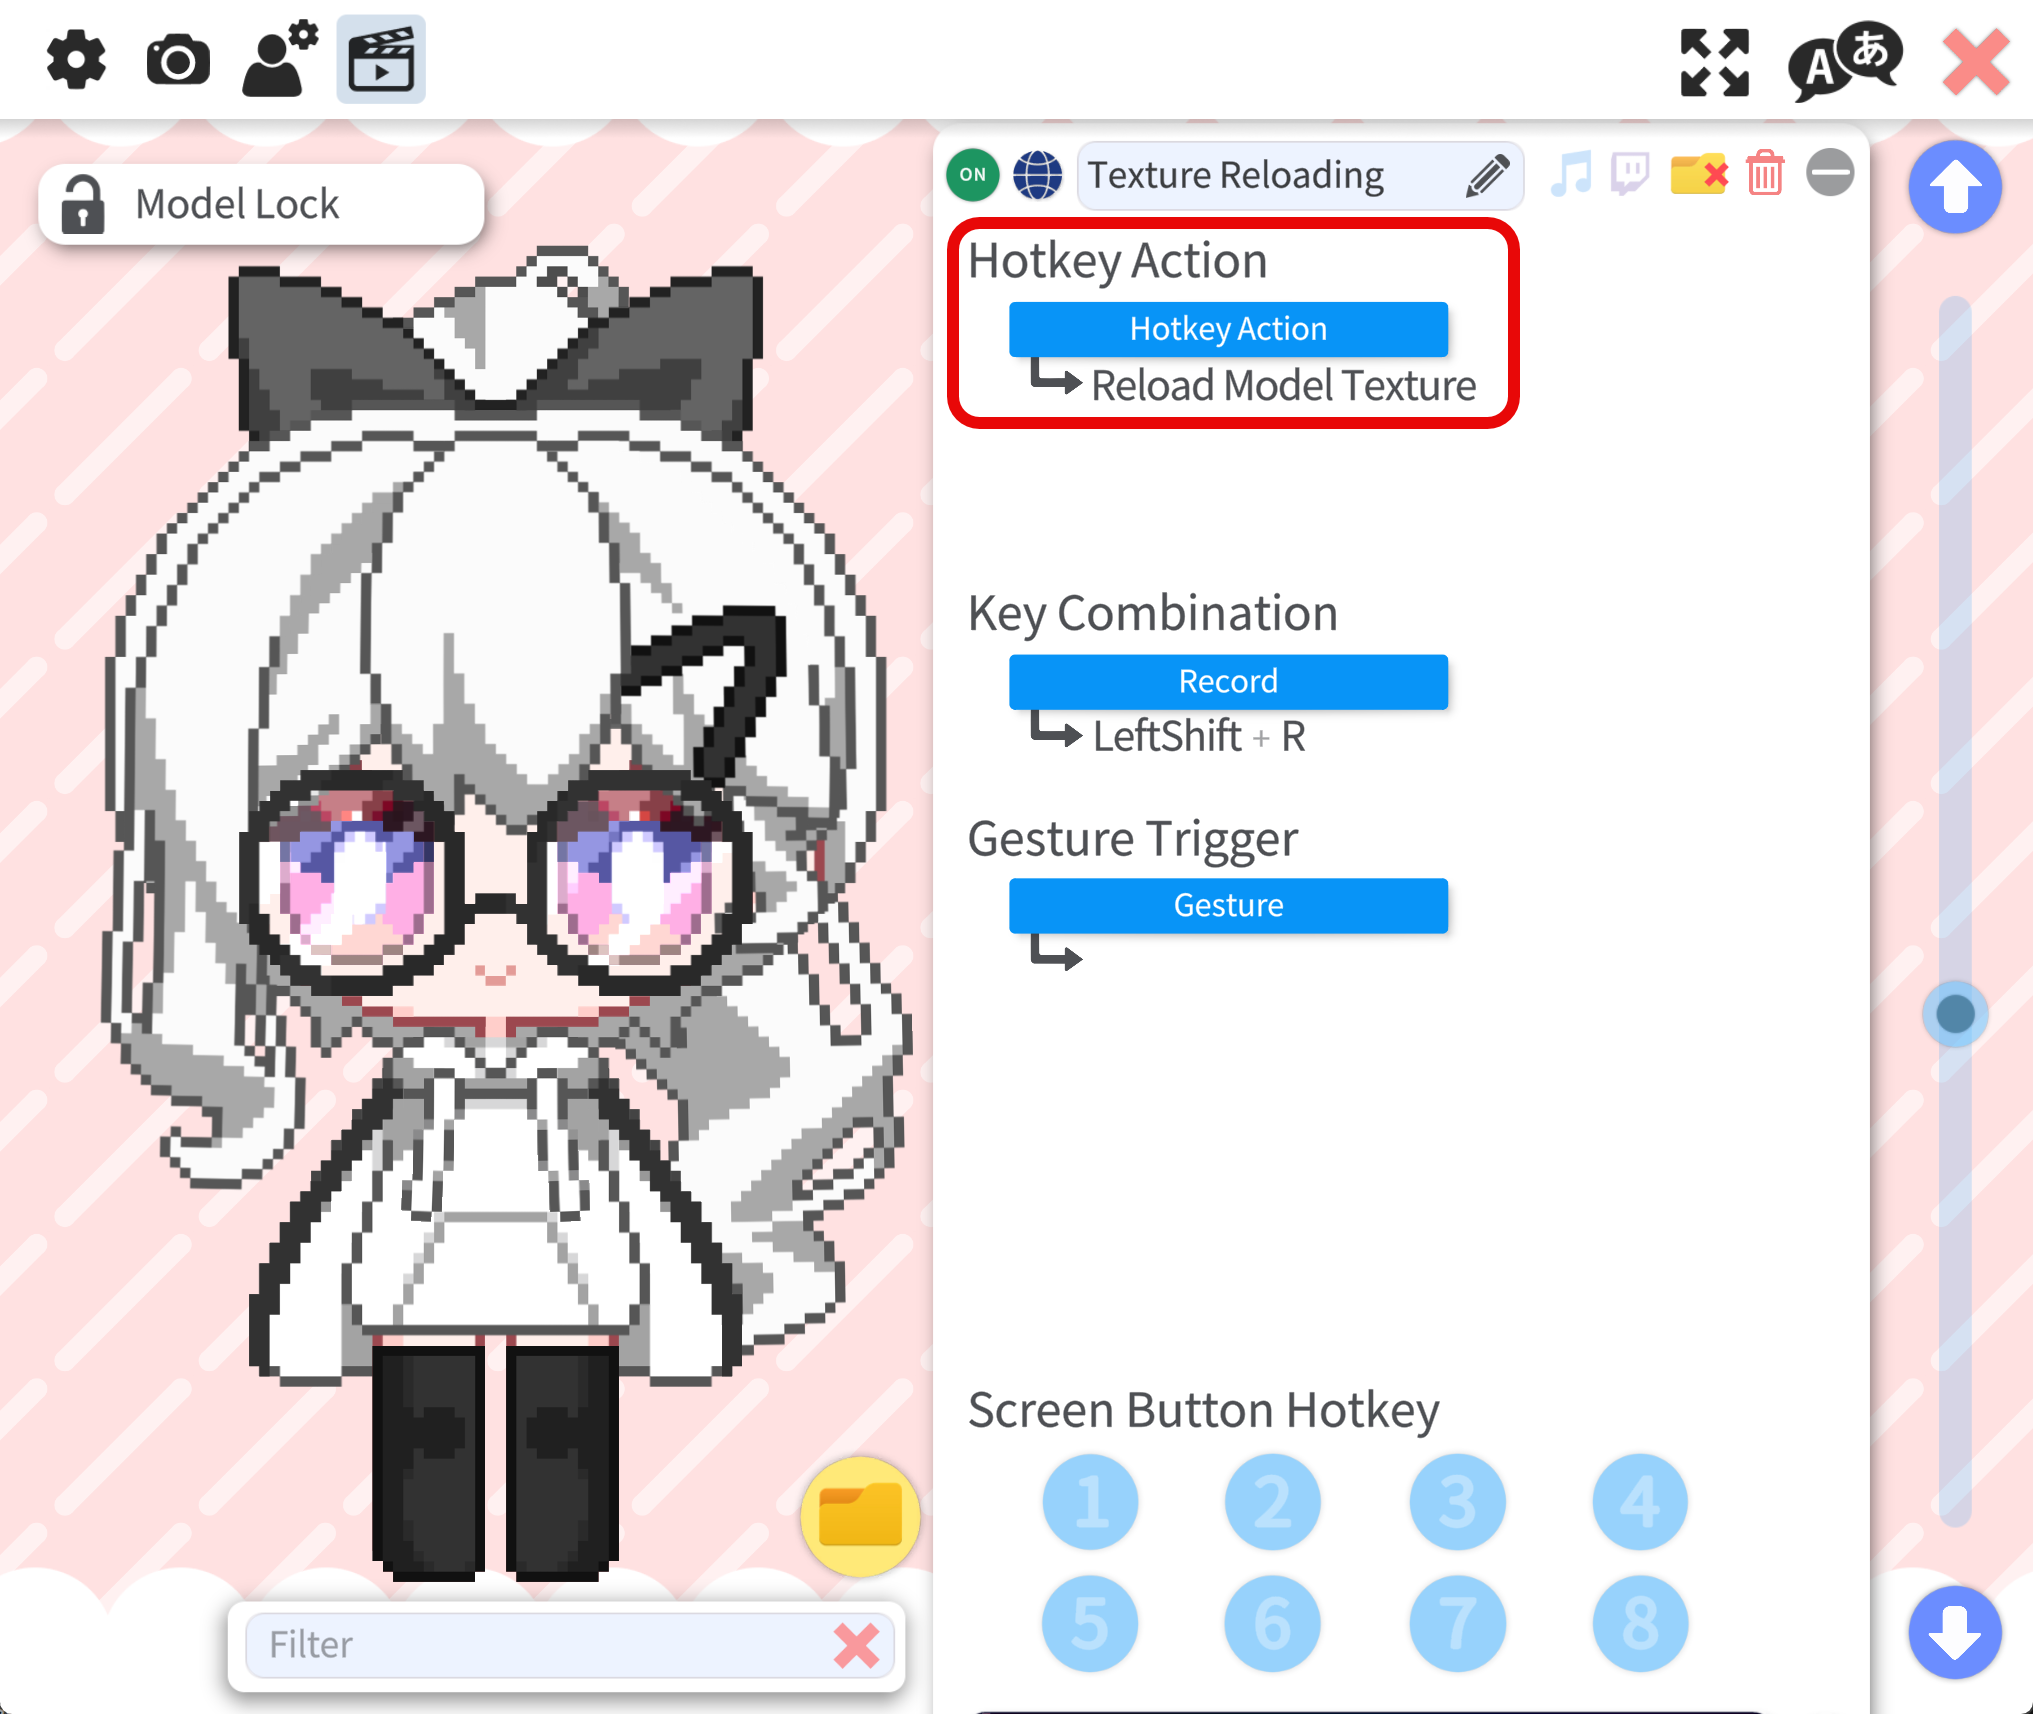
Reloading Textures
VTS can reload textures without reloading the model if you assign a hotkey for reloading model textures. After modifying the texture, trigger the reload so the changes apply to the model. The texture will not reload automatically, and you must trigger the reload manually to see the changes.
Editing Color
Locate the texture for your model (the texture PNGs are usually under a subfolder named [ModelName].[resolution], e.g. Type-H3.8192). Open the PNG in your editor. Here we use Adobe Photoshop as an example.
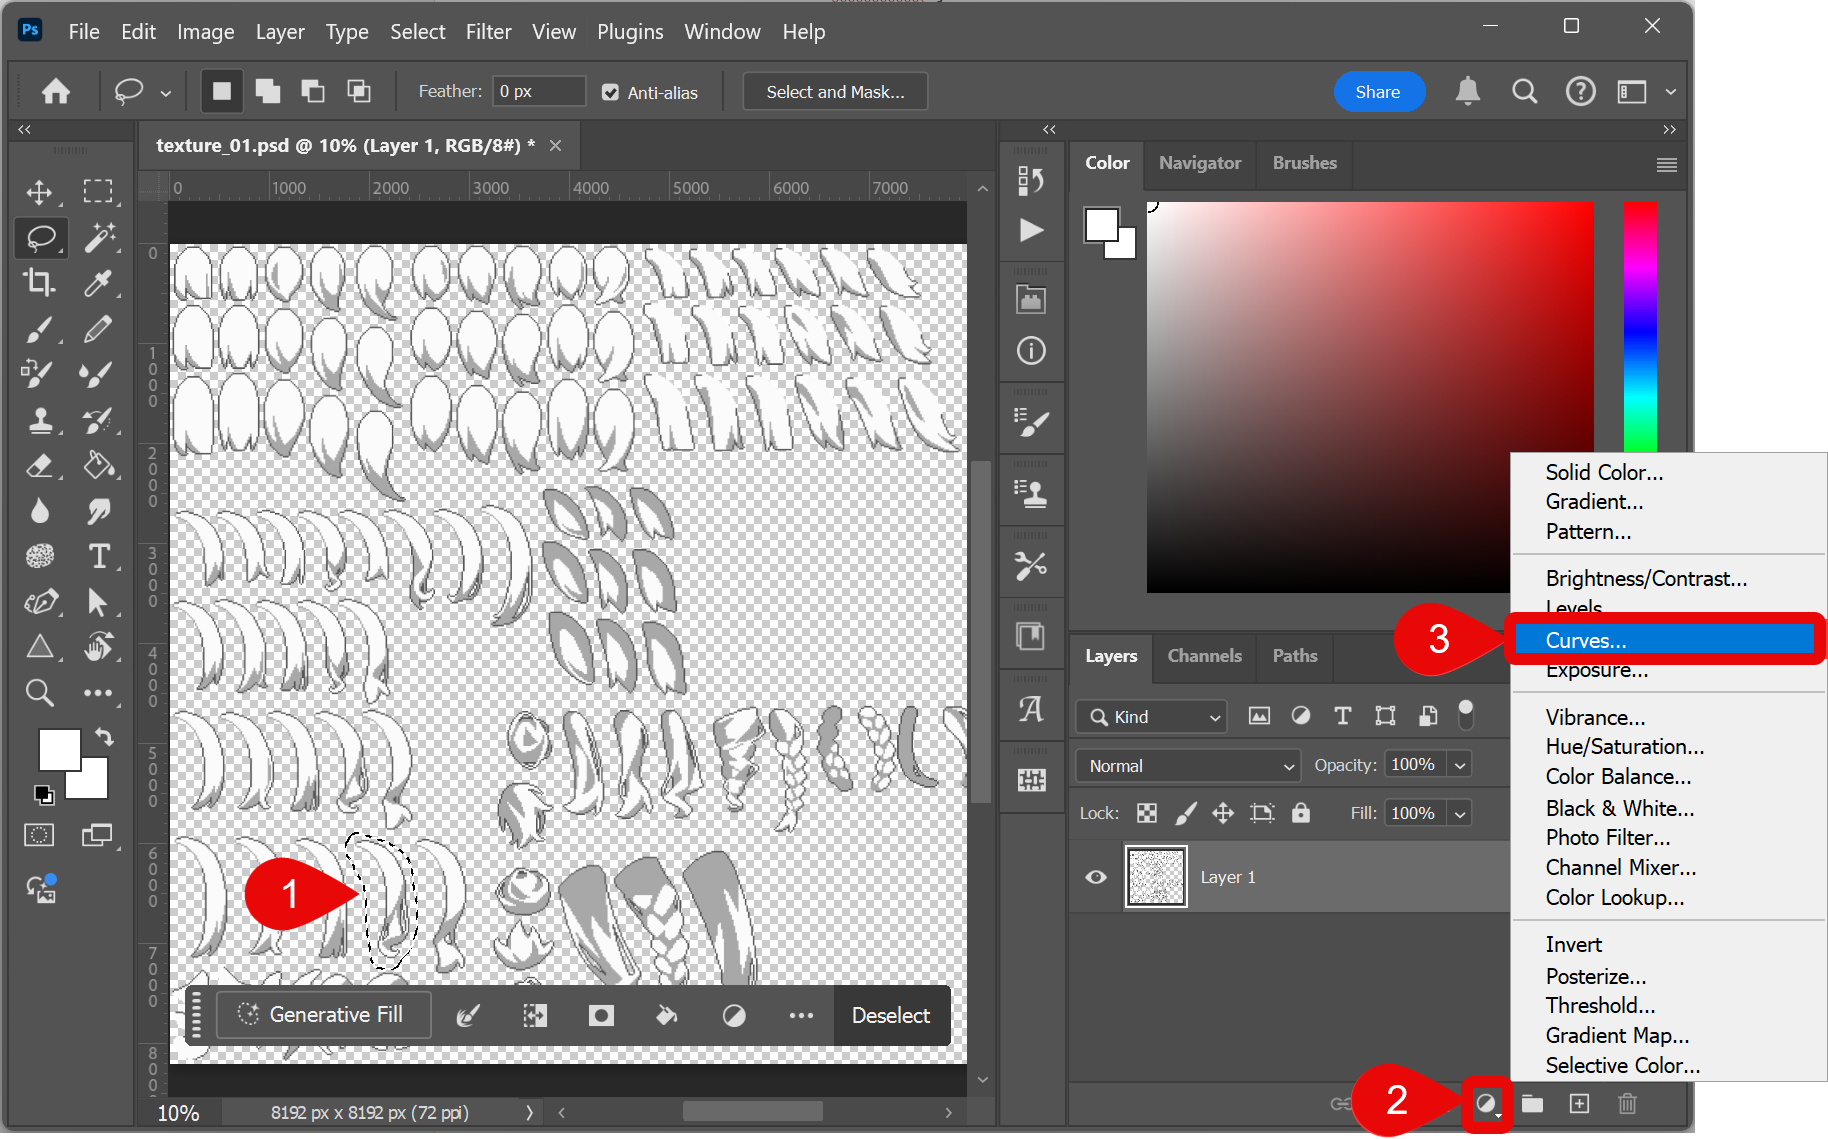
- Use the lasso tool to select the region you want to edit.
- Create an adjustment layer (or filter layer; the naming can differ by software).
- Here we use the curves adjustment layer to modify the color.
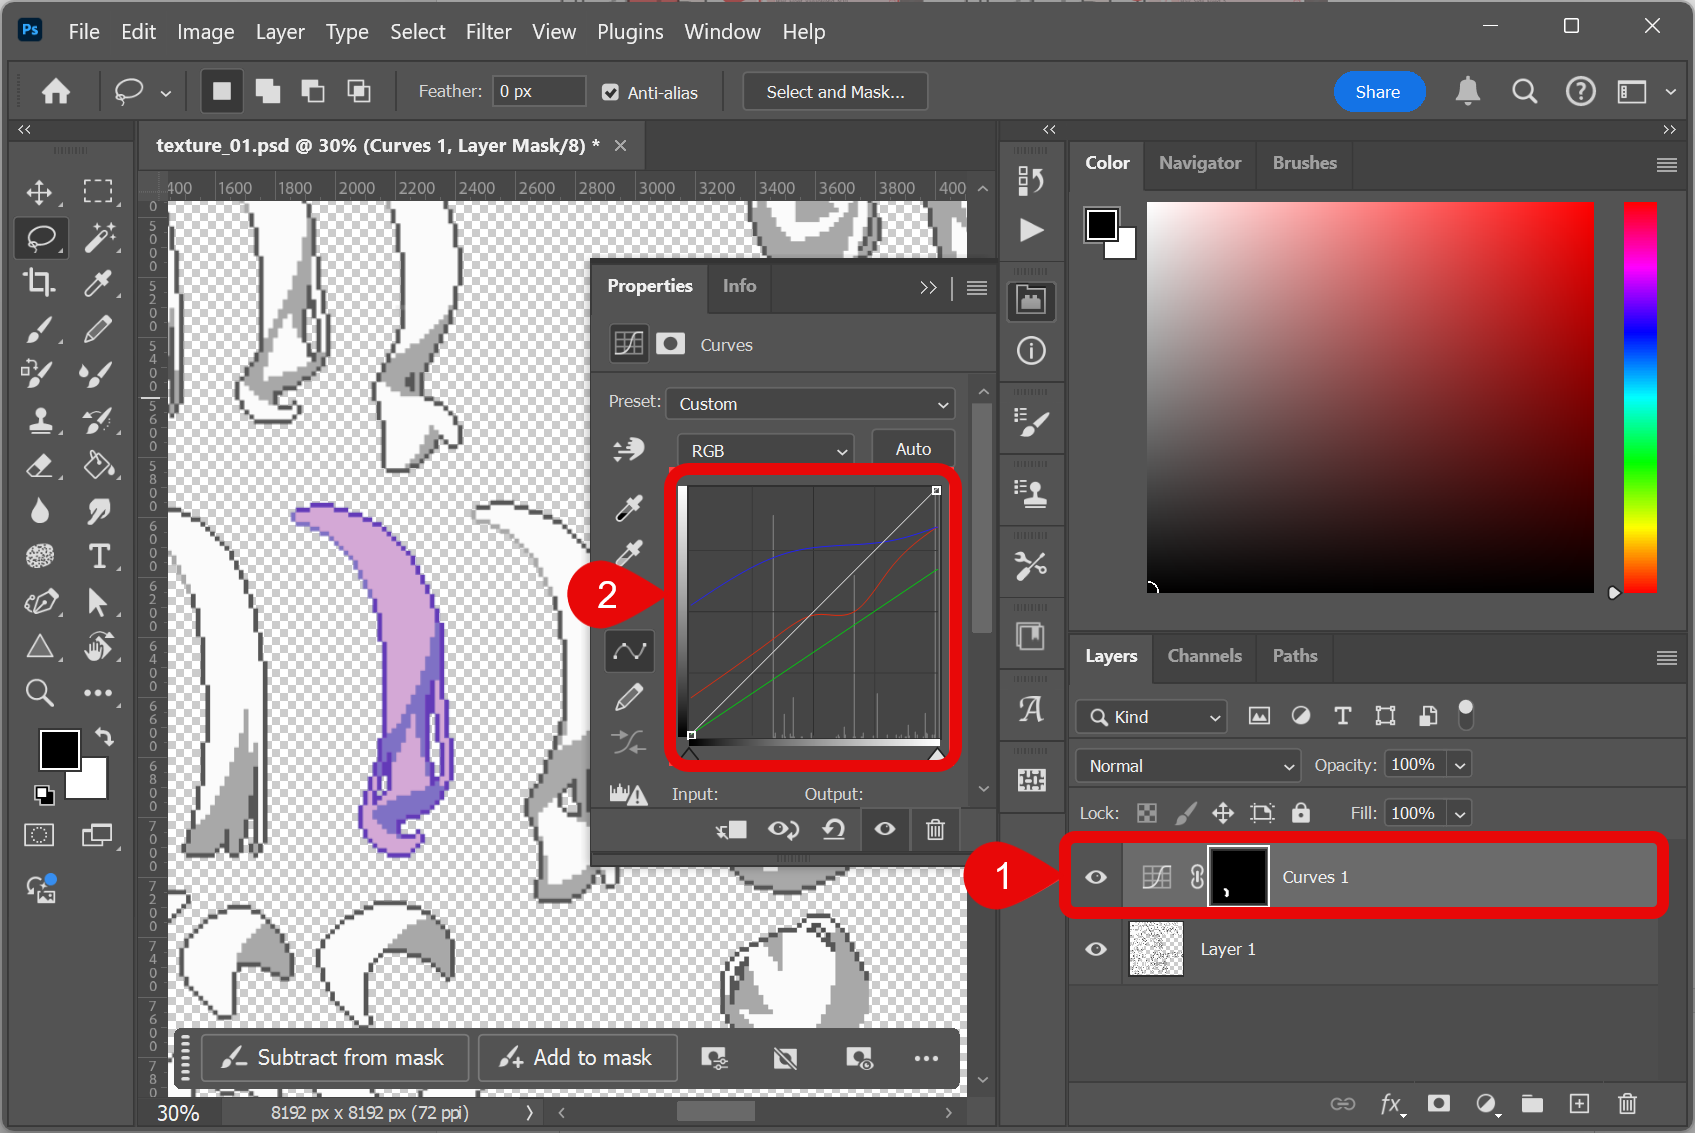
- Photoshop will automatically create a layer mask and confine the adjustment to the selected area. By adjusting the RGB curves, you can fine-tune the color of each part. In this example, the hues of the light and dark areas are different (the dark area is bluer), creating a natural look.
- Export the atlas as PNG into the model’s texture folder and replace the original file. Keep the same file name and pixel dimensions as the texture the model shipped with.
- Use your reload textures hotkey (see Reloading textures) after each save to check the result.
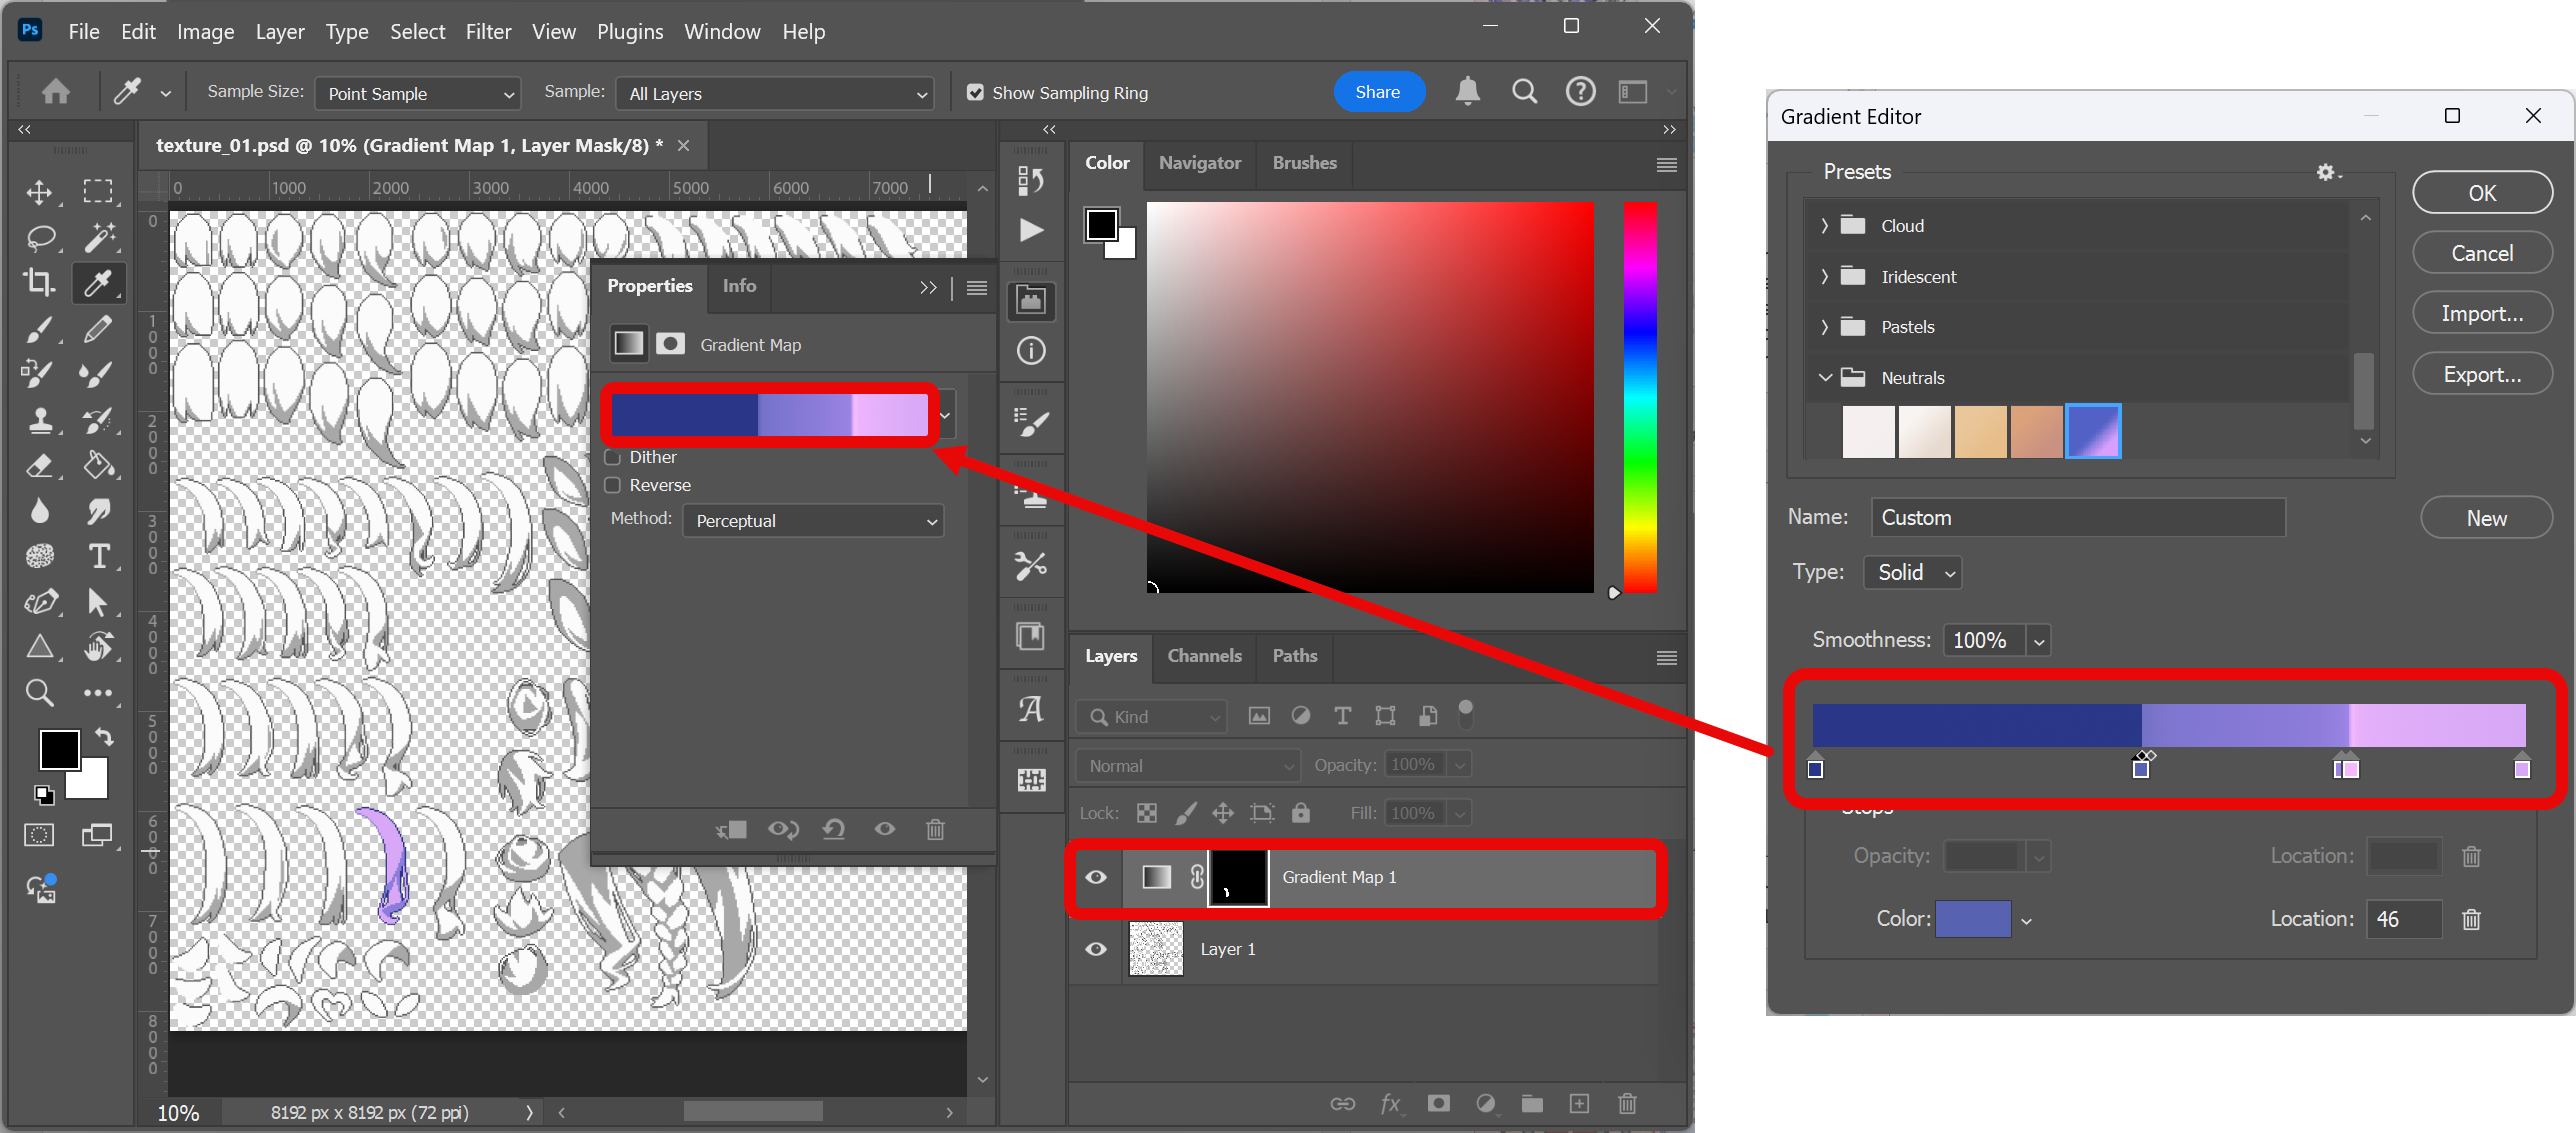
Alternatively, you can use a gradient map layer for color editing. Gradient maps will map the grayscale range of the selected part to the colors of a specified gradient. Choose Gradient Map from the Create new fill or adjustment layer menu and adjust the gradient. This method is recommended if you already have a character sheet where you can sample the colors from.
Drawing on Existing Parts
You can draw directly on the texture atlas to add new detail on the art itself: extra highlights, patterns, makeup, small accessories.
Usually you will need to lock the opacity to avoid drawing outside the mesh padding. If you want to expand the existing island, it is recommended to check all edges in VTS to make sure the drawing is within the mesh padding.
Erasing part of an island is usually fine. For example, shortening hair by removing part of the hair. If you erase too much, you can get gaps, seams, or underlying layers showing through, and the model may look wrong or broken.
Always save the edited textures as your editor’s native document (e.g. .psd, .clip) so layers and masks stay editable for later adjustments. Runtime loading uses only the exported PNG paths referenced by the model linking file, but saving the project file as a backup is always recommended.
See Also
- Mesh color editing — Faster, non-destructive tinting inside VTS.
- Live2D primer — Runtime files, ArtMeshes, and textures at a high level.
- Model customization — Expression-based customization without editing PNGs.