Mesh Color Editing
In Live2D models, each layer of the model art is placed on a mesh. The combination of the art image and the mesh is called "ArtMesh" in Live2D terms (For more details, see Live2D Primer).
If the model does not expose color through expression parameters or you want more flexibility in color editing, you can tint meshes inside VTS with multiply and screen colors. Editing the multiply and screen color of an ArtMesh only changes how the mesh is shaded, not the texture file related to the ArtMesh (for that, see Texture editing).
ArtMesh Color Editing
Customize Multiply and Screen Color for ArtMeshes
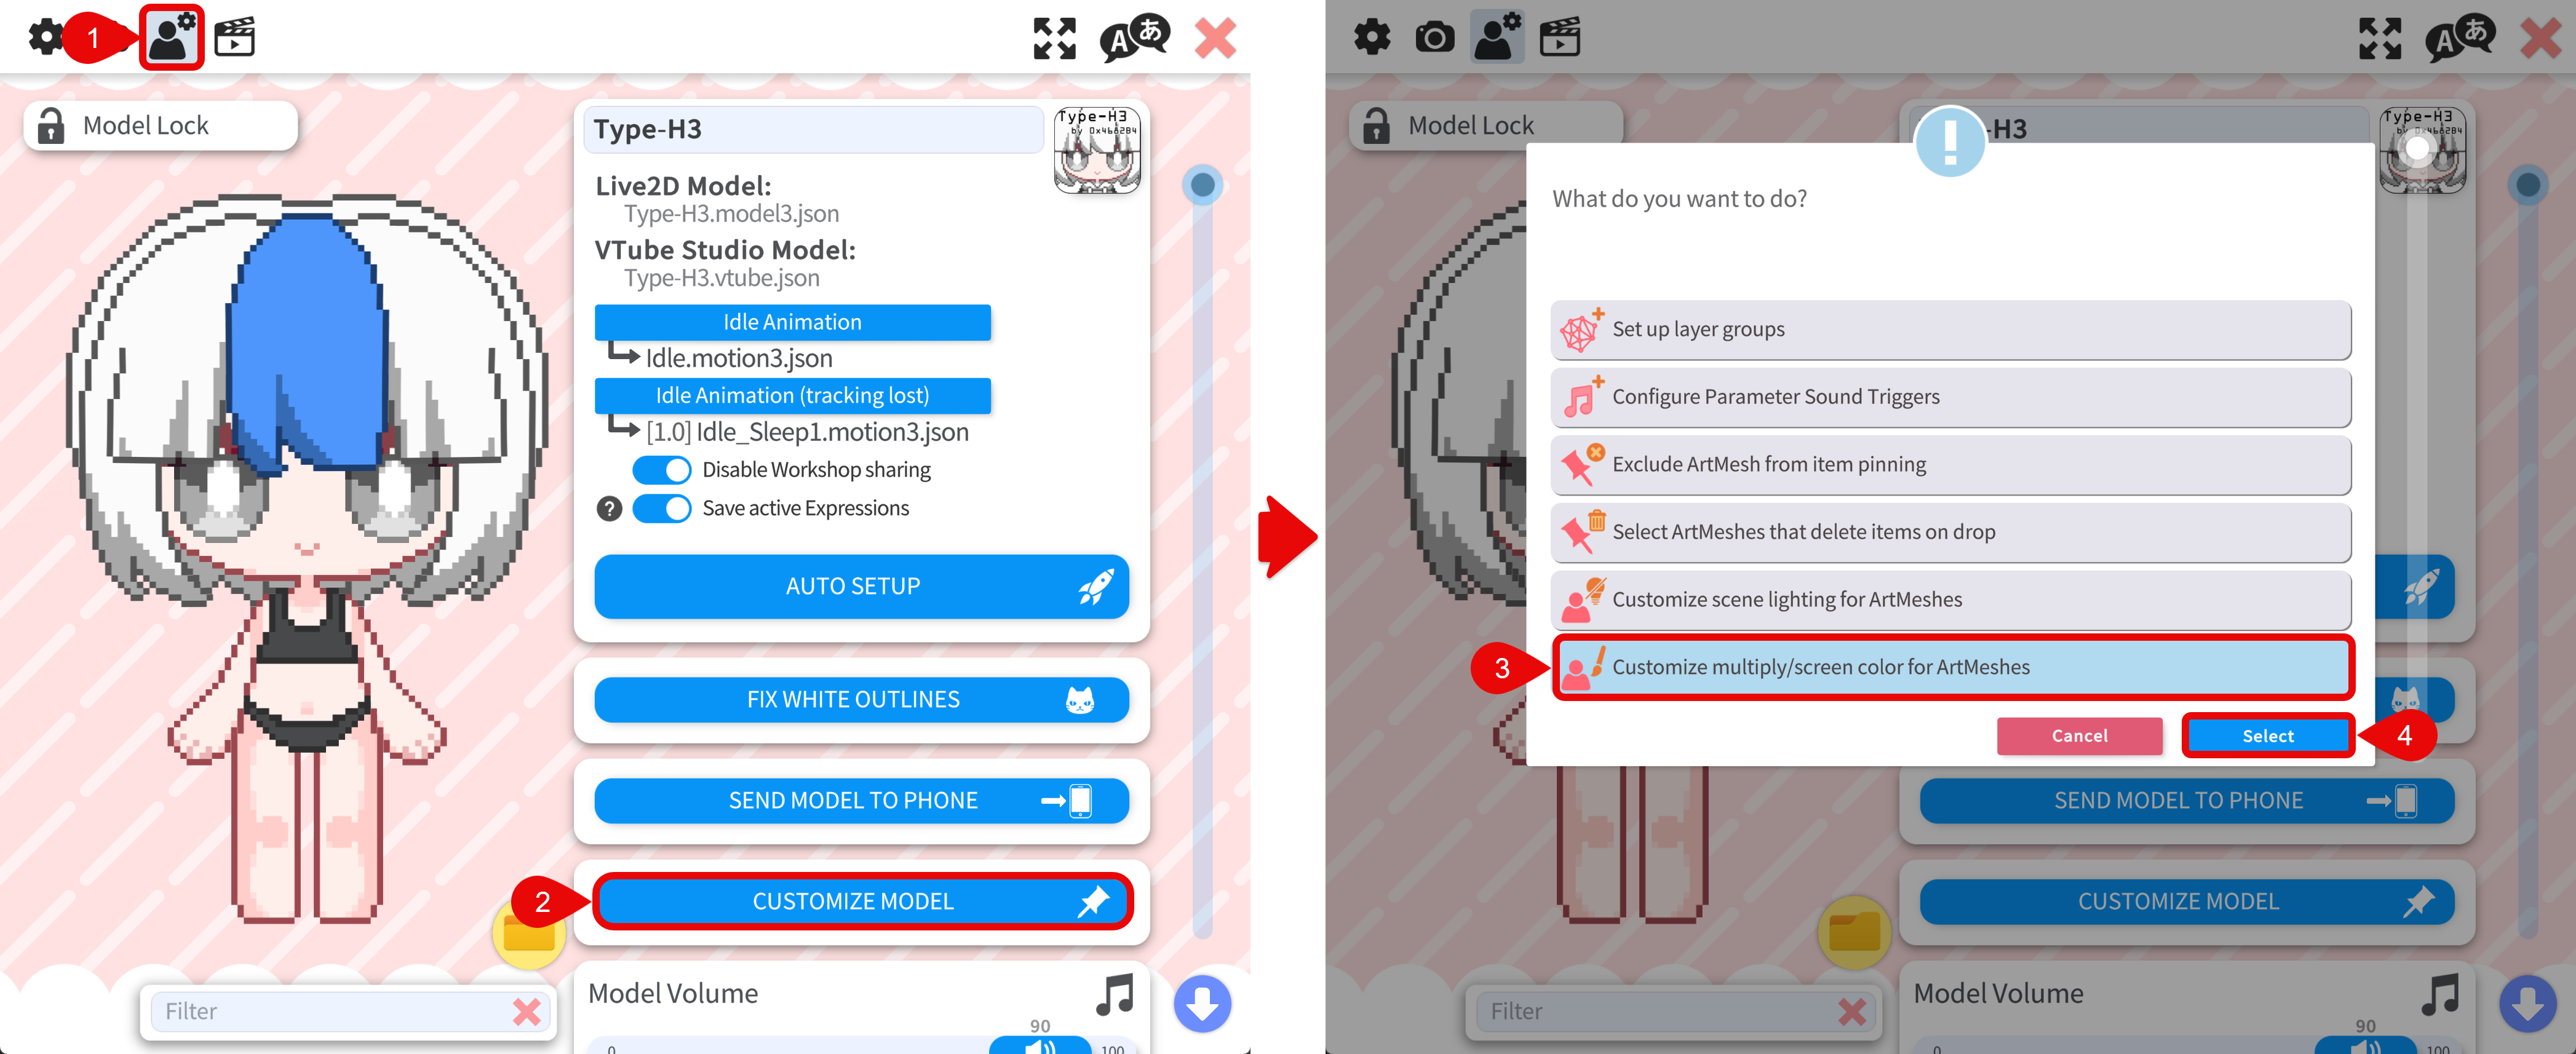
- Go to the Model Settings tab.
- Click the CUSTOMIZE MODEL button.
- In the popup menu, choose the option to Customize multiply/screen color for ArtMeshes (wording may vary).
Pick the Mesh
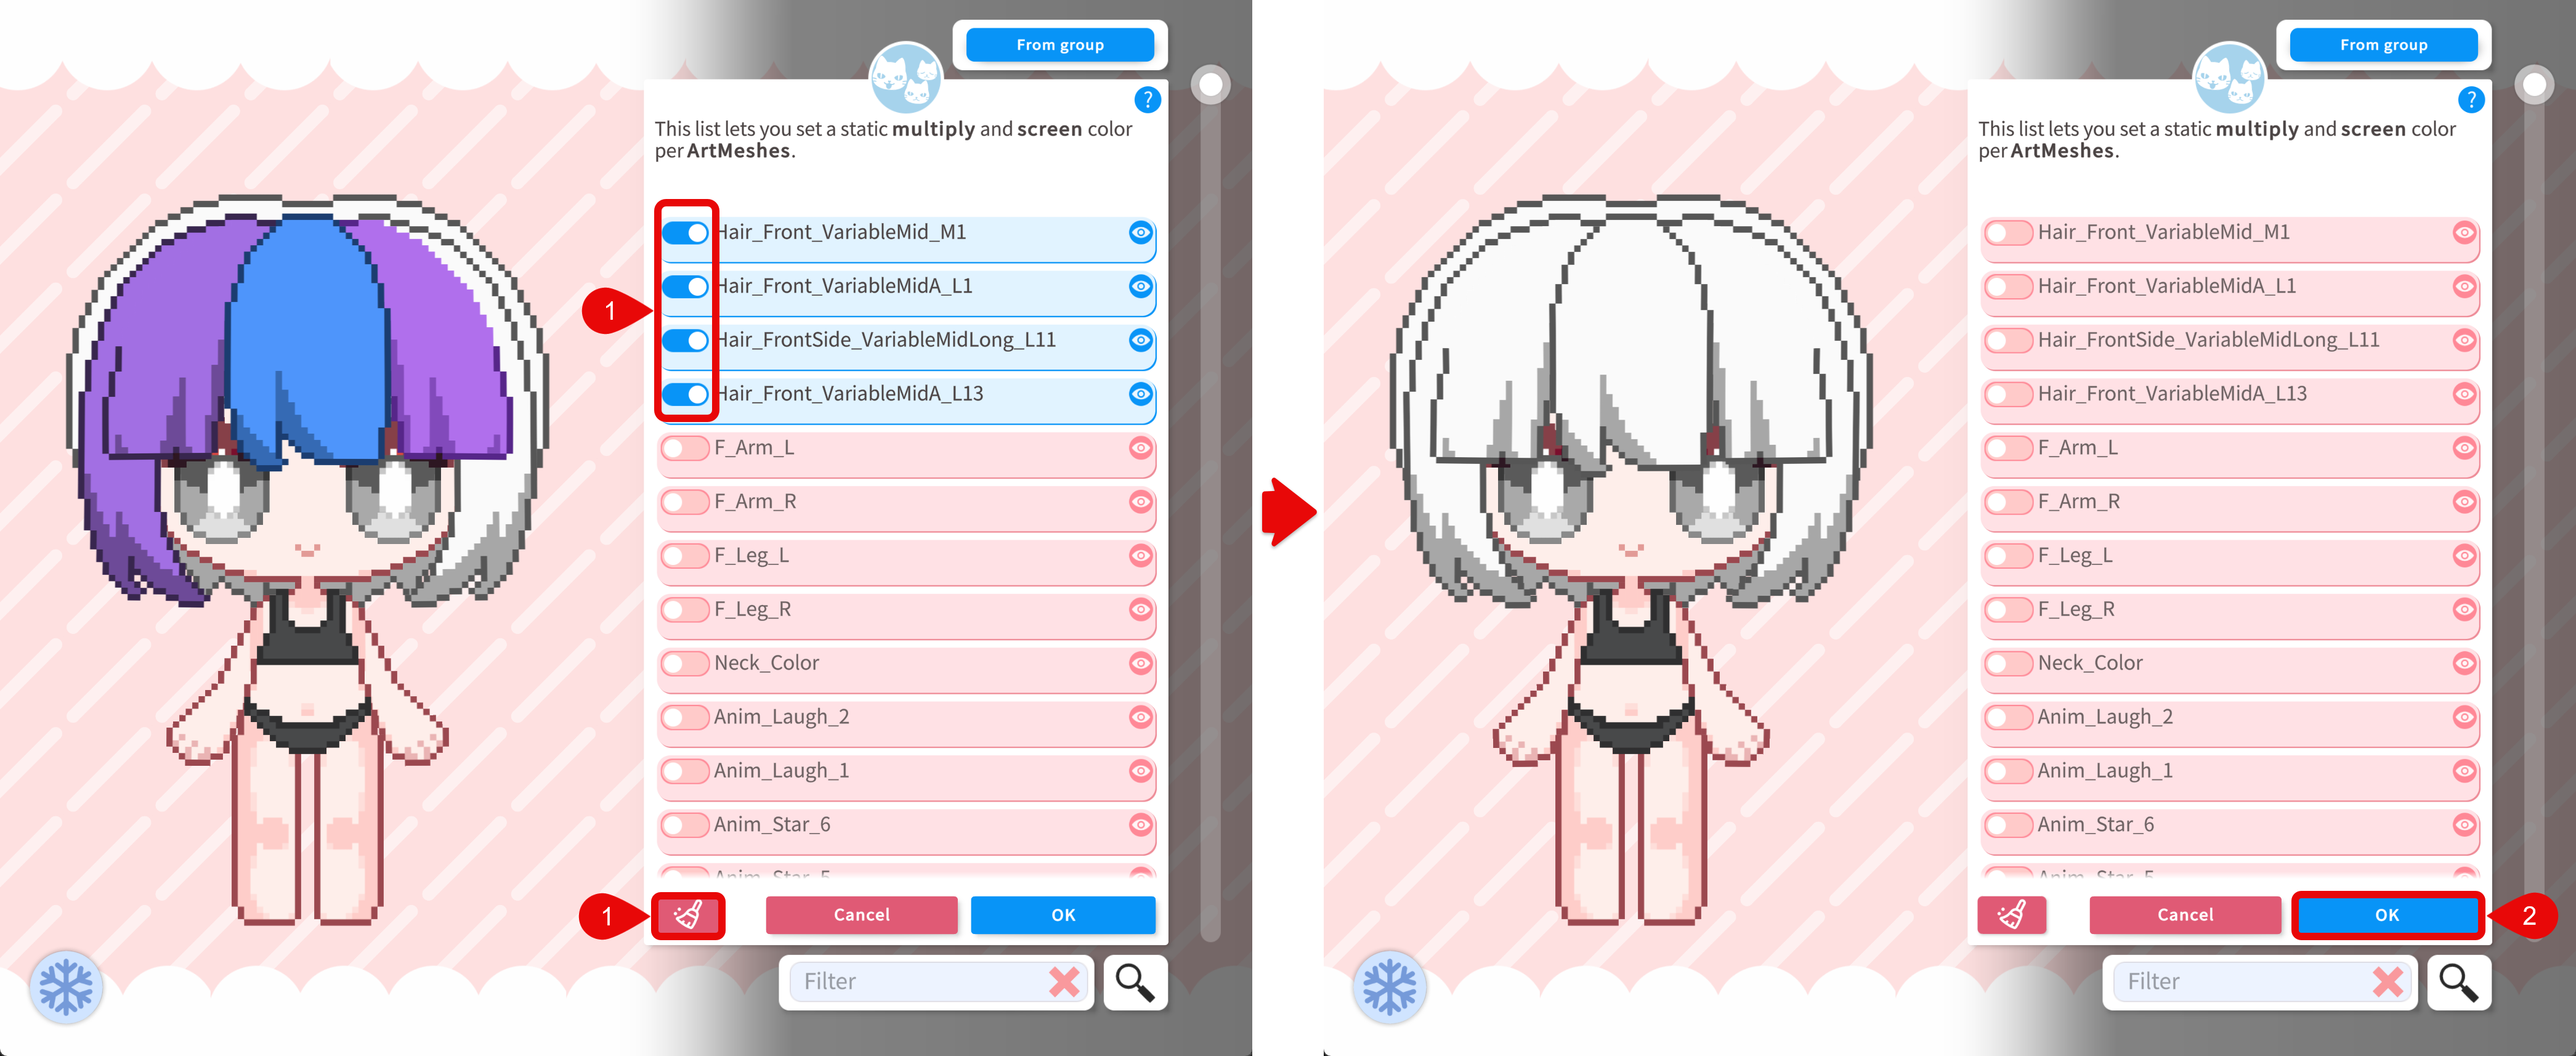
- Hover your mouse over the model. VTS highlights the ArtMesh under the cursor.
- The name of the highlighted ArtMesh will be displayed on the top left corner of the screen.
- Click the part you want. All the ArtMeshes at the clicked location will be filtered.
- Enable the ArtMesh you intend to edit. Usually this is the part with the name shown on the top left corner.
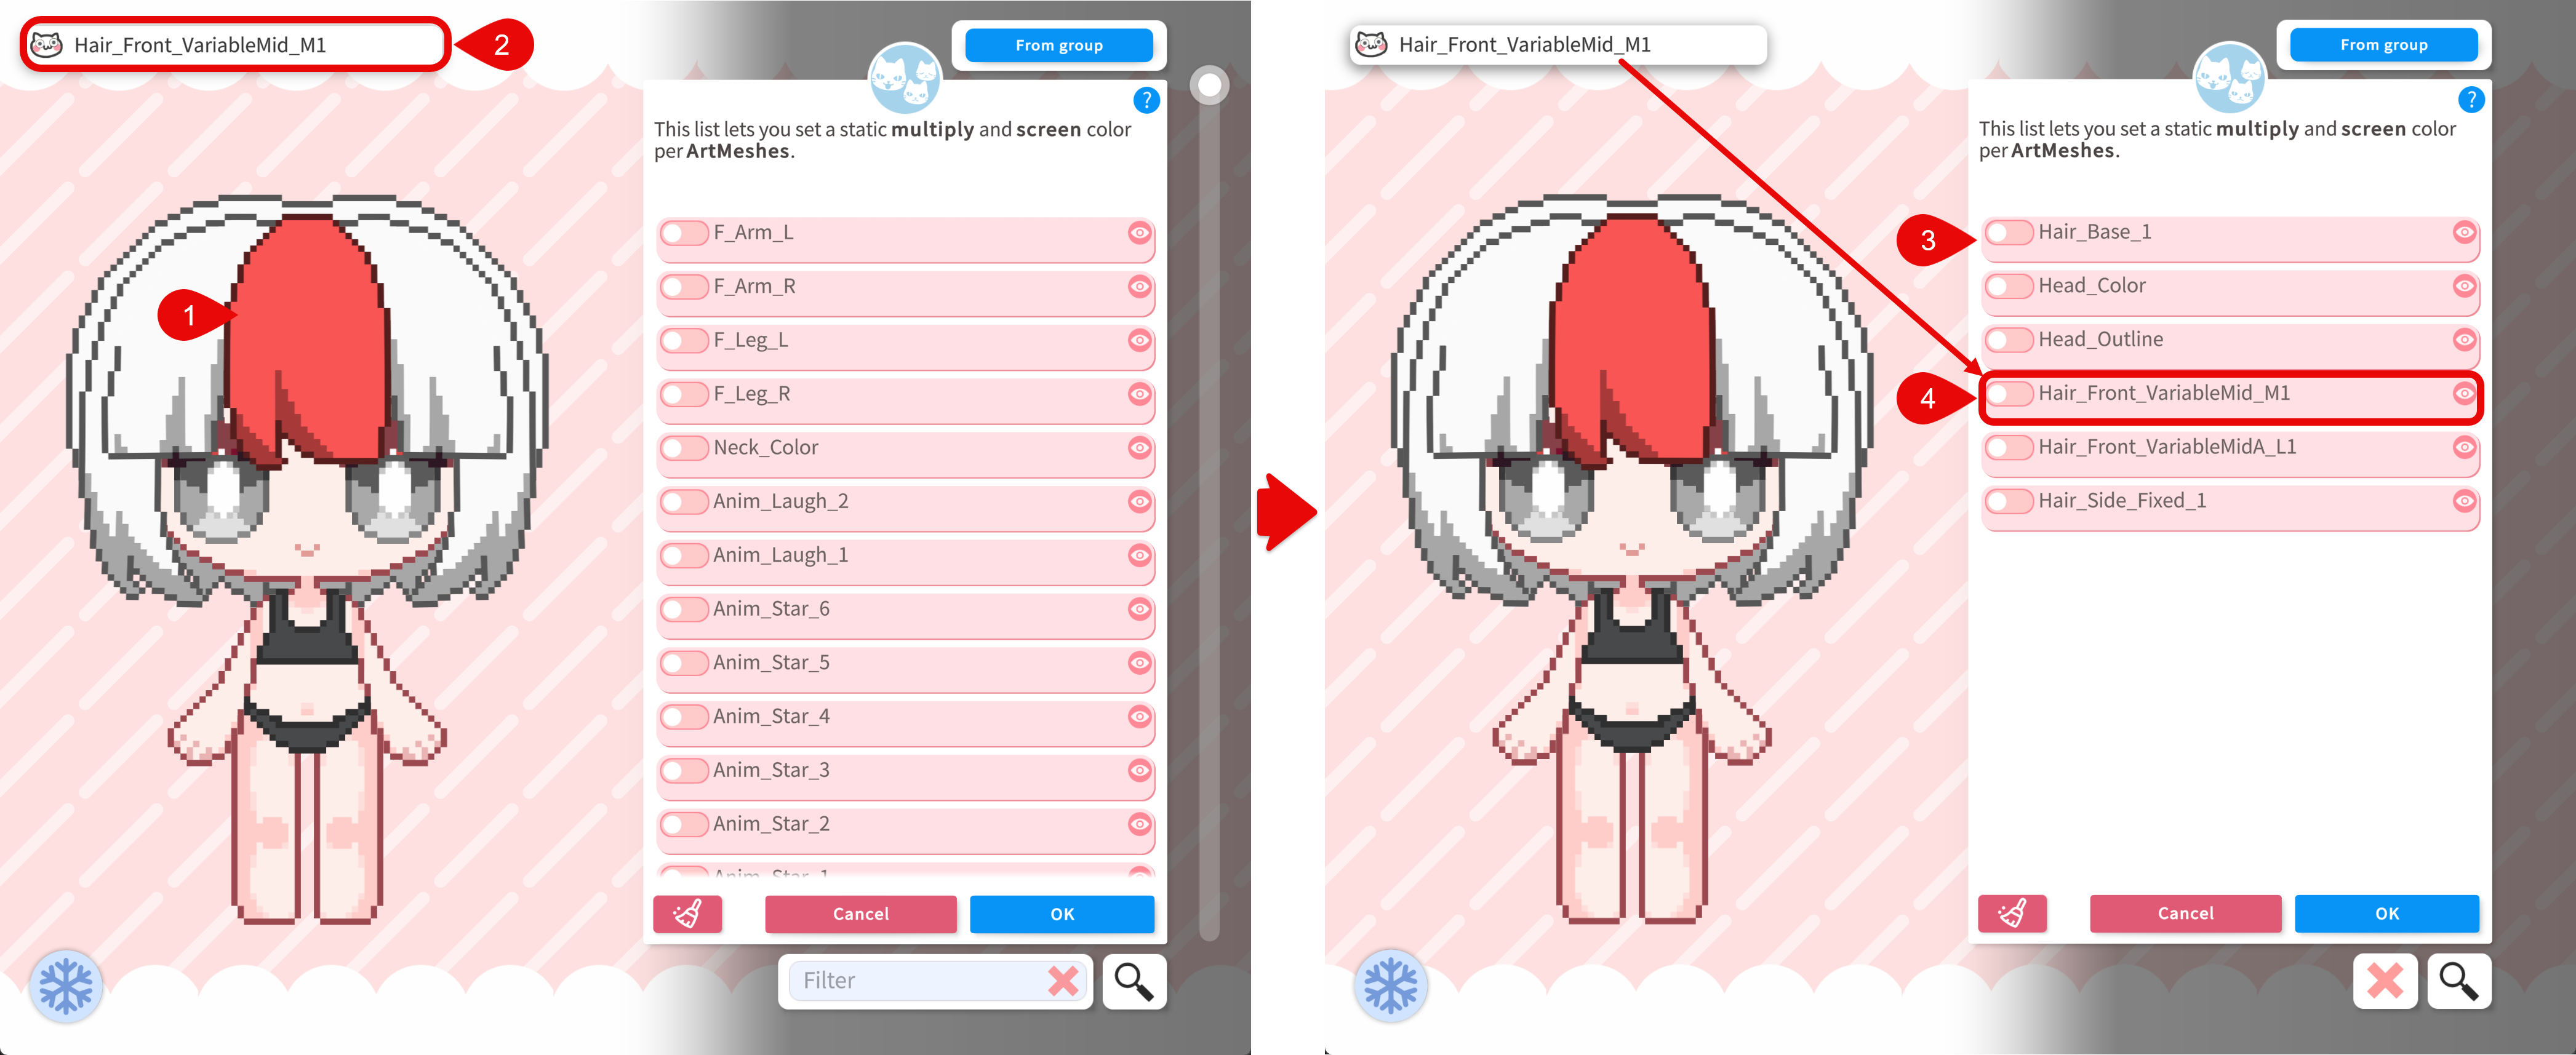
Since there are many ArtMeshes in a model, it is often helpful to group them into logical groups for easier management. You can do this by using the Mesh Groups feature. For more details, see ArtMesh (Layer) Groups.
Adjust Multiply and Screen Color
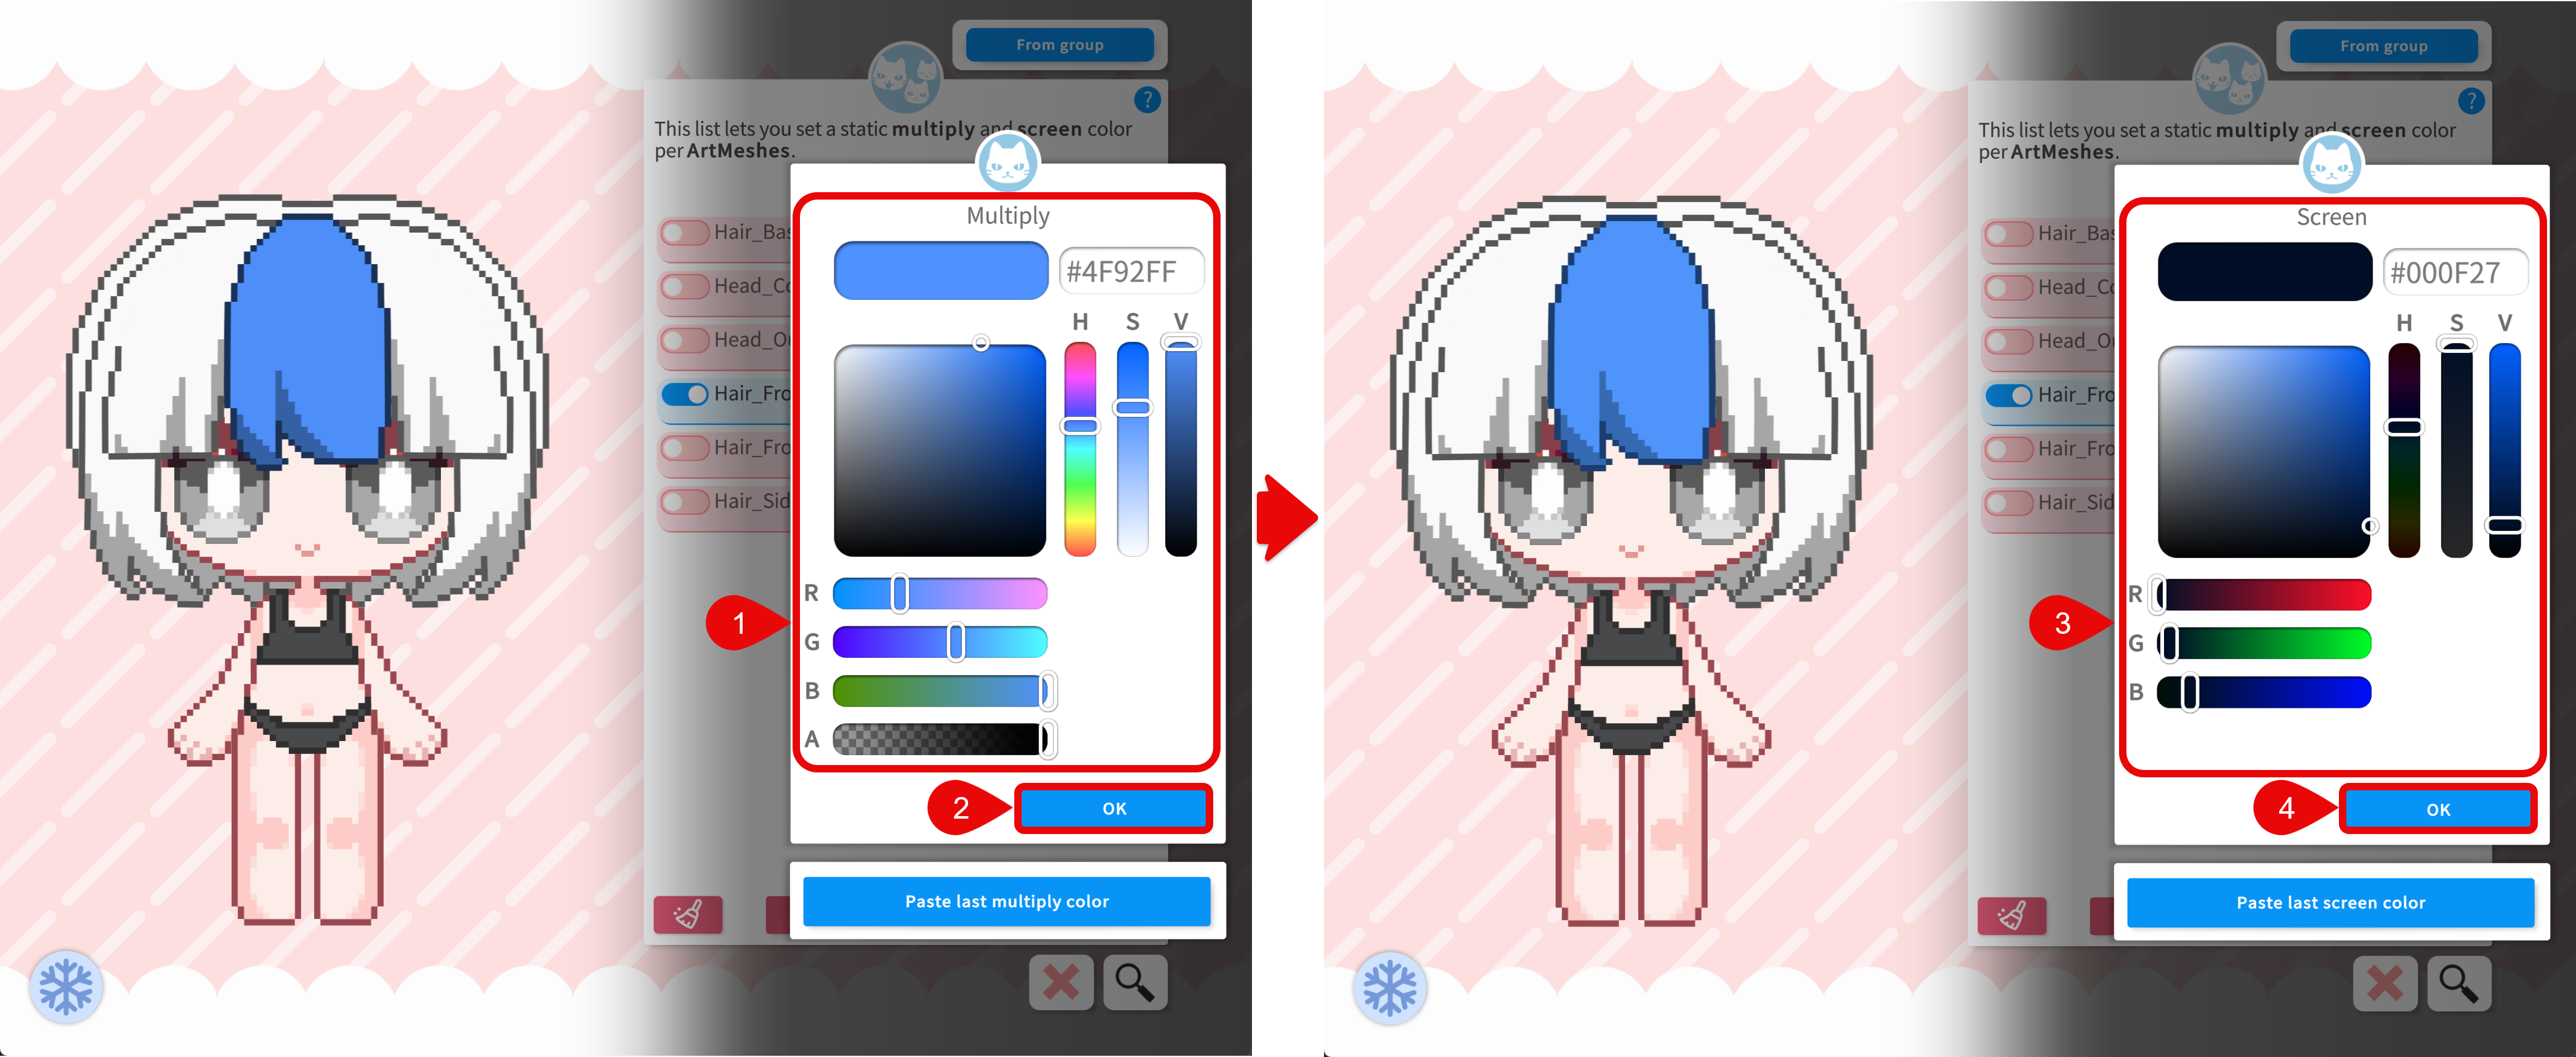
After enabling the ArtMesh, a small editor opens for the selected ArtMesh.
- First, pick the Multiply color. It darkens and tints.
- Click the "OK" button to proceed.
- Then pick the Screen color. It brightens and adds light.
- Click the "OK" button to apply the changes.
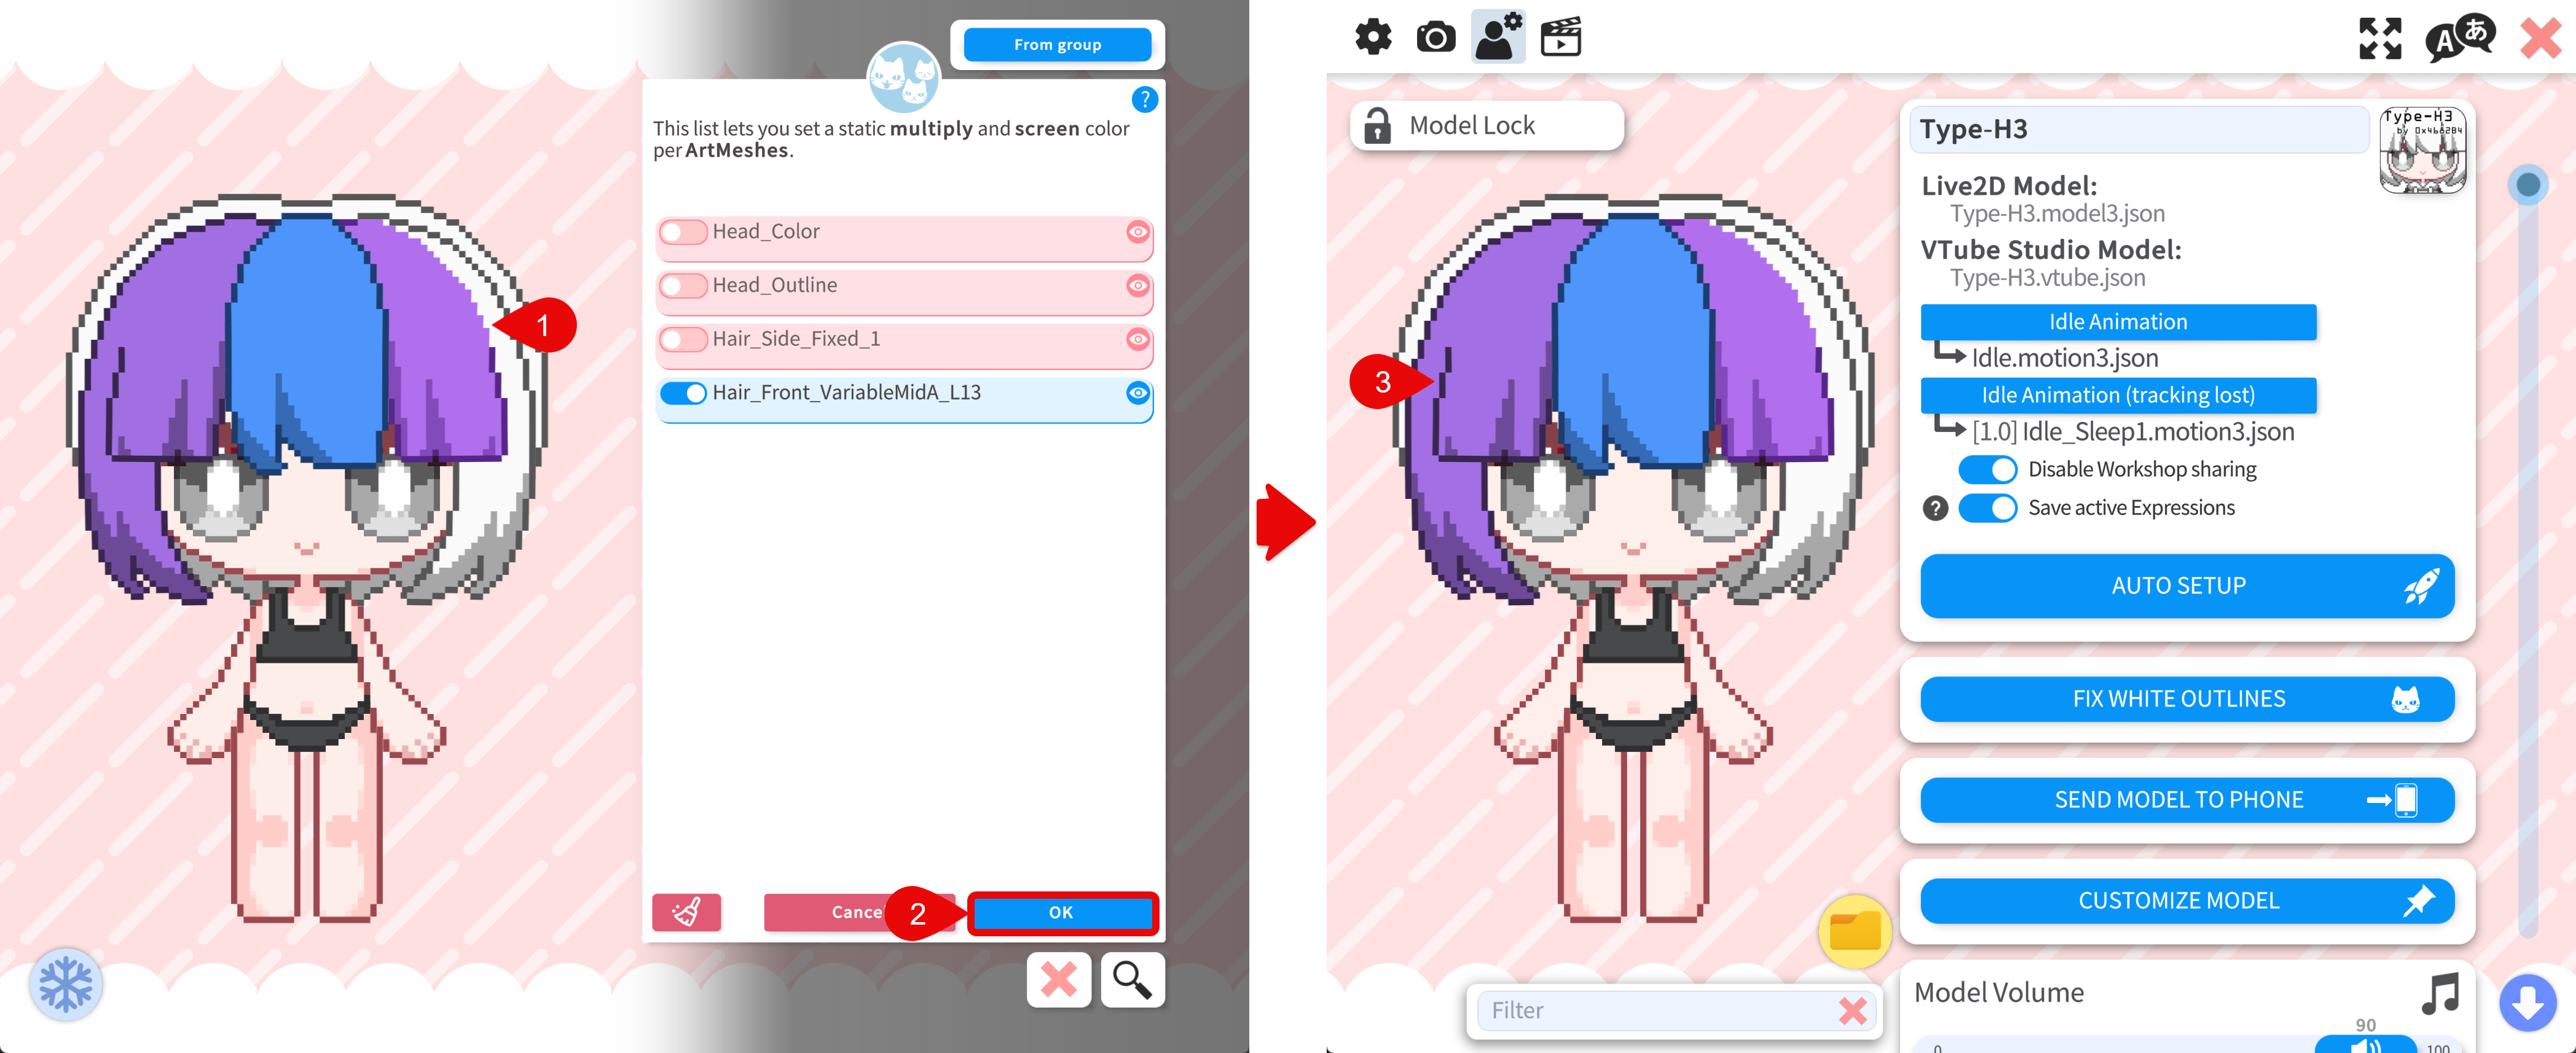
Apply the Changes
After editing all the ArtMeshes, click the "OK" button to apply the changes. The changes will be saved to the model setup file and the model will now have the new color.
Reset Mesh Colors
To clear tinting for meshes you changed, open the same Customize multiply/screen color for ArtMeshes editor and use the reset button or toggle off the ArtMesh you want to reset. Then click the "OK" button to apply the changes.
Save Multiple Versions of the Color Customization
The Customize multiply and screen color for ArtMeshes will change the mesh color of the current loaded model. To save multiple versions of the color customization, you can record the color customization in a hotkey. This way, you can switch between different color versions without having to edit the color customization again.
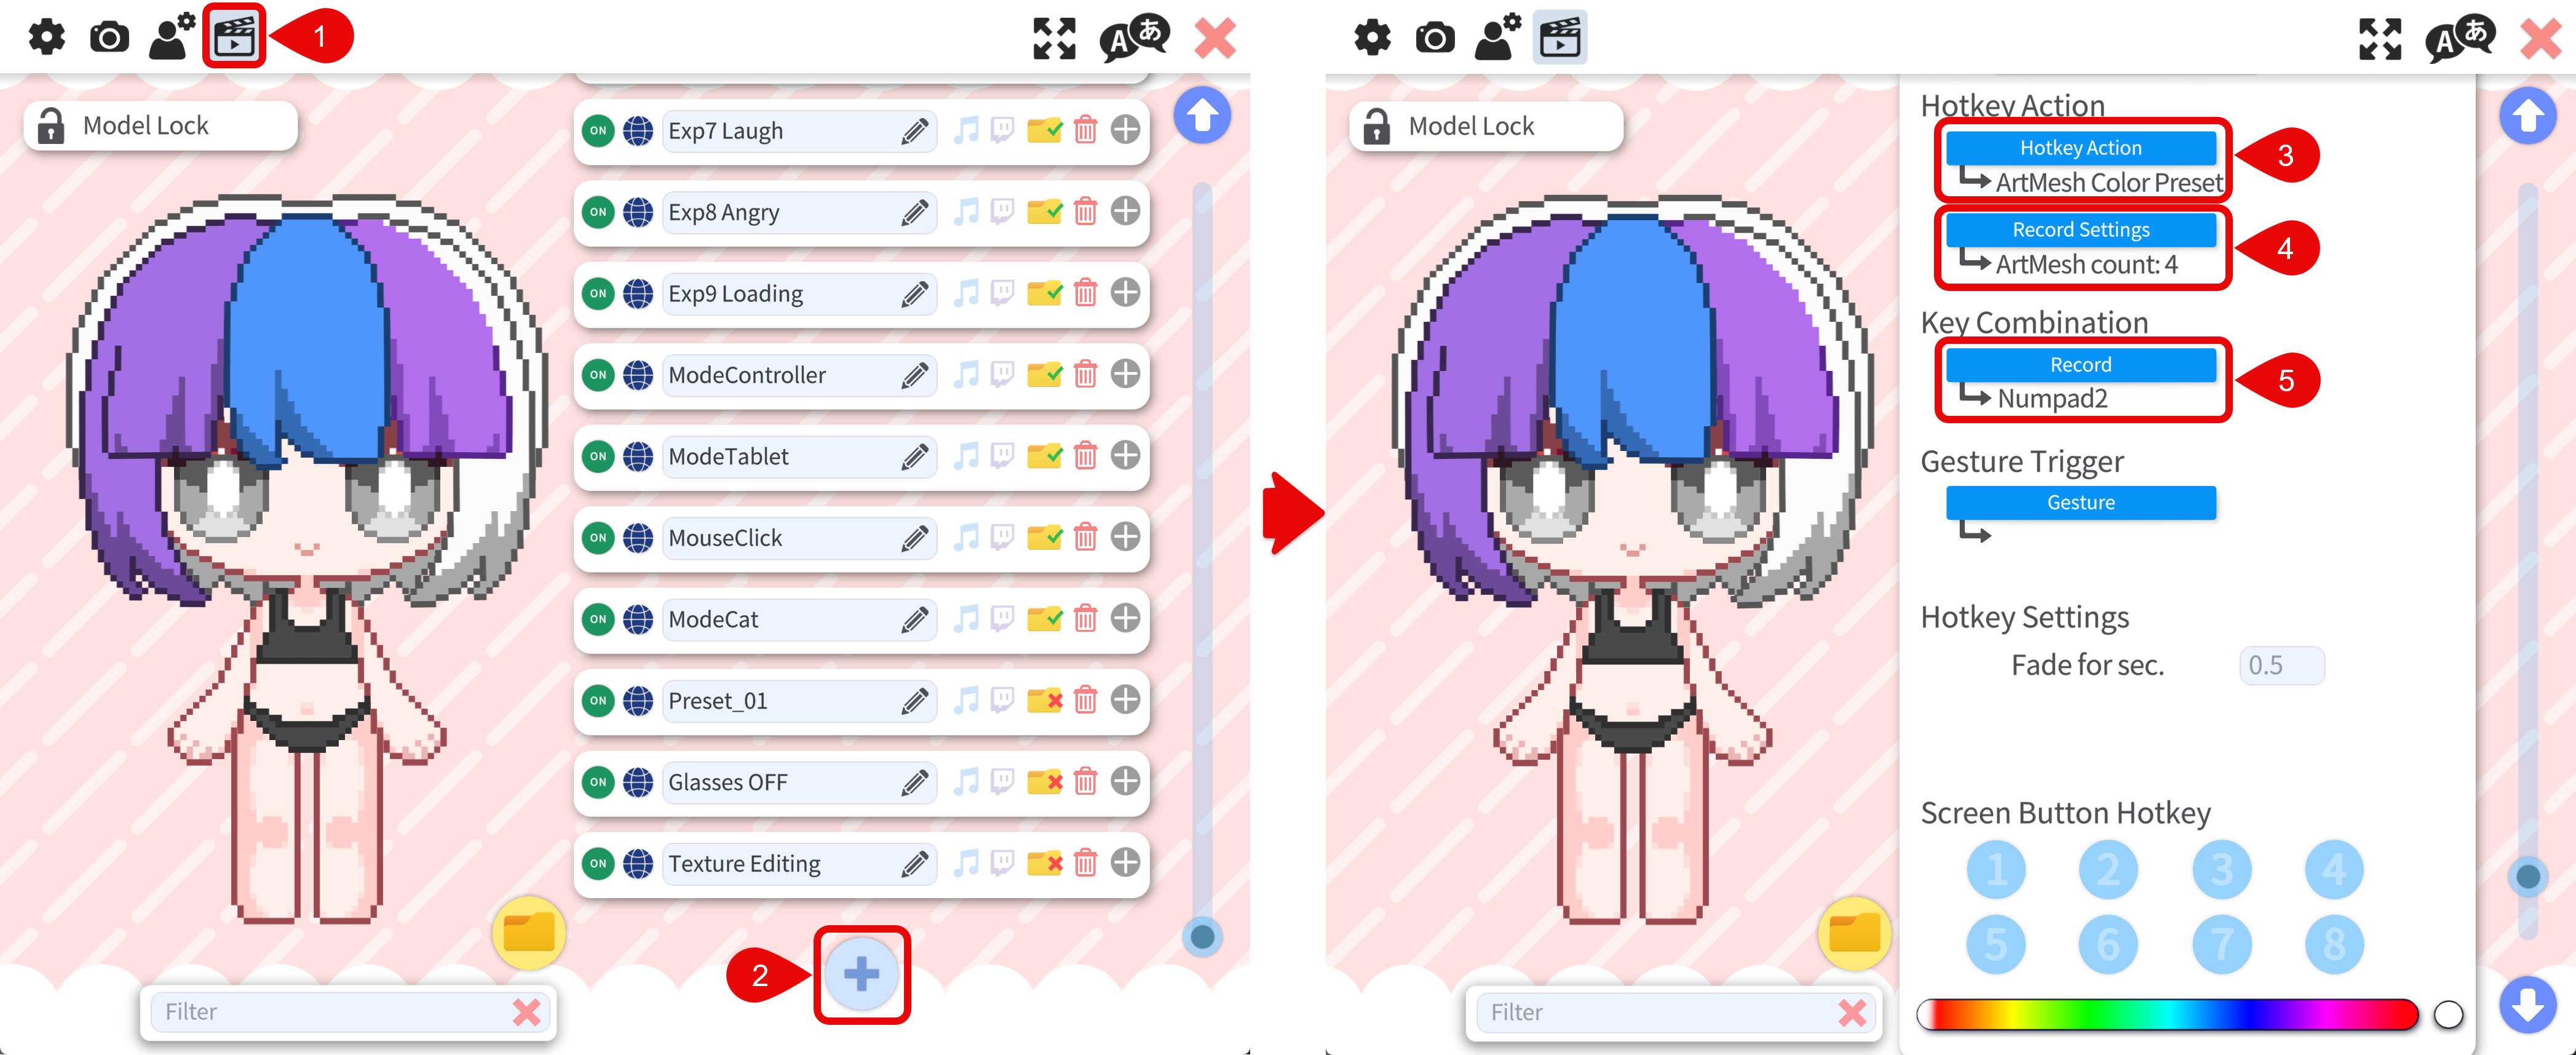
- Go to the Hotkey Settings & Expressions tab
- Scroll to the bottom of the hotkey list and use the + button to add a new hotkey.
- Set the Hotkey Action to ArtMesh Color Preset
- Press the Record Settings button to record the color customization.
- Assign a key combination you want for that color preset. Then you can press the key combination to deactivate/activate the color preset.
To save another color preset, edit the ArtMesh color customization and record the changes in a new hotkey.
Pressing the Record Settings button will record the current color customization state of the model and this will overwrite the previously saved state. The previously saved state will be lost permanently. There is no overwrite warning for this operation in VTS. It is always recommended to record the color customization in a new hotkey to avoid losing the previously saved state.
Where Settings Are Saved
Mesh multiply/screen edits are stored in your VTS model setup file (often named like [ModelName].vtube.json next to the model data VTS uses for that avatar). Back up that file before bulk edits or experiments. VTS also keeps automatic backups of setup data in the <VTube Studio app path>\VTube Studio_Data\StreamingAssets\Backup folder.
See Also
- Model customization — Saving looks with the Expression Editor and parameters.
- Texture editing — Editing the actual image files when you need permanent pixel changes.