Face Tracking
This page covers face tracking methods in VTube Studio (VTS):
- Webcam face tracking (Mediapipe Webcam Tracker, NVIDIA Webcam Tracker)
- iOS tracking (send data from iOS to PC)
- VBridger (Third-party plugin tracking)
When different trackers are used, the tracking parameters may be different. Although most of the models are set up in a way that uses parameters that are available in most trackers, there can still be some parameters that are not available in some trackers. For more information, please visit the VTS Model Settings page.
If certain parameters are not available in the tracker, you can replace the input parameters with a different parameter that is available in the tracker. For example, if the parameter BrowLeftY(up/down for left brow) is not available in the tracker, you can replace it with the parameter Brows(up/down for both brows combined).
Depending on the model package, the model may use parameters available when specific plugins are used for better tracking performance. For example, some models use VBridger parameters for better tracking performance.
Webcam Tracking
VTS supports built-in webcam tracking options, including Mediapipe Webcam Tracker and NVIDIA Webcam Tracker.
- Go to the settings menu (gear icon)
- Click on the Webcam, Tracking, Video & Visual tab.
- Select the tracking device you want to use. Select the highest resolution and the fps for the best tracking performance.
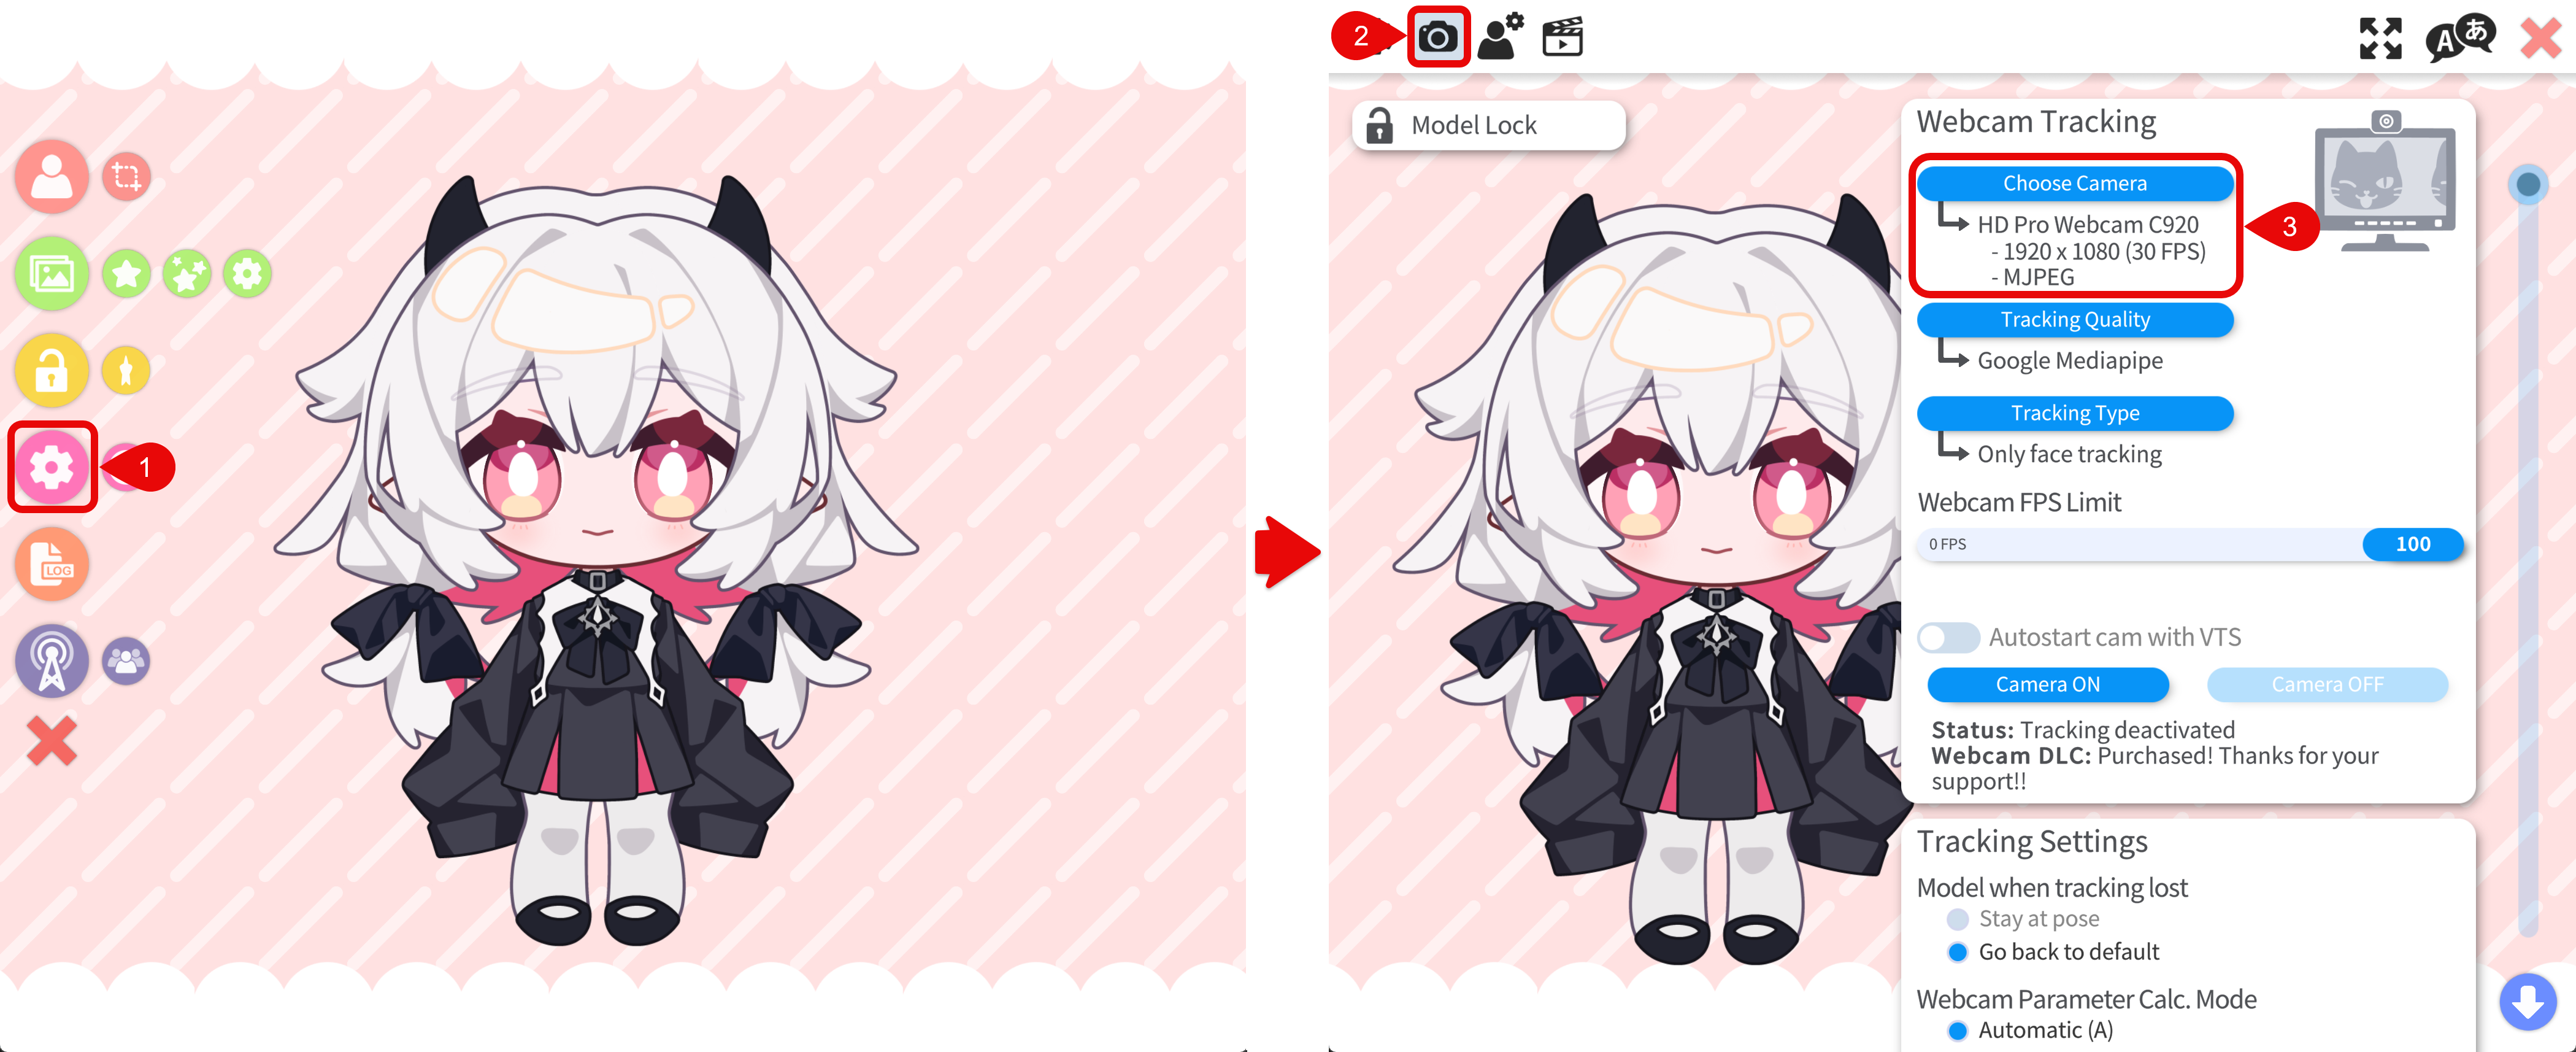
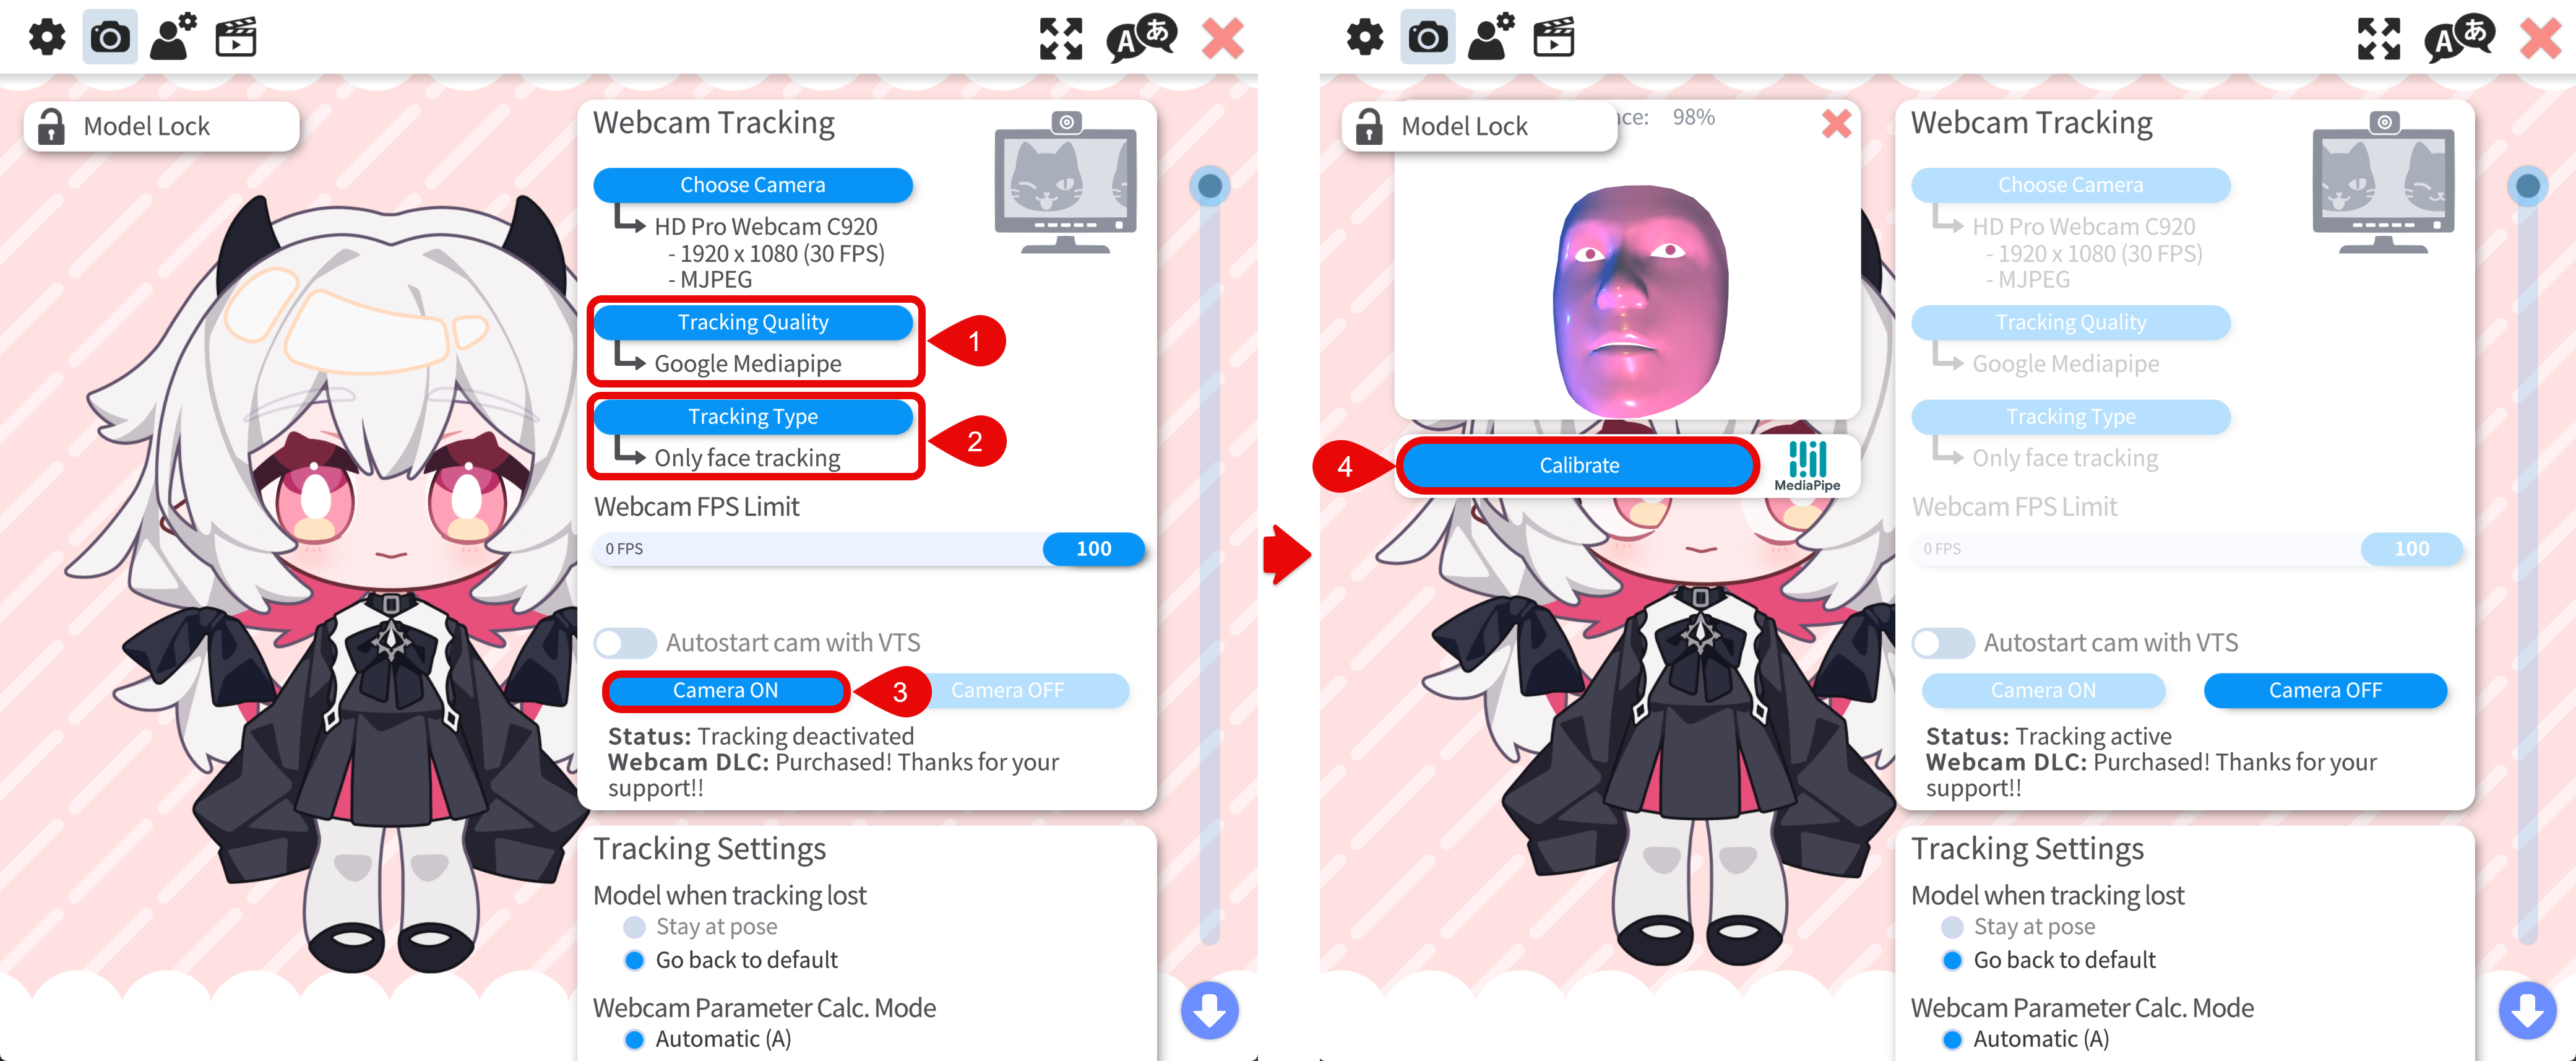
- Select the tracker in Tracking Quality:
- Mediapipe Webcam Tracker: general webcam option
- NVIDIA Webcam Tracker: need NVIDIA RTX GPU
- Select the Tracking Type:
- Only Face tracking: only track the face
- Only Hand tracking: only track the hands
- Face and Hand tracking: track the face and hands
- Click Camera On to start tracking.
- Face front to your screen and make a neutral expression. Click Calibrate to calibrate the tracking.
iOS Tracking
iOS face tracking is supported through the VTube Studio mobile app sending tracking data to the desktop app over local network. Make sure the iOS version of VTube Studio is installed on your iPhone.
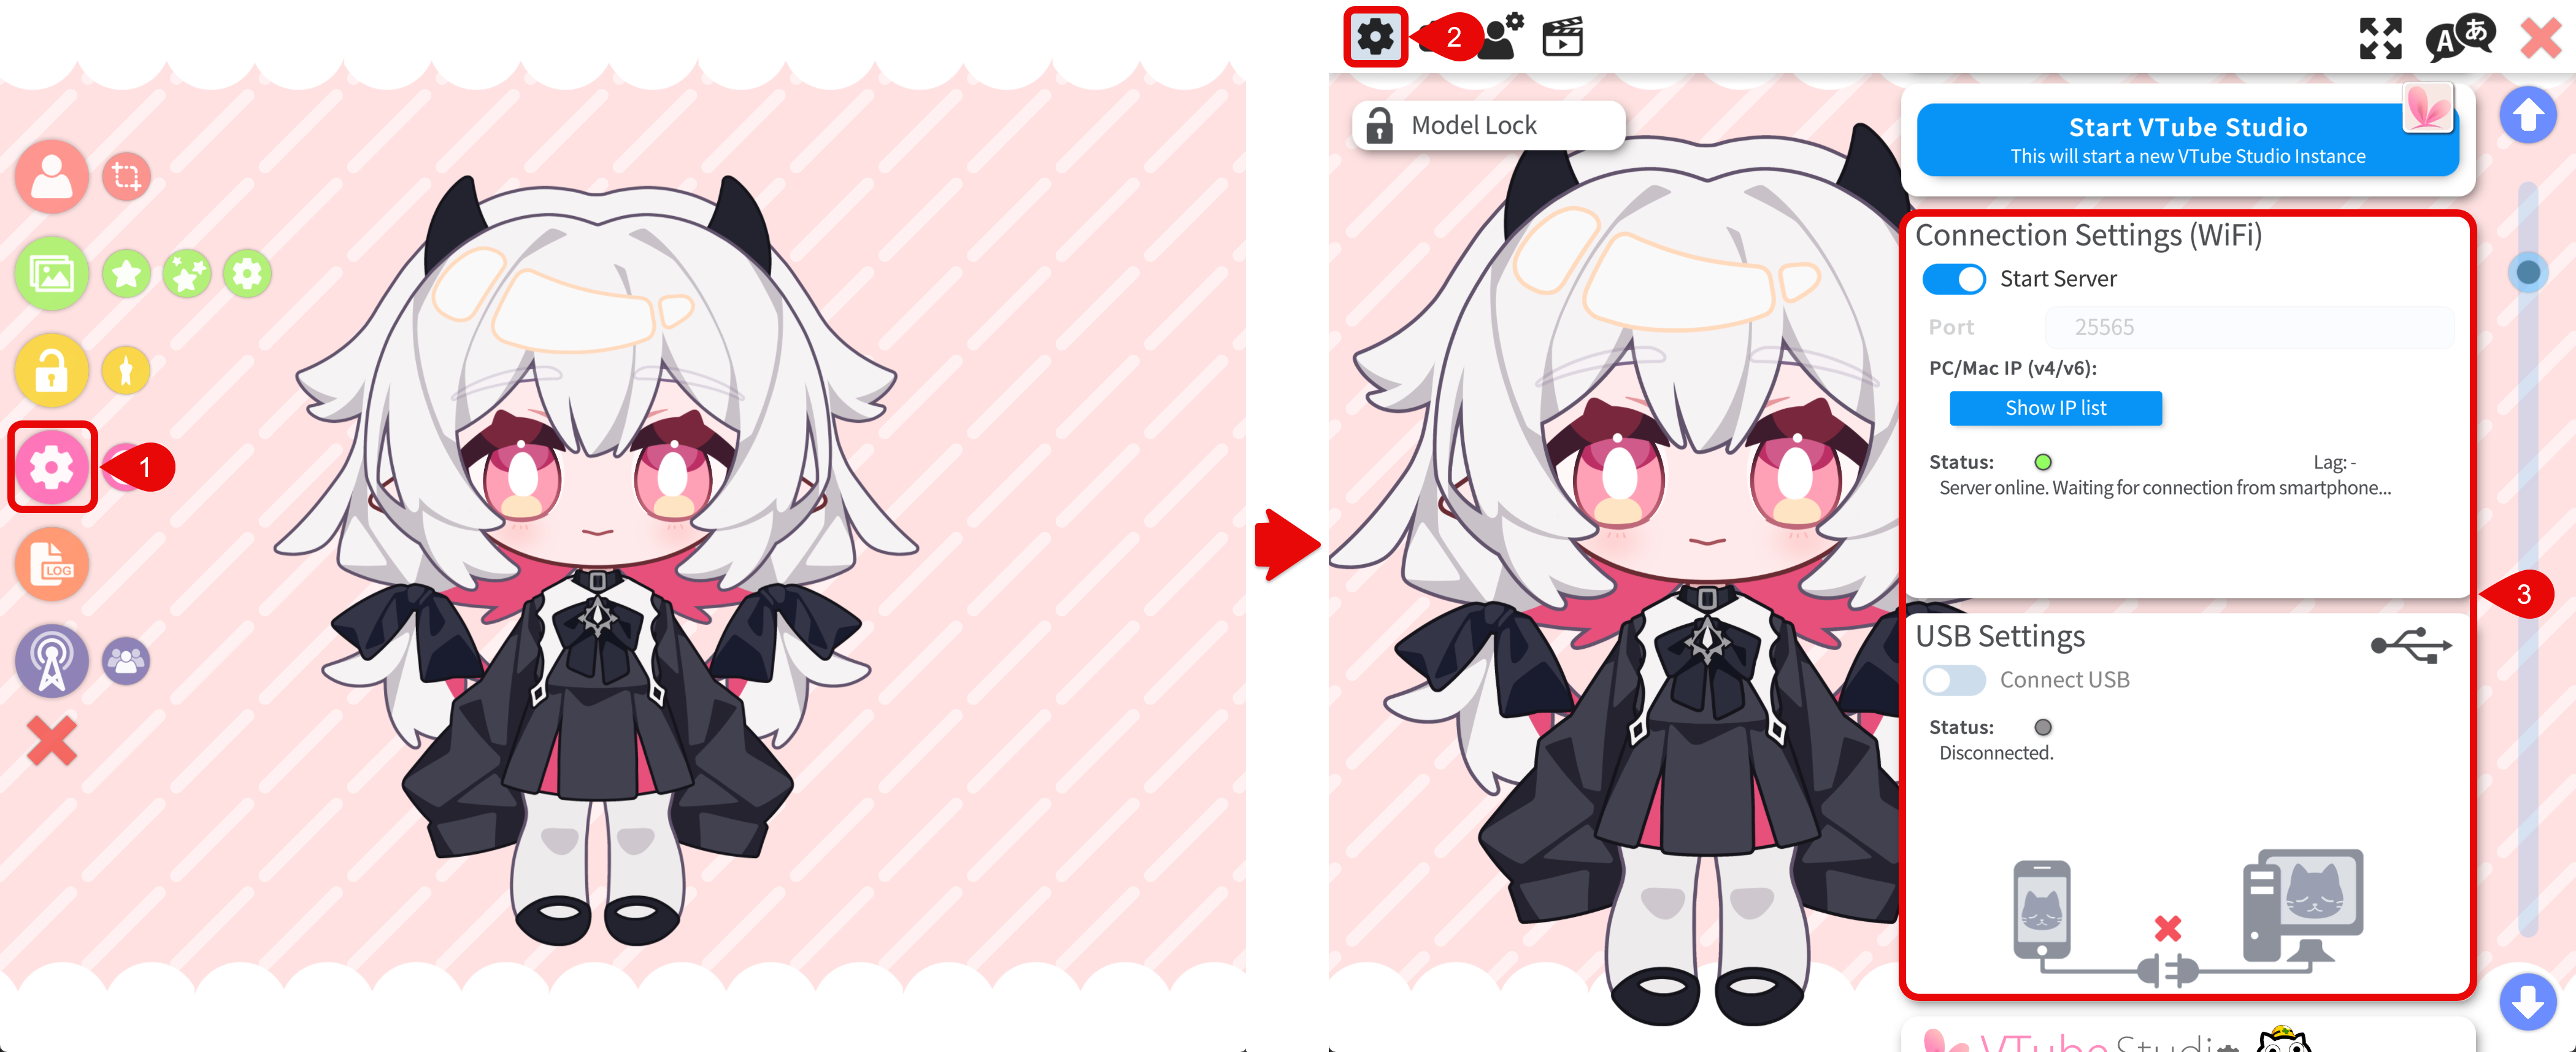
- Go to the settings menu (gear icon)
- Click the General Settings & External Connections tab
- Make sure the iPhone and PC are on the same local network and start the server in Connection Settings (WIFI). You can also use a usb cable to connect the iPhone and PC.
- In the iOS app, start face tracking
- In the Stream to PC (WIFI) tab, set the IP address by using the Find Server button.
- Enable the connect to PC option in the iOS app.

For more information, please refer to the Streaming to Mac/PC page in the VTS Wiki.
VBridger
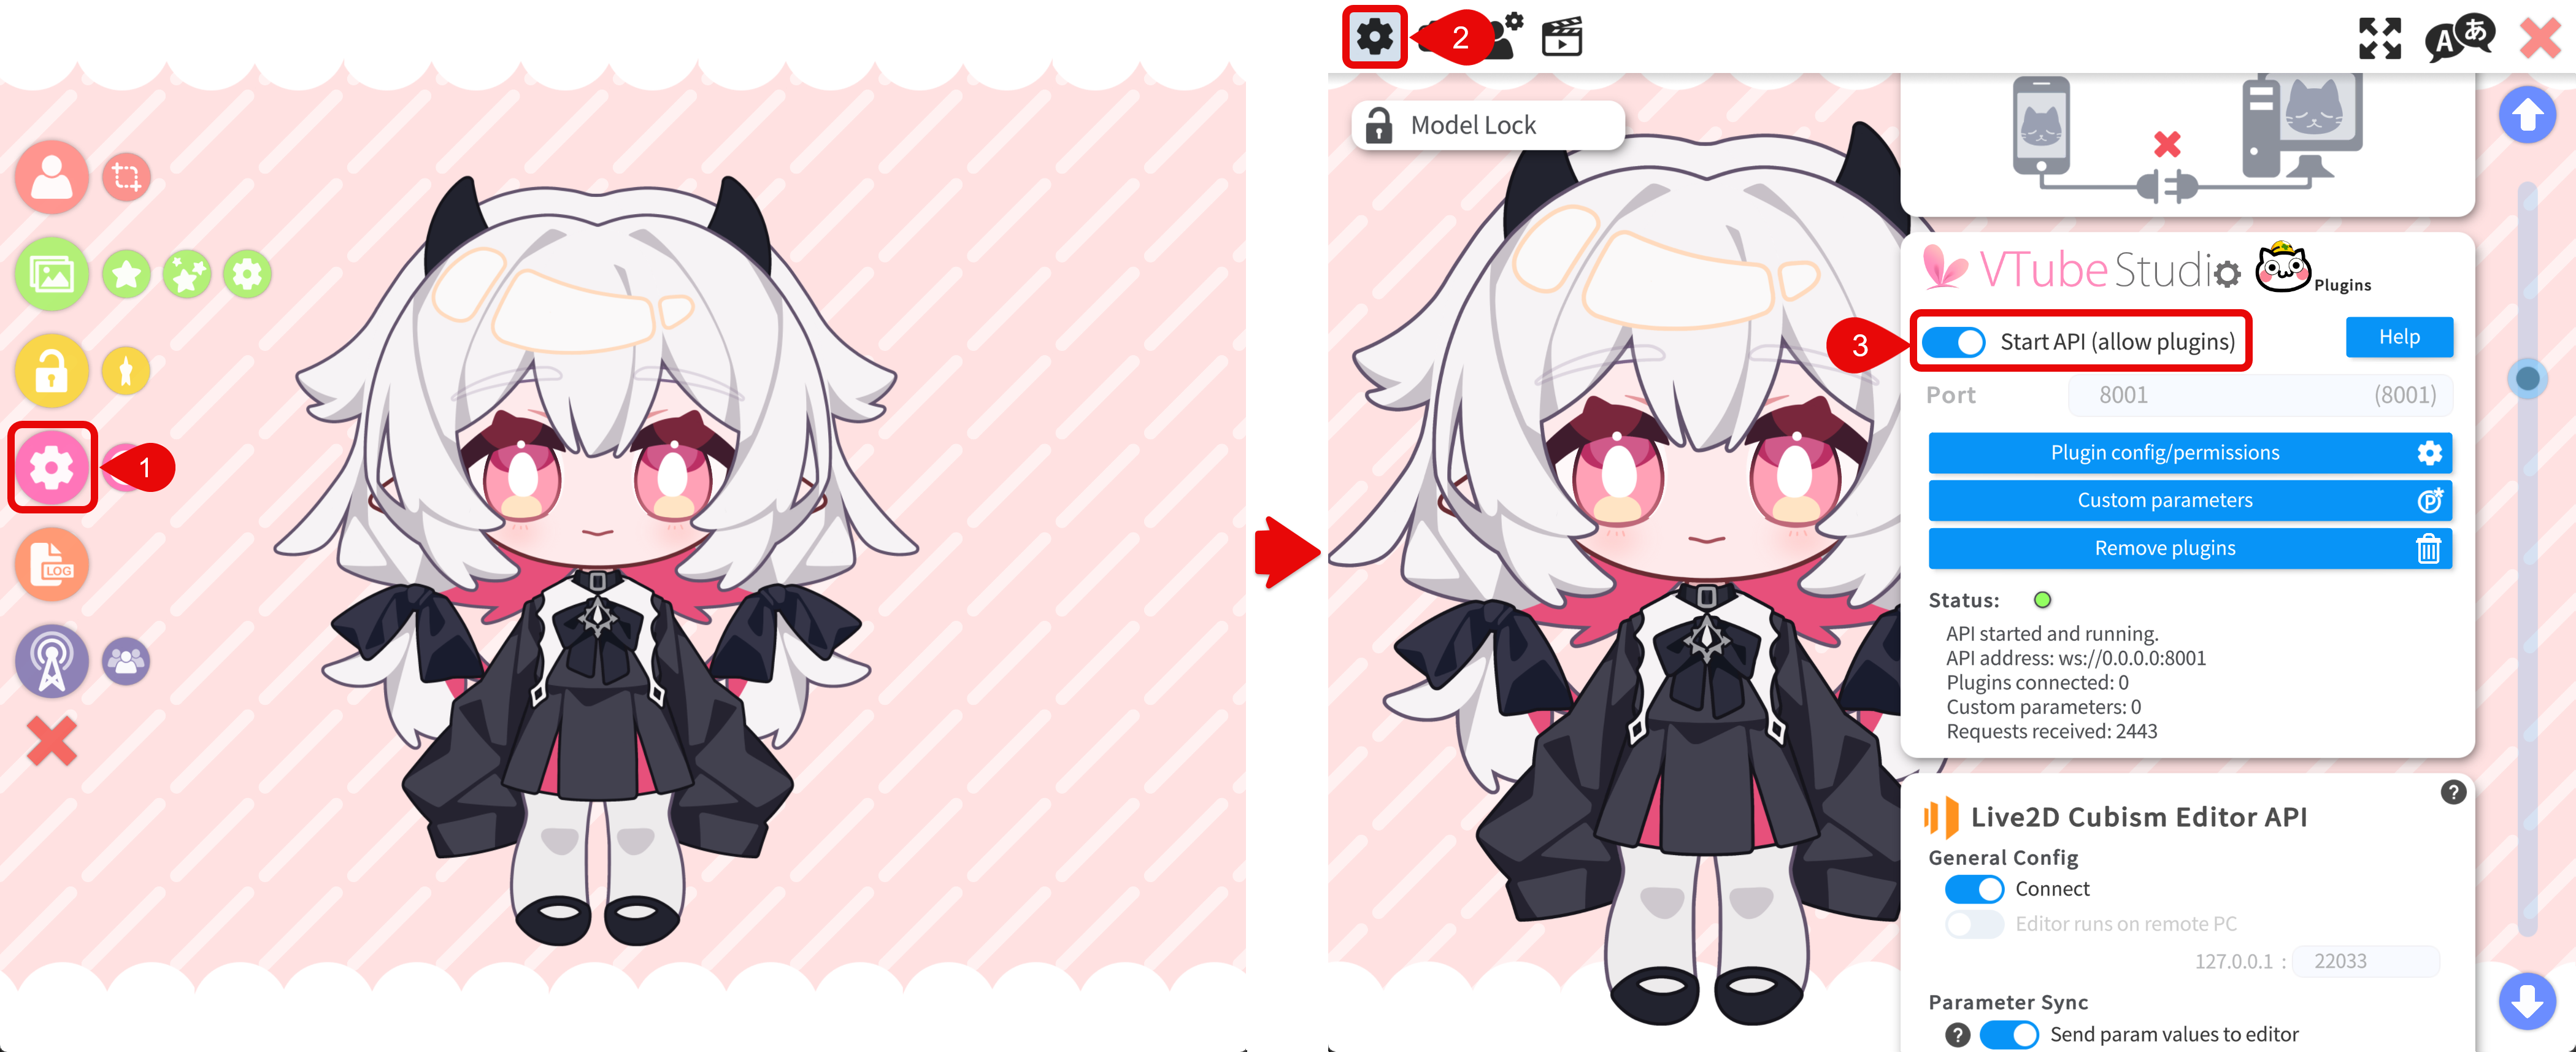
- Go to the settings menu (gear icon)
- Click the General Settings & External Connections tab
- Enable the VTS API in General Settings.
- Configure the tracking app. I use iFacialMocap but any other app that can send tracking data to VBridger should work. Usually you need to set the destination IP address to the IP address of the PC. VBridger will select the correct port automatically based on your selection of the tracking source.
- In VBridger, click Connect to iPhone to connect to your iPhone. You may need to set the IP address to your iPhone's IP address.
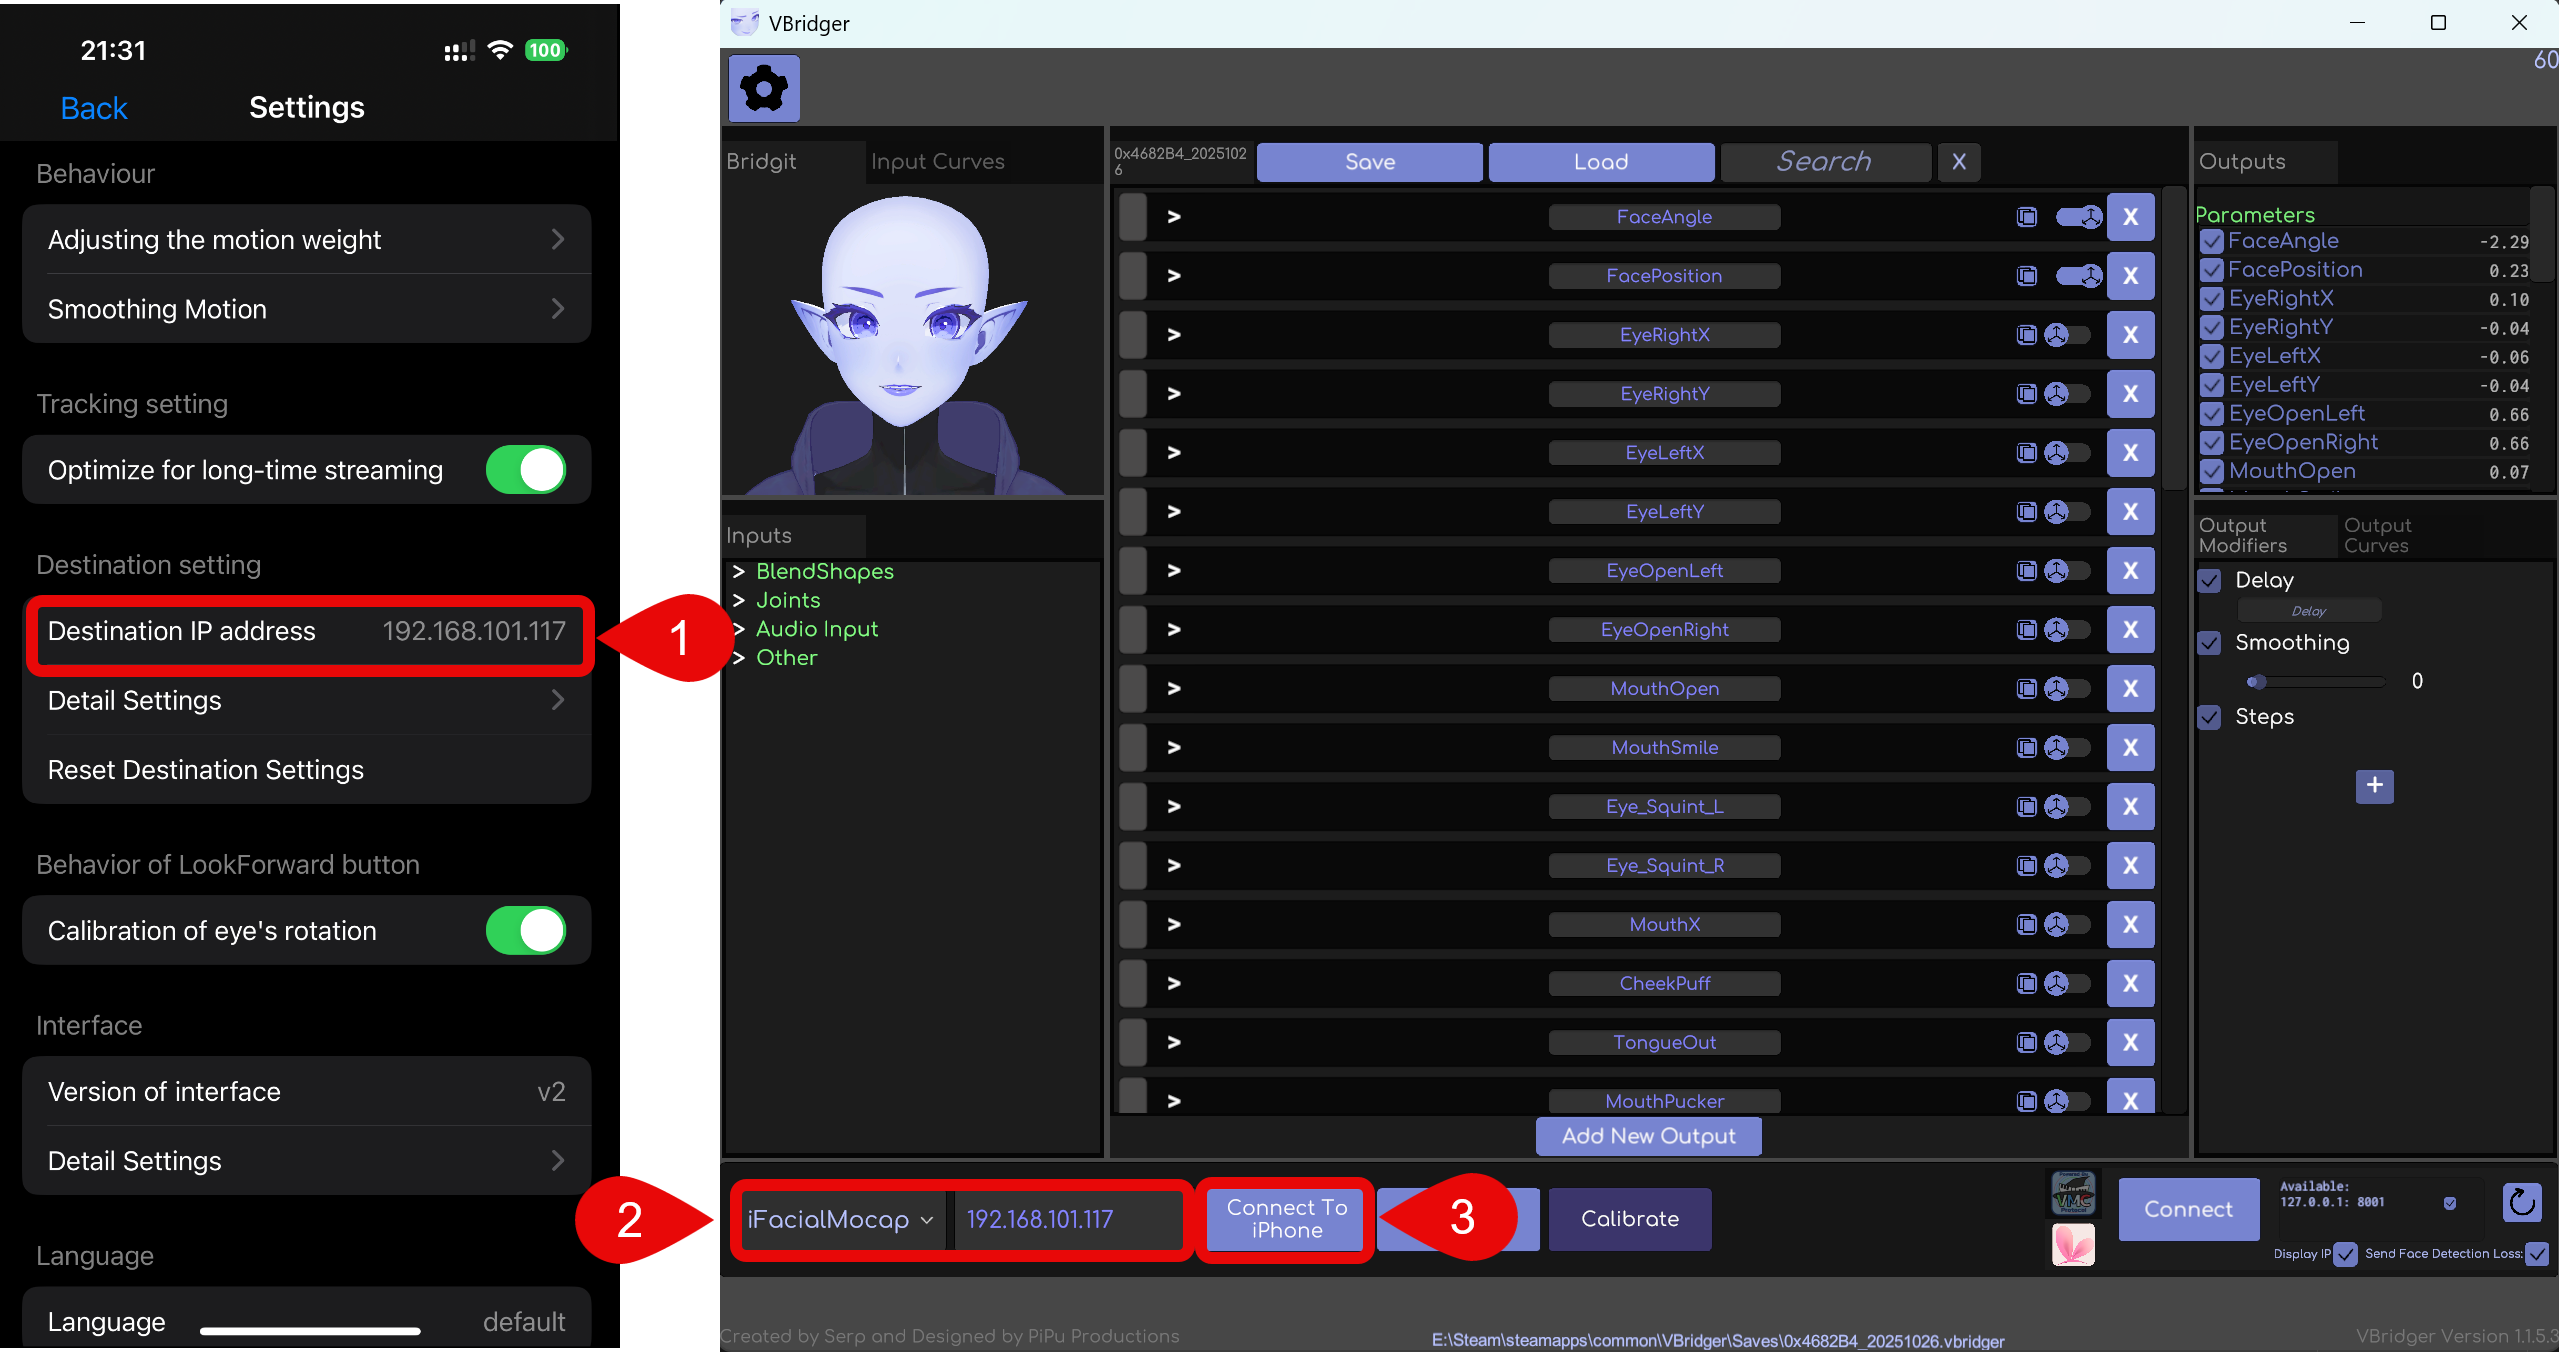
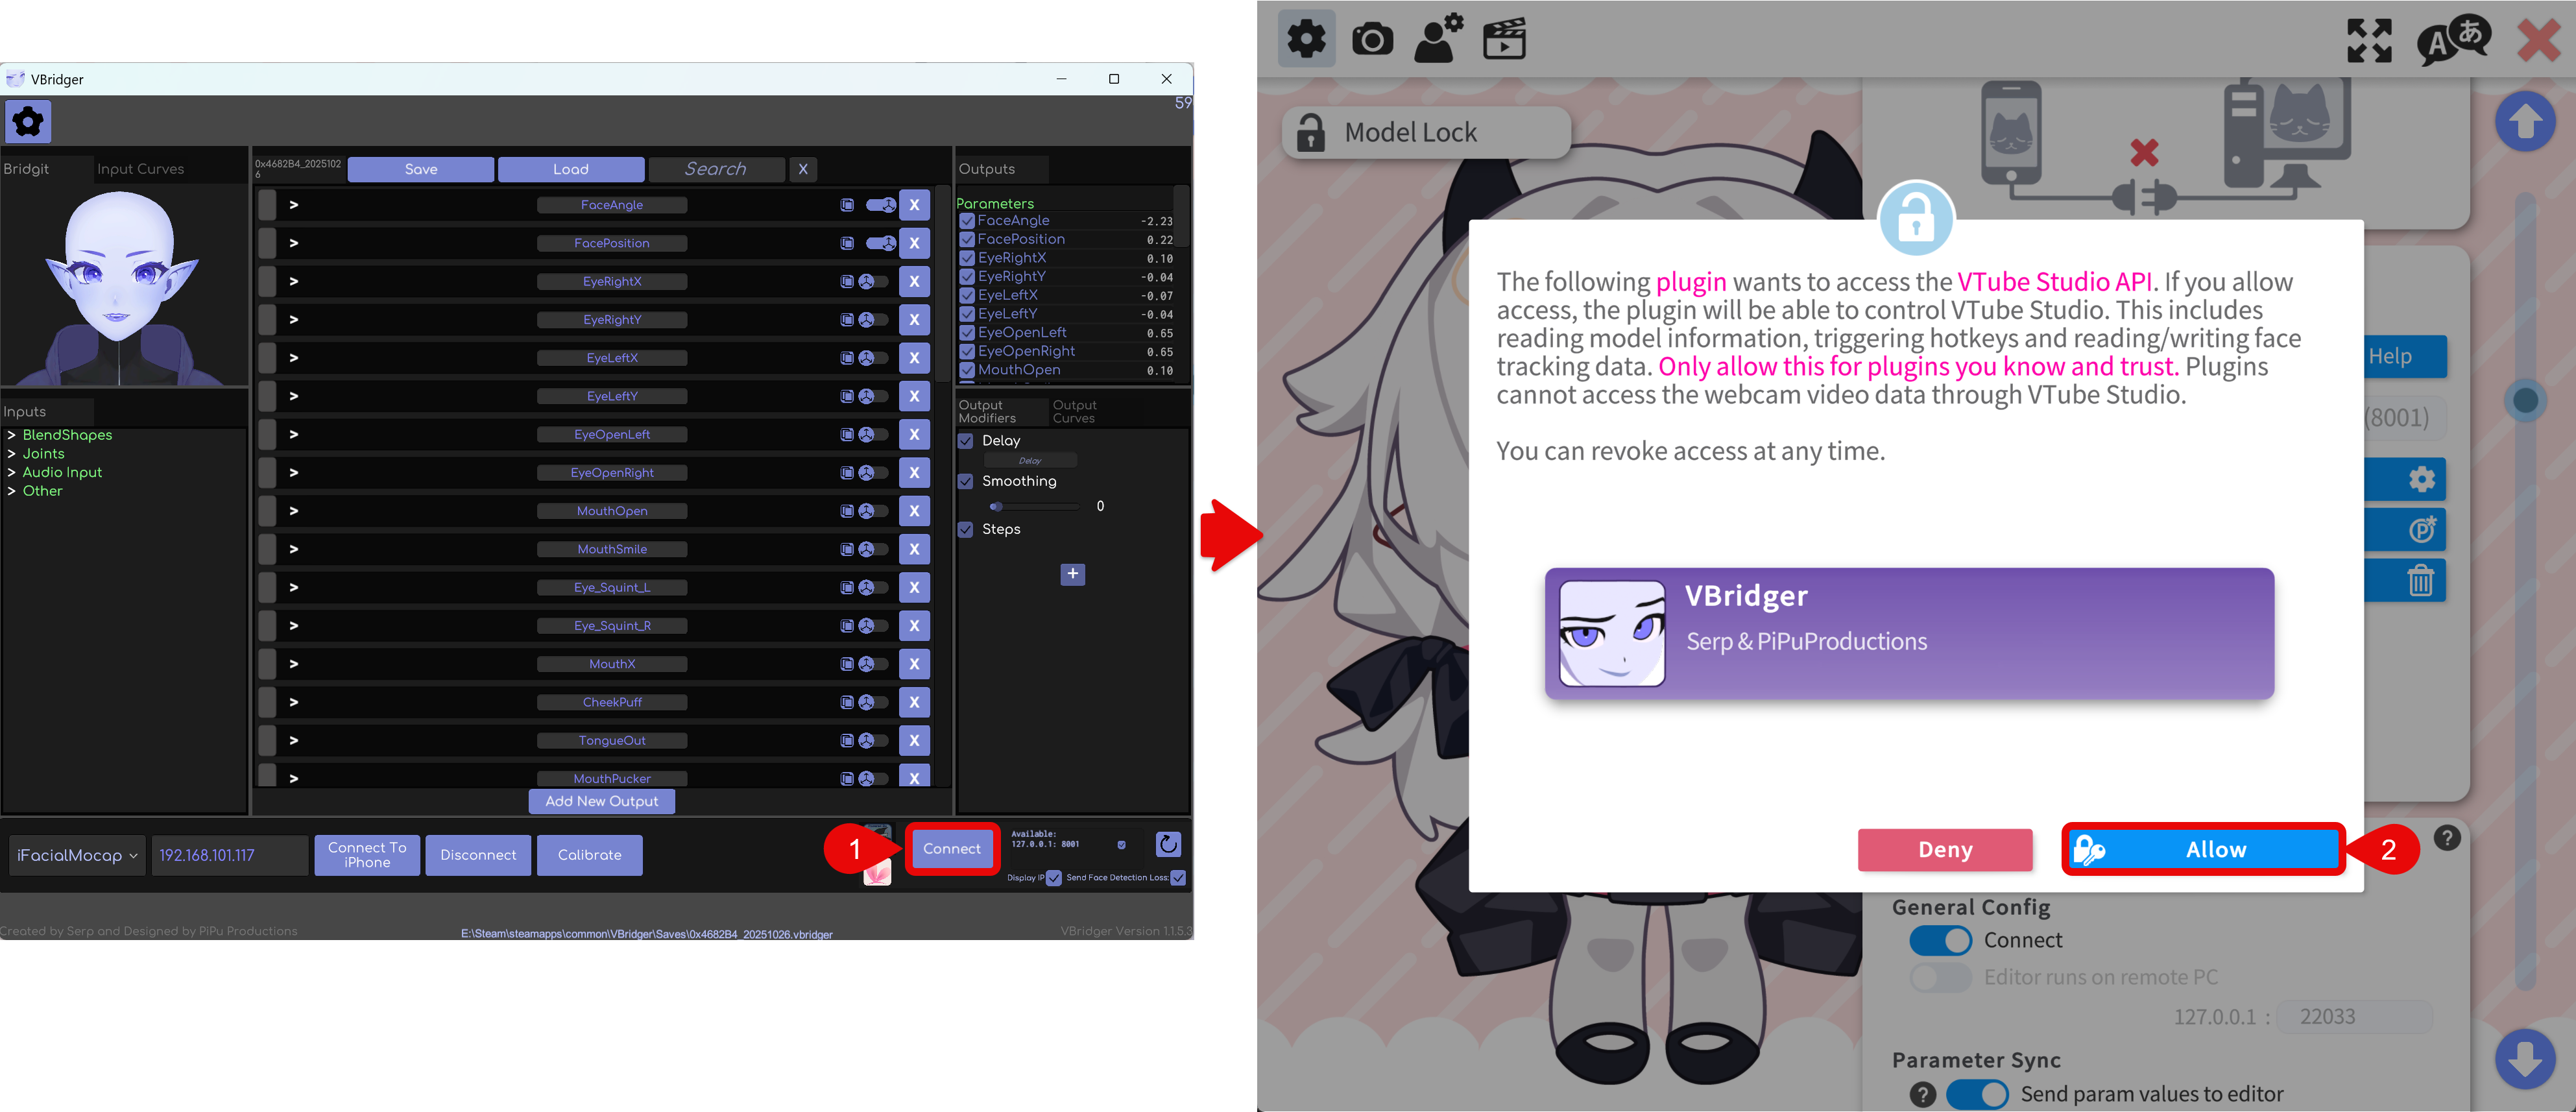
- If the connection is successful, you will be able to see the purple face in VBridger moving with your face. Then click Connect to connect to VTS.
- If this is the first connection, VTS will show a permission prompt. Click Allow in VTS to grant API access to VBridger.
VBridger supported tracking apps:
- iFacialMocap(iOS)
- VTube Studio (iOS)
- FaceMotion3D (iOS)
- MeowFace (Android)
- MediaPipe (PC)
- NVIDIA Tracking (PC)
For more information, please refer to the VBridger Documentation page. For the usage of a specific tracking app, please refer to the documentation of the app.
Tracking Settings
Usually you don't need to change the tracking settings, but I will explain it here for completeness.
![]()
- Model when tracking lost: Must be set to Go back to default otherwise the lost tracking animation will nto work.
- Webcam Parameter Calc. Mode (only affect mediapipe webcam tracker):
- **Automatic(A): **Need to move your face for 5 second everytime after you start the webcam tracking.
- **Manual(B): **When the calibrate button is pressed, look the to the camera with a neutral expression.This is the recommended mode.
- Link Eye Blinking (only affect mediapipe webcam tracker):
- Never: the blinking of the left and right eyes are not linked. Recommended if the tracking quality is good.
- Always: the blinking of the left and right eyes are linked (both eyes blink at the same time). Recommended if the tracking quality is very bad.
- When face is rotated: the blinking of the left and right eyes are linked only when the face is rotated. Recommended if the tracking quality is not good.
- Sensitivity (only affect mediapipe webcam tracker): Usually don't need to change this unless the tracking quality is very bad (a lot of jittering). I personnally never touch these.
If tracking looks bad or unstable (little movement, erratic motion, or heavy jitter of the model), adjusting VTube Studio’s tracking settings rarely fixes the root cause. The name suggests they should help, but in practice they usually cannot compensate for a poor capture setup.
- Fix the capture setup first: Improve lighting, distance, and angle. Avoid placing the camera extremely close or very far away, and keep it roughly centered and facing your face rather than at a steep side angle.
- Then tune parameter bindings to match how your inputs actually move. Spend your time there instead of chasing small changes in tracking settings alone.