Model Loading
To load [ModelName] in VTube Studio (VTS):
note
[ModelName] is the name of the model you are loading. It depends on the specific model package you use. Usually the model folder name is the same as the model name.
- Extract the downloaded model package.
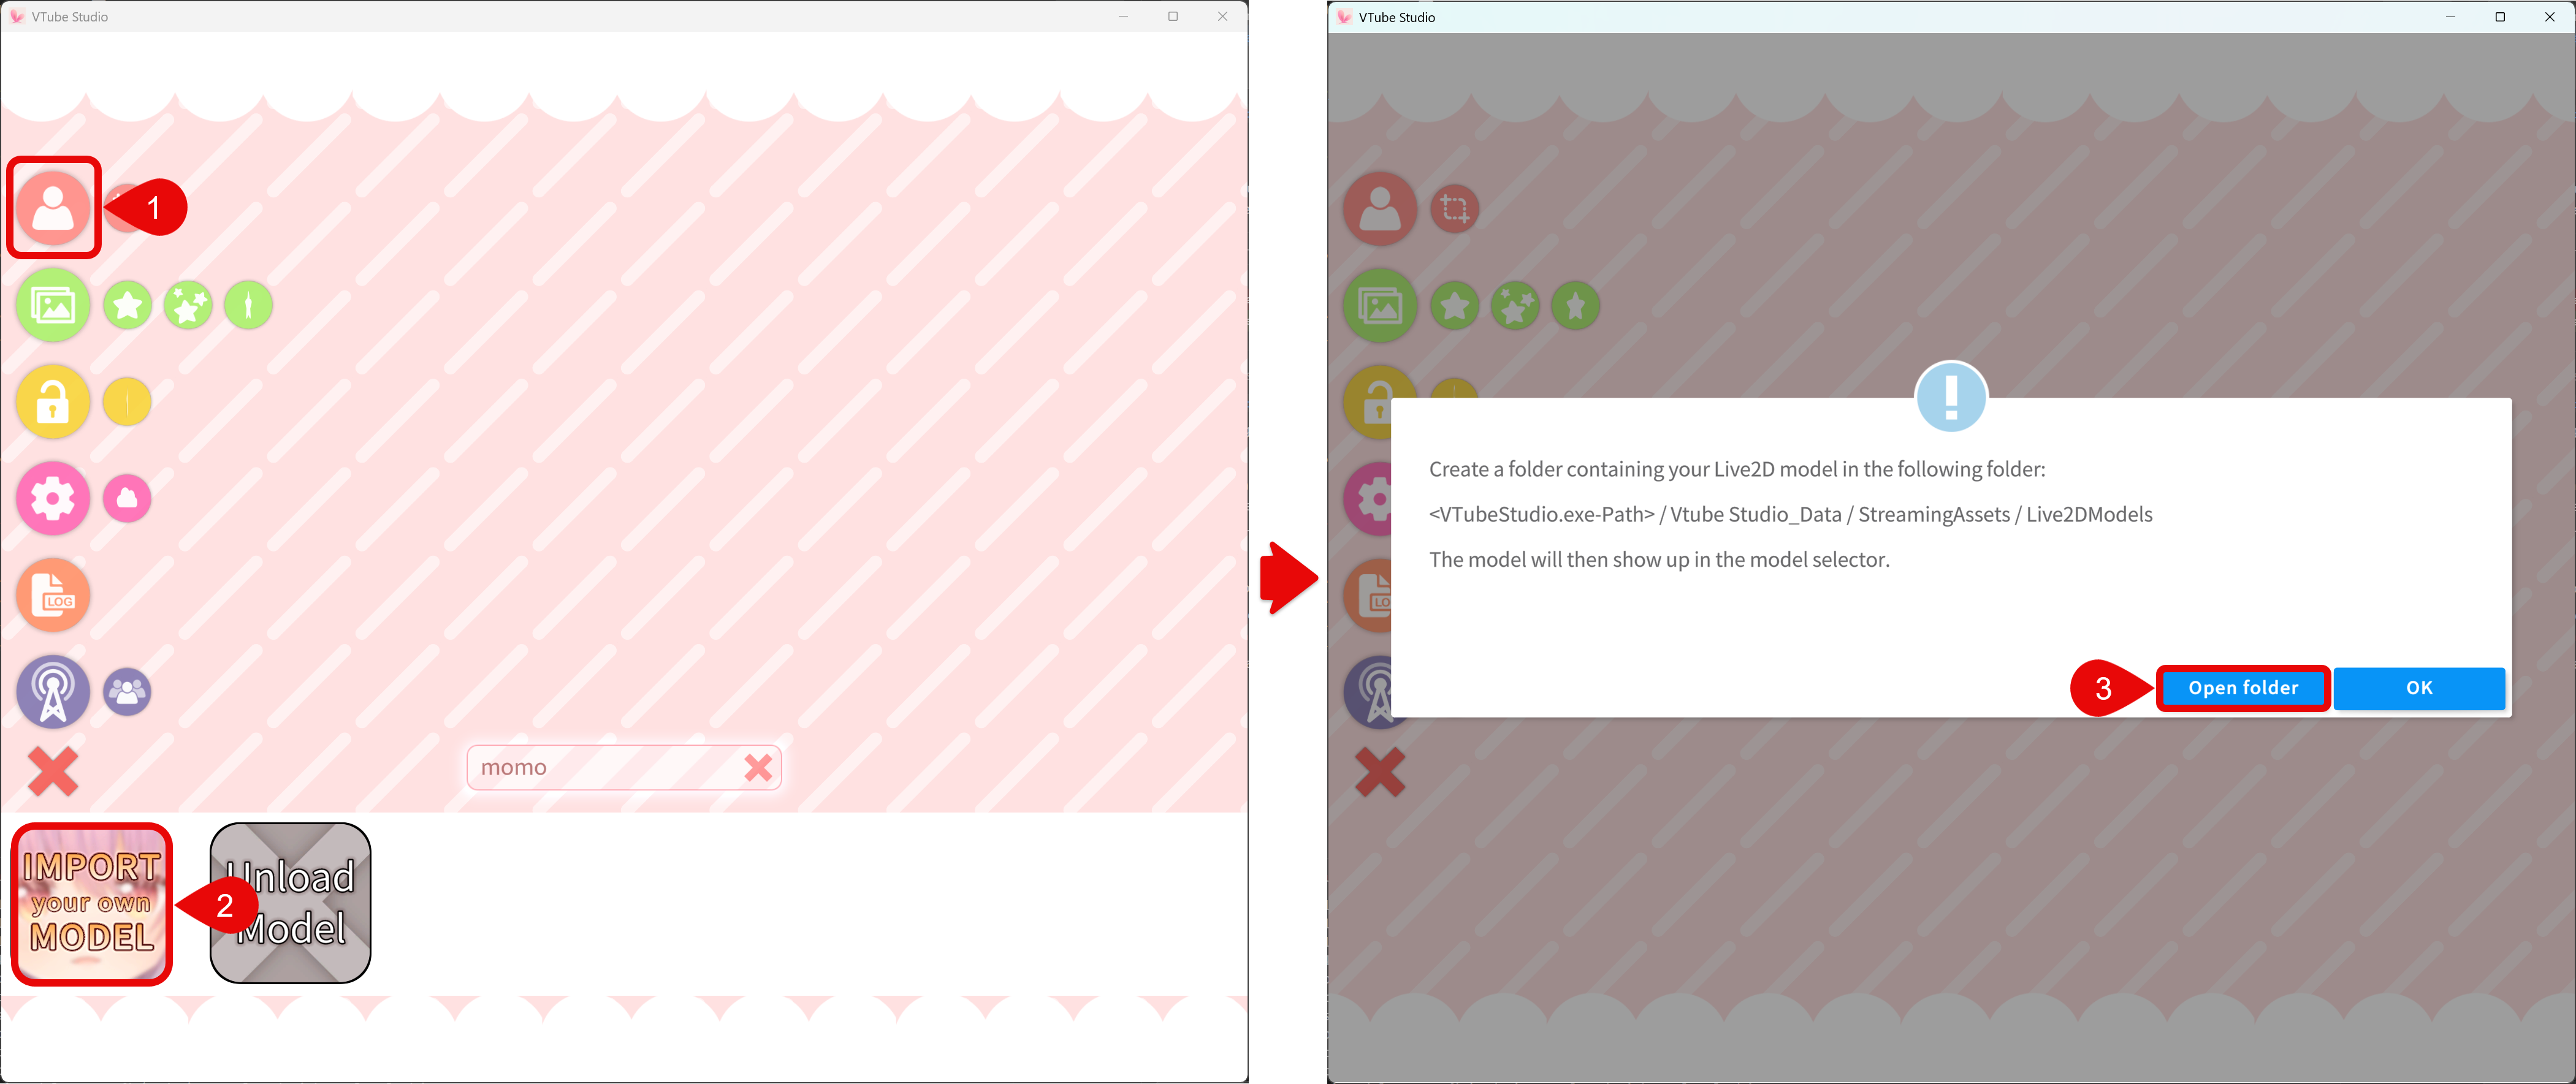
- In VTS, open the model menu and click Import your own Model.
- Click Open Folder in the import dialog to jump directly to the VTS model directory:
<VTube Studio app path>\VTube Studio_Data\StreamingAssets\Live2DModels\
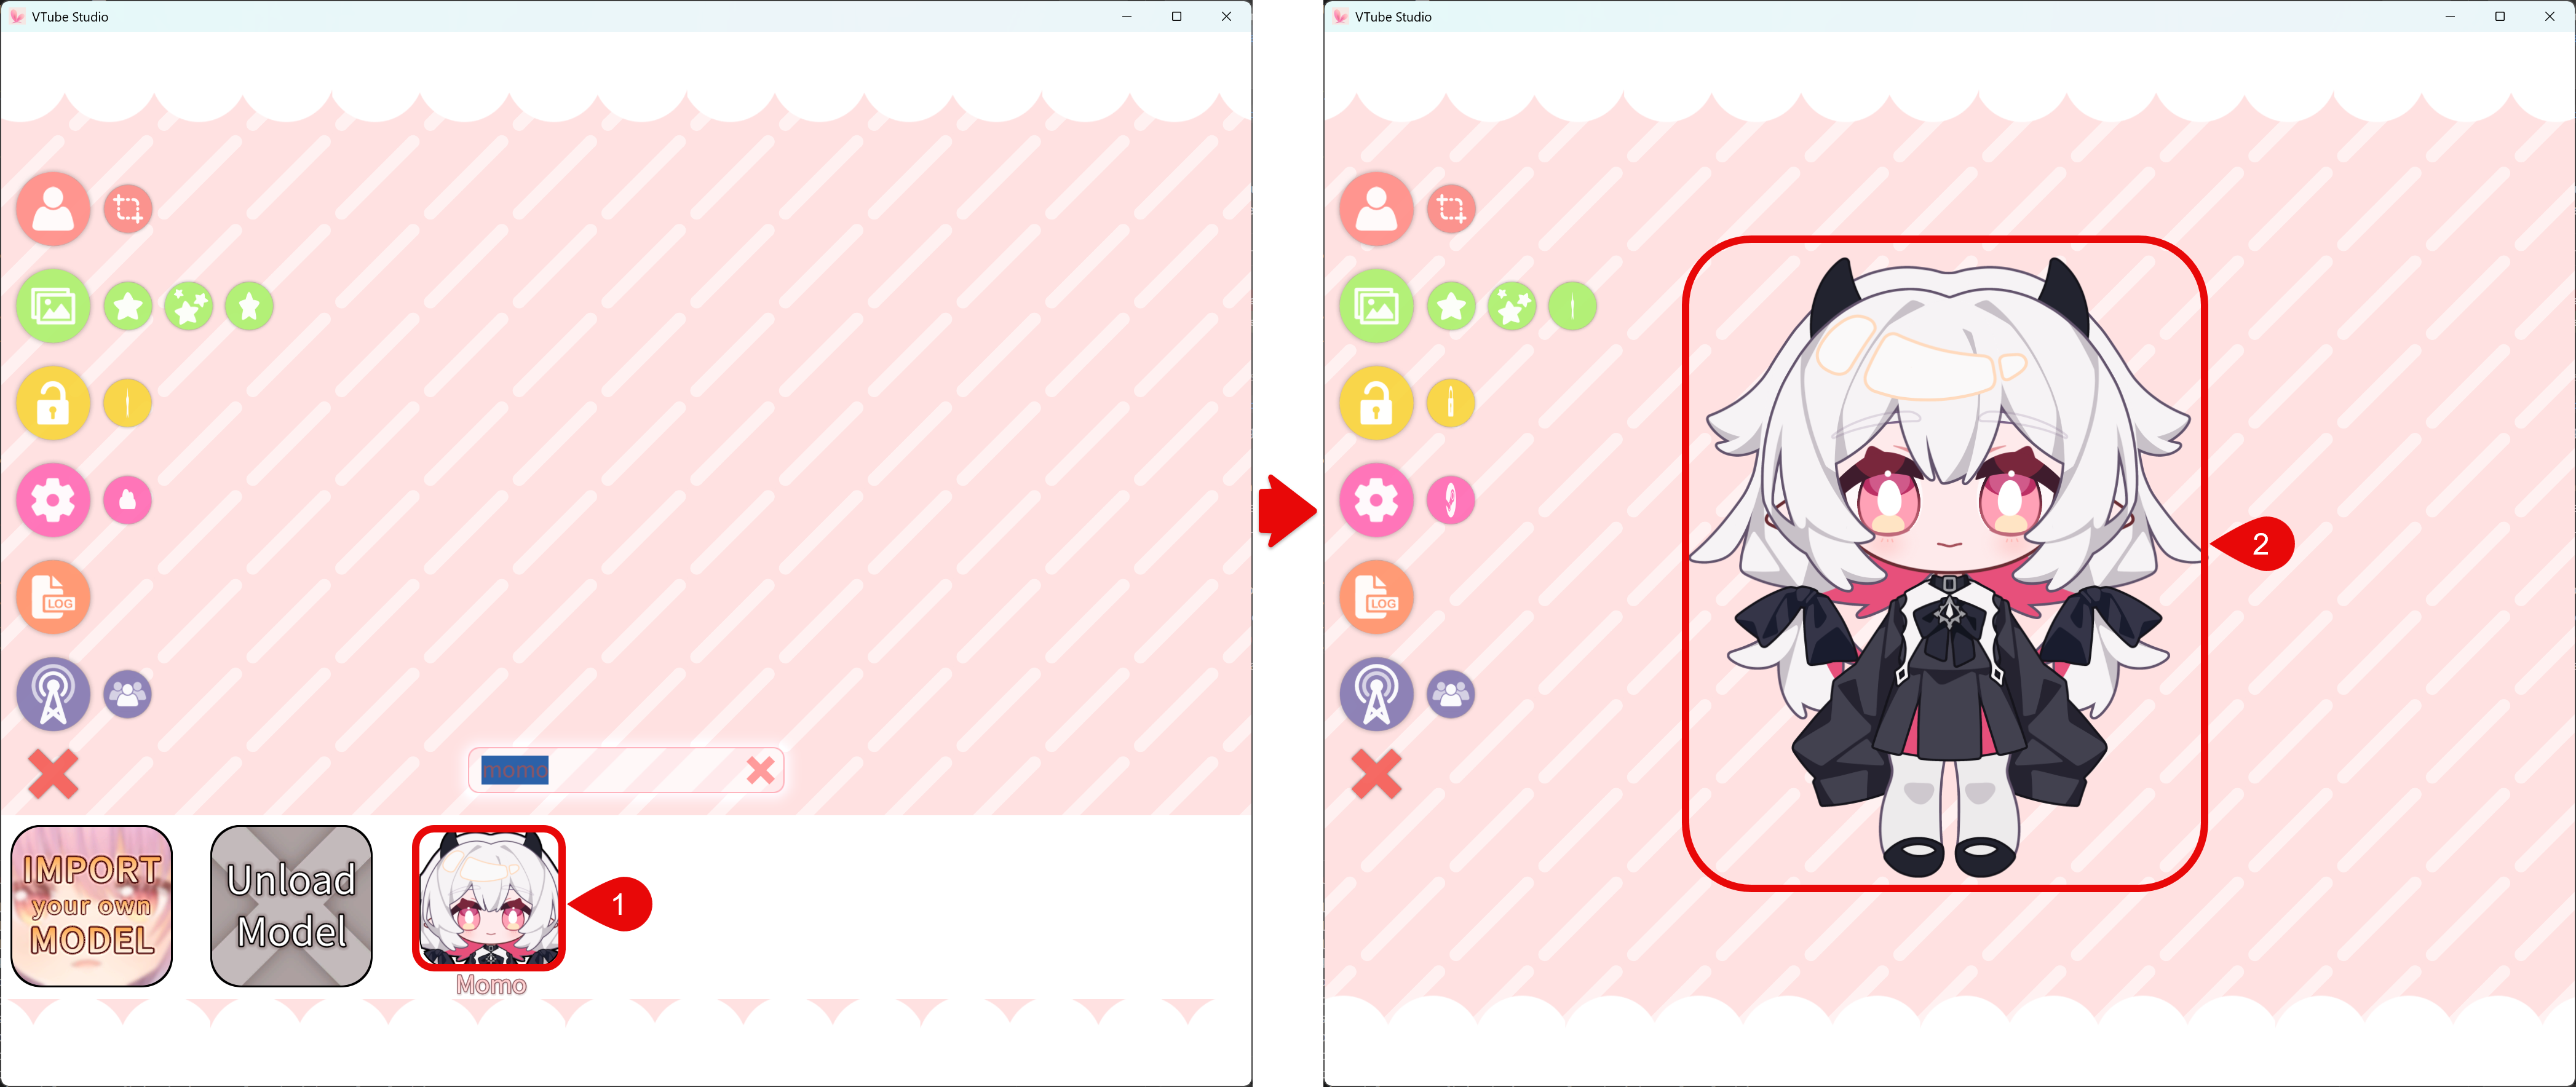
- If needed, restart VTS so it can scan and register the new model.
- Select
[ModelName]from the model list to load it.
Required Files
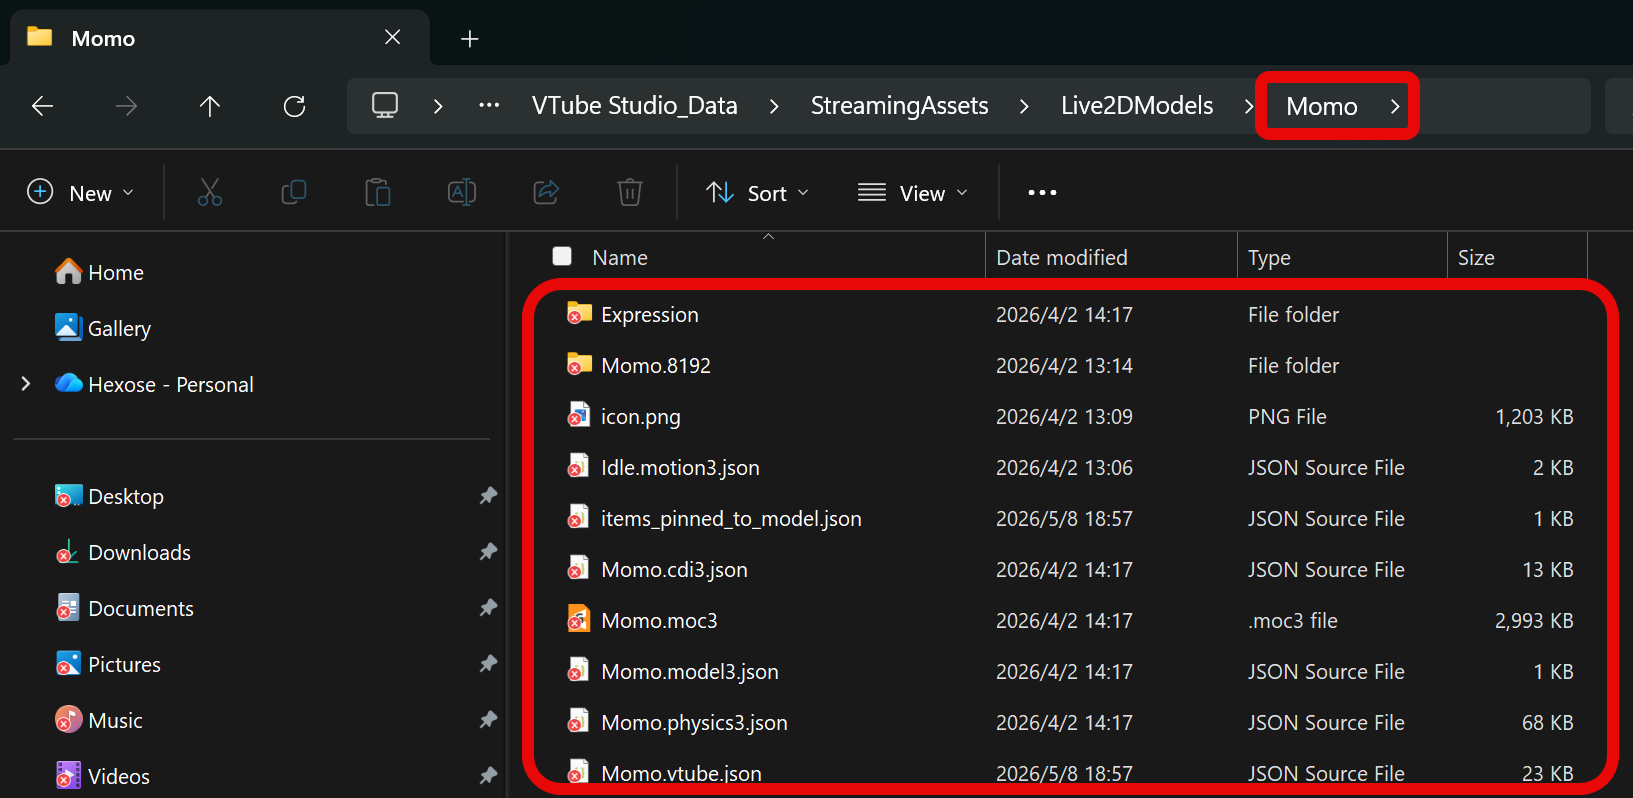
At minimum, the [ModelName] folder should include:
[ModelName].model3.json(model index file)[ModelName].moc3(model data file)[ModelName].physics3.json(physics file)- Texture folder (usually named like
[ModelName].2048or similar)
Optional but recommended:
- Expression and motion files (
.exp3.json,.motion3.json) - An icon image (
.pngor.jpg) for the model selection list
info
If [ModelName] does not appear in the VTS model list, check both items below:
- Required files: Make sure
[ModelName].model3.json,[ModelName].moc3,[ModelName].physics3.json, and the texture folder are all present. - Folder hierarchy: Make sure there is no extra folder level between
Live2DModelsand the actual model files. The model files should be directly insideLive2DModels/[ModelName]/, notLive2DModels/[ModelName]/[ModelName]/.
About Auto-Setup
This model is usually preconfigured. You normally do not need to run setup again.
If the Auto-Setup dialog appears, check whether [ModelName].vtube.json exists in the [ModelName] folder. If it is missing, verify that the model archive was extracted completely and no files were removed.